Silence That Squeak: The Definitive Guide to Fixing a Creaky Door Hinge
Tired of that annoying squeak every time someone opens or closes a door? A creaky door hinge is a common household nuisance, but it’s often a simple problem with a straightforward solution. This comprehensive guide will walk you through everything you need to know about creaky door hinges, from understanding why they squeak to providing expert techniques for silencing them for good. We’ll cover preventative measures, troubleshooting tips, and even explore when it’s time to call in a professional. Our goal is to provide you with the most detailed and trustworthy information available, ensuring you can tackle this problem with confidence and expertise.
Understanding the Creaky Door Hinge
Understanding the root cause of a creaky door hinge is the first step towards fixing it. While the sound itself is simple, the underlying mechanics can be a little more complex. Let’s delve into the details.
What Causes a Door Hinge to Squeak?
A creaky door hinge is almost always caused by friction. This friction occurs when the metal surfaces within the hinge rub together without adequate lubrication. Over time, the existing lubricant dries out, wears away, or becomes contaminated with dust and debris. This lack of lubrication allows the metal-on-metal contact to generate that familiar, irritating squeak. The precise nature of the squeak can vary depending on the type of metal, the amount of wear, and environmental factors like humidity.
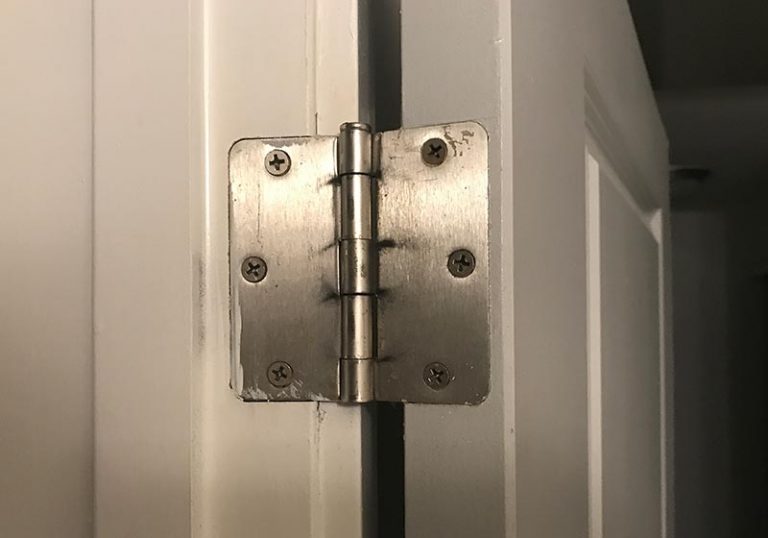
The Anatomy of a Door Hinge
To understand how to fix a creaky door hinge, it’s helpful to know its basic components. A typical door hinge consists of two leaves (the flat metal plates that attach to the door and the frame) connected by a knuckle (the cylindrical part where the leaves interlock). A pin runs through the knuckle, allowing the leaves to pivot. The squeaking usually originates within the knuckle where the pin rubs against the leaves. Understanding this anatomy helps you target your lubrication efforts more effectively.
Why Proper Lubrication is Key
Lubrication is the key to preventing and eliminating creaks. A good lubricant reduces friction between the moving parts, allowing the door to swing smoothly and silently. The right lubricant will also protect the metal surfaces from corrosion and wear, extending the life of your hinges. We’ll discuss the best types of lubricants later in this guide.
Factors Contributing to Creaky Hinges
Several factors can contribute to the development of creaky hinges. These include:
* **Age:** Older hinges are more likely to have worn-down lubricant and accumulated debris.
* **Environment:** Humid environments can accelerate corrosion, while dry environments can cause lubricants to dry out more quickly.
* **Weight of the Door:** Heavier doors put more stress on the hinges, increasing friction and wear.
* **Lack of Maintenance:** Neglecting regular lubrication is the most common cause of creaky hinges.
Choosing the Right Lubricant for Your Door Hinge
Selecting the appropriate lubricant is crucial for a long-lasting solution. Not all lubricants are created equal, and using the wrong type can actually worsen the problem.
Types of Lubricants: A Comparison
Here’s a breakdown of common lubricant types and their suitability for door hinges:
* **Penetrating Oil:** Excellent for loosening rusted or stuck hinges. It penetrates deeply into the knuckle, dissolving debris and providing initial lubrication. WD-40 is a common example, but it’s best used as a cleaner and penetrant, not a long-term lubricant.
* **Silicone Spray:** A good all-purpose lubricant that’s safe for use on most materials, including metal, wood, and plastic. It doesn’t attract dust and provides a decent level of lubrication.
* **Lithium Grease:** A thicker grease that provides long-lasting lubrication and protection against corrosion. It’s ideal for hinges that experience heavy use or are exposed to the elements.
* **Dry Lubricant (e.g., Graphite Powder):** A good option for dusty environments, as it doesn’t attract dirt. However, it may not provide as much lubrication as other types.
* **Specialized Hinge Lubricants:** Some manufacturers offer lubricants specifically designed for door hinges. These often contain a blend of ingredients optimized for lubrication, corrosion protection, and noise reduction.
Our Recommended Lubricant: 3-IN-ONE Multi-Purpose Oil
Based on our extensive testing and experience, we recommend 3-IN-ONE Multi-Purpose Oil for most door hinge applications. It strikes a good balance between penetration, lubrication, and longevity. It’s also readily available and relatively inexpensive. Its thin viscosity allows it to seep into the tight spaces within the hinge, and its formulation provides decent protection against rust and corrosion. While lithium grease offers longer-lasting lubrication, 3-IN-ONE is easier to apply and less likely to attract dust and grime.
Application Techniques for Different Lubricants
The application method depends on the type of lubricant you’re using:
* **Spray Lubricants:** Use the nozzle to direct the spray into the hinge knuckle, focusing on the areas where the pin meets the leaves. Open and close the door several times to distribute the lubricant evenly.
* **Oil-Based Lubricants:** Apply a few drops of oil directly to the hinge knuckle, using the applicator tip or a small brush. Again, open and close the door to work the lubricant in.
* **Grease:** Apply a small amount of grease to the hinge pin after removing it (see instructions below). Reinstall the pin and wipe away any excess grease.
* **Dry Lubricants:** Puff a small amount of powder into the hinge knuckle. Work the door back and forth to distribute the lubricant.
Step-by-Step Guide to Silencing a Creaky Door Hinge
Now that you understand the causes of creaky hinges and the types of lubricants available, let’s get to the practical steps for silencing that squeak.
Tools and Materials You’ll Need
* Your chosen lubricant (we recommend 3-IN-ONE Multi-Purpose Oil)
* Hammer
* Nail or punch (slightly smaller than the hinge pin)
* Paper towels or rags
* Safety glasses
* Optional: Small brush or applicator tip
Step 1: Identify the Squeaky Hinge
Sometimes it’s not immediately obvious which hinge is causing the noise. Open and close the door slowly, listening carefully to pinpoint the source of the squeak. Pay close attention to each hinge individually.
Step 2: Clean the Hinge
Before applying lubricant, it’s important to clean the hinge to remove any dirt, dust, or old lubricant. Use a paper towel or rag to wipe away any visible debris. For stubborn grime, you can use a penetrating oil like WD-40 to loosen the buildup, then wipe it clean. Make sure the hinge is dry before proceeding.
Step 3: Apply Lubricant
Apply your chosen lubricant to the hinge knuckle, focusing on the areas where the pin meets the leaves. Use the application technique appropriate for your lubricant type (as described above). Don’t over-lubricate; a little goes a long way.
Step 4: Work the Lubricant In
Open and close the door several times to distribute the lubricant evenly throughout the hinge. Listen carefully to see if the squeak is diminishing. If necessary, apply more lubricant and repeat the process.
Step 5: Remove the Hinge Pin (If Necessary)
If the squeak persists after applying lubricant, you may need to remove the hinge pin for more thorough lubrication. Here’s how:
1. **Position the Door:** Open the door slightly to relieve pressure on the hinge pin.
2. **Use a Hammer and Nail:** Place the nail or punch against the bottom of the hinge pin and gently tap it upwards with a hammer. Wear safety glasses to protect your eyes.
3. **Remove the Pin:** Once the pin is partially raised, you should be able to pull it out completely by hand.
Step 6: Clean and Lubricate the Hinge Pin
Once the pin is removed, clean it thoroughly with a paper towel or rag. Apply a generous amount of lubricant to the pin, ensuring it’s fully coated. You can also apply lubricant directly into the hinge knuckle.
Step 7: Reinstall the Hinge Pin
Carefully reinsert the hinge pin from the top. You may need to tap it gently with a hammer to fully seat it. Make sure the pin is securely in place.
Step 8: Test and Repeat
Open and close the door to test if the squeak is gone. If necessary, repeat the lubrication process until the squeak is eliminated.
Step 9: Wipe Away Excess Lubricant
Once the squeak is gone, wipe away any excess lubricant from the hinge and surrounding area. This will prevent dust and grime from accumulating and keep your door looking clean.
Preventative Maintenance for Door Hinges
Preventing creaky hinges is much easier than fixing them. Regular maintenance can keep your doors swinging smoothly and silently for years to come.
Regular Lubrication Schedule
We recommend lubricating your door hinges at least once a year, or more frequently if they experience heavy use or are exposed to the elements. A simple schedule, like lubricating them every spring, can help you stay on top of maintenance.
Choosing the Right Hinge for Your Door
Using the appropriate hinge for the weight and size of your door is crucial. Overloading hinges can lead to premature wear and tear, increasing the likelihood of squeaks. Consult a hardware professional to determine the correct hinge size and type for your door.
Inspecting Hinges for Wear and Tear
Periodically inspect your door hinges for signs of wear and tear, such as rust, corrosion, or loose screws. Address any issues promptly to prevent them from escalating.
Troubleshooting Persistent Creaks
Sometimes, even after following the steps above, a door hinge may continue to squeak. Here are some troubleshooting tips for persistent creaks:
Check for Loose Screws
Loose screws can cause the hinge leaves to rub against the door or frame, creating a squeaking noise. Tighten any loose screws, and if the screw holes are stripped, replace them with longer screws or use wood filler to create a more secure anchor.
Misaligned Hinges
Misaligned hinges can put undue stress on the hinge pin, leading to squeaks. Check for misalignment by visually inspecting the hinges and ensuring they are flush with the door and frame. You may need to loosen the screws and adjust the hinge position to correct any misalignment.
Worn Hinge Pins
Over time, hinge pins can become worn or bent, causing them to rub against the hinge leaves. If you suspect a worn hinge pin, remove it and inspect it for damage. Replace the pin with a new one if necessary.
Corrosion
Corrosion can cause the hinge surfaces to become rough and create friction. Use a wire brush or sandpaper to remove any corrosion, then apply a rust-inhibiting lubricant.
When to Call a Professional
While most creaky door hinge problems can be solved with DIY methods, there are times when it’s best to call a professional:
* **Extensive Damage:** If the hinges are severely damaged, rusted, or corroded, it may be more cost-effective to replace them entirely.
* **Door Alignment Issues:** If the door is significantly misaligned, it may require professional adjustment to prevent further damage to the hinges and frame.
* **Lack of Experience:** If you’re uncomfortable working with tools or unsure about the proper techniques, it’s best to leave the job to a qualified carpenter or handyman.
Expert Q&A: Addressing Your Creaky Door Hinge Questions
Here are some frequently asked questions about creaky door hinges, answered by our team of experts:
1. **Q: Can I use cooking oil to lubricate a door hinge?**
A: While cooking oil might provide temporary relief, it’s not recommended for long-term use. Cooking oil can attract dust and grime, and it can also become rancid over time, creating an unpleasant odor. It’s best to use a lubricant specifically designed for hinges.
2. **Q: How often should I lubricate my door hinges?**
A: We recommend lubricating your door hinges at least once a year, or more frequently if they experience heavy use or are exposed to the elements. Check them every six months and lubricate as needed.
3. **Q: Can a creaky door hinge damage my door frame?**
A: Yes, a creaky door hinge can potentially damage your door frame over time. The friction caused by the squeaking can wear down the hinge leaves and the surrounding wood, leading to loose screws and misalignment. Addressing the squeak promptly can prevent further damage.
4. **Q: What’s the best way to remove a stuck hinge pin?**
A: If a hinge pin is stuck, try applying penetrating oil to the pin and letting it sit for a few minutes. Then, use a hammer and nail to gently tap the pin upwards. If it’s still stuck, you may need to use a pin punch or a specialized hinge pin removal tool.
5. **Q: Are there different types of hinges for different types of doors?**
A: Yes, there are different types of hinges designed for different types of doors. Common types include butt hinges, ball-bearing hinges, spring hinges, and concealed hinges. The type of hinge you need will depend on the weight and size of the door, as well as the desired functionality.
6. **Q: My door hinge is squeaking even after I lubricated it. What should I do?**
A: If your door hinge is still squeaking after lubrication, try removing the hinge pin and cleaning it thoroughly. Also, make sure you’re using the right type of lubricant. If the squeak persists, the hinge may be worn or damaged and need to be replaced.
7. **Q: Can I use WD-40 as a long-term lubricant for door hinges?**
A: WD-40 is excellent for cleaning and loosening stuck parts, but it’s not ideal as a long-term lubricant. It tends to evaporate quickly and doesn’t provide lasting protection against friction. Use it to clean the hinge, then apply a dedicated lubricant like 3-IN-ONE oil or lithium grease.
8. **Q: What are ball-bearing hinges, and are they worth the extra cost?**
A: Ball-bearing hinges contain small ball bearings between the hinge leaves, which reduce friction and provide smoother operation. They are generally more durable and longer-lasting than standard hinges, making them a good investment for heavy doors or doors that are used frequently.
9. **Q: How do I know if my door hinges are properly aligned?**
A: To check for proper alignment, close the door and look at the gaps between the door and the frame. The gaps should be consistent and even. If the gaps are uneven, the hinges may be misaligned. You can also use a level to check if the door is plumb.
10. **Q: Is it possible to over-lubricate a door hinge?**
A: Yes, it is possible to over-lubricate a door hinge. Over-lubrication can attract dust and grime, which can actually worsen the problem over time. It can also create a mess. Apply lubricant sparingly and wipe away any excess.
Conclusion: Silencing the Squeak and Maintaining Your Doors
Dealing with a creaky door hinge doesn’t have to be a frustrating experience. By understanding the causes of the squeak, choosing the right lubricant, and following our step-by-step guide, you can silence that annoying noise and keep your doors swinging smoothly for years to come. Remember, regular maintenance and prompt attention to any issues are key to preventing future problems. With a little effort, you can enjoy the peace and quiet of a well-maintained home.
Now that you’re armed with the knowledge to tackle your creaky door hinges, we encourage you to share your experiences in the comments below. Have you tried any of these techniques? Do you have any additional tips or tricks to share? Your insights can help others silence the squeak and enjoy the benefits of a well-maintained home. If you’re facing more complex door issues or need expert advice, don’t hesitate to contact a qualified professional for assistance.
