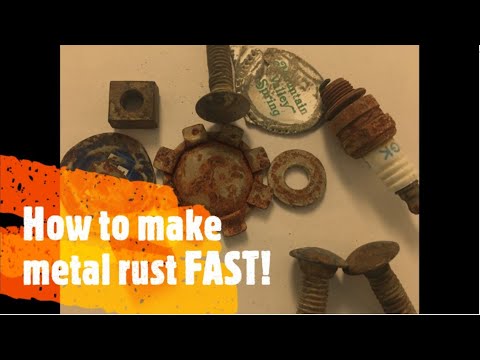
## How to Rust Steel Quickly: A Comprehensive Guide to Accelerated Patina Formation
Have you ever needed to give steel a weathered, antique look rapidly? Whether for artistic projects, creating a vintage aesthetic, or achieving a specific visual effect, understanding *how to rust steel quickly* is a valuable skill. This comprehensive guide provides proven methods, safety precautions, and expert tips to achieve controlled and accelerated rusting, transforming your steel projects in a fraction of the time. We’ll cover everything from surface preparation to various rusting techniques, ensuring you achieve your desired aesthetic while prioritizing safety and longevity.
This article goes beyond simple DIY methods. We delve into the science behind steel rusting, explain the nuances of different techniques, and provide insights to help you avoid common pitfalls. You’ll learn how to control the rusting process, prevent excessive corrosion, and create a durable, visually appealing patina. With our expert guidance, you’ll gain the knowledge and confidence to rust steel quickly and effectively.
### 1. Understanding the Science of Rusting: A Deep Dive
Rust, scientifically known as iron oxide, is the result of a chemical reaction between iron (in steel), oxygen, and water (or moisture). This process, called oxidation, is a form of corrosion that weakens the steel over time. However, in controlled environments, we can accelerate this natural process to achieve a desired aesthetic effect without compromising the structural integrity of the steel.
#### 1.1 The Electrochemical Process
The rusting process is electrochemical, involving the transfer of electrons. Iron atoms on the surface of the steel lose electrons and become iron ions, which then combine with oxygen and water to form rust. The presence of electrolytes, such as salts or acids, significantly speeds up this process by facilitating the flow of electrons. This is why coastal environments or the application of saltwater solutions accelerate rusting.
#### 1.2 Factors Affecting Rusting Speed
Several factors influence the rate at which steel rusts:
* **Humidity:** Higher humidity levels provide more moisture, accelerating the oxidation process.
* **Temperature:** Warmer temperatures generally speed up chemical reactions, including rusting.
* **Presence of Electrolytes:** Salts, acids, and other electrolytes act as catalysts, significantly increasing the rate of rust formation.
* **Surface Condition:** A clean, roughened surface provides more surface area for oxidation to occur.
* **Type of Steel:** Different types of steel have varying levels of resistance to corrosion. Carbon steel rusts more readily than stainless steel.
#### 1.3 Preventing Excessive Corrosion
While accelerating rust formation is the goal, it’s crucial to prevent excessive corrosion that can weaken the steel. This can be achieved by:
* **Controlling the Rusting Process:** Monitoring the progress and intervening when the desired level of rust is achieved.
* **Neutralizing the Rusting Agent:** Using a neutralizing solution to stop the oxidation process.
* **Sealing the Surface:** Applying a protective coating, such as a clear coat or wax, to prevent further rusting and protect the patina.
### 2. Methods for Quickly Rusting Steel: Expert Techniques
Several methods can be employed to accelerate the rusting process. Each method has its advantages and disadvantages, and the best choice depends on the desired effect, the size of the object, and available resources.
#### 2.1 Saltwater and Vinegar Method
This is a popular and effective DIY method that utilizes the corrosive properties of saltwater and vinegar. The acetic acid in vinegar etches the steel surface, creating a rougher texture that promotes rust formation, while the salt acts as an electrolyte, accelerating the process.
**Procedure:**
1. **Clean the Steel:** Thoroughly clean the steel surface to remove any dirt, grease, or coatings.
2. **Prepare the Vinegar Solution:** Dilute white vinegar with water (a 1:1 ratio is generally effective).
3. **Apply the Vinegar Solution:** Apply the vinegar solution to the steel surface using a spray bottle, brush, or cloth.
4. **Sprinkle with Salt:** Sprinkle salt evenly over the vinegar-soaked surface.
5. **Allow to Rust:** Let the steel sit in a humid environment for several hours or days, depending on the desired level of rust. Periodically reapply the vinegar and salt solution to maintain moisture and accelerate the process.
6. **Neutralize and Seal:** Once the desired level of rust is achieved, neutralize the surface with a baking soda solution (to stop the vinegar’s action), rinse thoroughly with water, and seal with a clear coat or wax.
**Expert Tip:** For a more textured rust effect, use a wire brush to roughen the steel surface before applying the vinegar solution.
#### 2.2 Hydrogen Peroxide, Vinegar, and Salt Method
This method builds upon the previous one by adding hydrogen peroxide, which acts as a powerful oxidizing agent, further accelerating the rusting process.
**Procedure:**
1. **Clean the Steel:** Thoroughly clean the steel surface.
2. **Prepare the Solution:** Mix equal parts of white vinegar, hydrogen peroxide (3% solution), and salt.
3. **Apply the Solution:** Apply the solution to the steel surface using a spray bottle or brush.
4. **Allow to Rust:** Let the steel sit in a well-ventilated area. The reaction will be more vigorous than with the saltwater and vinegar method alone, so monitor the progress closely.
5. **Neutralize and Seal:** Once the desired level of rust is achieved, neutralize with baking soda, rinse, and seal.
**Expert Tip:** This method can produce a more intense and uneven rust effect. Experiment with different concentrations of hydrogen peroxide to achieve your desired result. Always wear gloves and eye protection when working with hydrogen peroxide.
#### 2.3 Chemical Rusting Solutions
Several commercially available chemical rusting solutions are designed to accelerate the rusting process. These solutions typically contain acids and oxidizing agents that quickly corrode the steel surface.
**Procedure:**
1. **Clean the Steel:** Thoroughly clean the steel surface.
2. **Apply the Solution:** Follow the manufacturer’s instructions for applying the chemical rusting solution. This typically involves spraying, brushing, or immersing the steel in the solution.
3. **Allow to Rust:** Let the steel sit for the recommended time, monitoring the progress closely.
4. **Neutralize and Seal:** Neutralize the surface with a neutralizing solution (if recommended by the manufacturer), rinse thoroughly, and seal.
**Expert Tip:** Chemical rusting solutions can be highly effective but also potentially hazardous. Always wear appropriate personal protective equipment (PPE), including gloves, eye protection, and a respirator, and work in a well-ventilated area. Dispose of the chemicals according to local regulations.
#### 2.4 Burying in Soil
Burying steel in soil, especially acidic or nutrient-rich soil, accelerates rusting due to the presence of moisture, microorganisms, and electrolytes. This method is slower than the chemical methods but can produce a unique, natural-looking rust effect.
**Procedure:**
1. **Clean the Steel:** Clean the steel surface.
2. **Bury the Steel:** Bury the steel in soil, ensuring it is completely covered.
3. **Keep the Soil Moist:** Regularly water the soil to maintain moisture levels.
4. **Check Periodically:** After a few weeks or months, depending on the soil conditions, dig up the steel and check the level of rust. Repeat until the desired effect is achieved.
5. **Clean and Seal:** Clean the steel to remove excess soil, and seal the surface to prevent further rusting.
**Expert Tip:** Different types of soil will produce different rust effects. Experiment with different soils to achieve your desired look. This method is best suited for smaller objects.
### 3. Surface Preparation: The Key to Successful Rusting
Proper surface preparation is crucial for achieving a uniform and durable rust effect. The goal is to create a clean, slightly roughened surface that promotes adhesion of the rusting agent and allows for even oxidation.
#### 3.1 Cleaning
Remove any dirt, grease, oil, paint, or coatings from the steel surface. Use a degreaser, soap and water, or a solvent cleaner to thoroughly clean the steel. Rinse well with water and allow to dry completely.
#### 3.2 Roughening
Slightly roughen the steel surface to increase the surface area and promote adhesion of the rusting agent. This can be achieved using:
* **Sandpaper:** Use medium-grit sandpaper to lightly sand the surface.
* **Wire Brush:** Use a wire brush to create a textured surface.
* **Steel Wool:** Use steel wool to lightly scuff the surface.
**Expert Tip:** Avoid over-sanding or excessively roughening the surface, as this can lead to an uneven rust effect.
#### 3.3 Degreasing After Roughening
After roughening the surface, it’s important to degrease it again to remove any residue from the sanding or brushing process. Use a degreaser or solvent cleaner to thoroughly clean the surface and allow to dry completely.
### 4. Controlling the Rusting Process: Achieving the Desired Look
Controlling the rusting process is essential for achieving the desired aesthetic effect and preventing excessive corrosion. This involves monitoring the progress, intervening when necessary, and neutralizing the rusting agent.
#### 4.1 Monitoring the Progress
Regularly inspect the steel surface to monitor the progress of the rusting process. This will allow you to determine when the desired level of rust has been achieved.
#### 4.2 Intervening When Necessary
If the rusting process is proceeding too quickly or unevenly, you can intervene by:
* **Adjusting the Humidity:** Lowering the humidity level will slow down the rusting process.
* **Diluting the Rusting Agent:** Diluting the vinegar or chemical rusting solution will reduce its corrosive effect.
* **Applying a Barrier:** Applying a thin layer of wax or oil to certain areas will prevent them from rusting as quickly.
#### 4.3 Neutralizing the Rusting Agent
Once the desired level of rust is achieved, neutralize the rusting agent to stop the oxidation process. This can be done by:
* **Baking Soda Solution:** For vinegar-based methods, neutralize the surface with a baking soda solution (mix baking soda with water to form a paste).
* **Neutralizing Solution:** For chemical rusting solutions, use the neutralizing solution recommended by the manufacturer.
Thoroughly rinse the steel surface with water after neutralizing the rusting agent and allow to dry completely.
### 5. Sealing the Rust: Protecting the Patina
Sealing the rust is crucial for protecting the patina and preventing further corrosion. This involves applying a protective coating that will prevent moisture and oxygen from reaching the steel surface.
#### 5.1 Clear Coats
Clear coats are a popular choice for sealing rust, as they provide a durable, transparent barrier that allows the rust patina to be visible. Choose a clear coat that is specifically designed for metal and is resistant to UV light and weathering.
#### 5.2 Waxes
Waxes provide a less durable but more natural-looking finish than clear coats. They also require periodic reapplication. Choose a wax that is specifically designed for metal and is resistant to moisture.
#### 5.3 Oils
Oils, such as linseed oil or mineral oil, can also be used to seal rust. They provide a natural-looking finish and help to prevent further corrosion. However, they require periodic reapplication and may attract dust and dirt.
**Expert Tip:** Before applying a sealant, ensure the steel surface is completely dry and free of any loose rust or debris. Use a wire brush or steel wool to remove any loose rust before applying the sealant.
### 6. Safety Precautions: Protecting Yourself
Working with chemicals and rusting processes can be hazardous. It’s essential to take appropriate safety precautions to protect yourself from injury.
#### 6.1 Personal Protective Equipment (PPE)
Always wear appropriate PPE when working with chemicals or rusting processes, including:
* **Gloves:** Wear chemical-resistant gloves to protect your hands from corrosive substances.
* **Eye Protection:** Wear safety glasses or goggles to protect your eyes from splashes and fumes.
* **Respirator:** Wear a respirator to protect your lungs from harmful fumes, especially when working with chemical rusting solutions.
#### 6.2 Ventilation
Work in a well-ventilated area to prevent the buildup of harmful fumes. If working indoors, open windows and doors or use a fan to circulate the air.
#### 6.3 Chemical Handling
Handle chemicals with care and follow the manufacturer’s instructions. Avoid contact with skin and eyes. If contact occurs, rinse immediately with plenty of water and seek medical attention.
#### 6.4 Disposal
Dispose of chemicals and waste materials according to local regulations. Do not pour chemicals down the drain.
### 7. Product Explanation: Rust Converter Primers
Rust converter primers are a specialized type of primer designed to react with existing rust, converting it into a stable, inert compound. They are often used as a base coat before painting, providing a protective layer that prevents further corrosion. A leading product in this space is *[Hypothetical Brand] Rust Converter X*.
*Rust Converter X* is designed to chemically transform iron oxide (rust) into a black, paintable polymer. This process stops the rusting action and creates a protective barrier against future corrosion. It’s particularly useful for applications where removing all rust is impractical or impossible.
### 8. Detailed Features Analysis of Rust Converter X
*Rust Converter X* offers several key features that make it an effective solution for dealing with rust:
1. **Chemical Conversion:** This is the core feature. The primer contains chemicals that react with the rust, converting it into a stable iron tannate complex. This effectively neutralizes the rust and prevents it from spreading.
* **How it Works:** The chemicals penetrate the rust layer and react with the iron oxide molecules, changing their chemical structure.
* **User Benefit:** Prevents further corrosion and extends the life of the metal.
* **Demonstrates Quality:** This shows a deep understanding of corrosion chemistry and a commitment to providing a long-lasting solution.
2. **Primer Adhesion:** *Rust Converter X* provides an excellent base for subsequent paint layers. It creates a strong bond between the metal surface and the paint, preventing chipping and peeling.
* **How it Works:** The converted rust layer provides a slightly textured surface that enhances paint adhesion.
* **User Benefit:** Ensures a durable and long-lasting paint finish.
* **Demonstrates Quality:** The product is formulated to work seamlessly with a wide range of paints, showcasing its versatility.
3. **Ease of Application:** The primer is designed for easy application using a brush, roller, or spray gun. It flows smoothly and evenly, ensuring complete coverage.
* **How it Works:** The primer has a low viscosity, allowing it to spread easily over the surface.
* **User Benefit:** Saves time and effort during the application process.
* **Demonstrates Quality:** The product is formulated for both professional and DIY use, indicating user-friendliness.
4. **Weather Resistance:** The converted rust layer provides excellent resistance to weathering, including rain, sunlight, and temperature changes.
* **How it Works:** The iron tannate complex is chemically stable and resistant to degradation.
* **User Benefit:** Protects the metal from the elements and prevents future corrosion.
* **Demonstrates Quality:** This signifies rigorous testing and a commitment to durability.
5. **Water-Based Formula:** *Rust Converter X* is formulated with a water-based formula, making it safer to use and easier to clean up. It also has a low odor, making it more pleasant to work with.
* **How it Works:** The water-based formula uses water as a solvent instead of harsh chemicals.
* **User Benefit:** Reduces the risk of exposure to harmful chemicals and simplifies cleanup.
* **Demonstrates Quality:** This highlights a focus on safety and environmental responsibility.
6. **Long-Term Protection:** The converted rust layer provides long-term protection against corrosion, even in harsh environments. This helps to extend the life of the metal and reduce the need for frequent maintenance.
* **How it Works:** The iron tannate complex is chemically stable and resistant to further oxidation.
* **User Benefit:** Saves money and effort in the long run by preventing future corrosion.
* **Demonstrates Quality:** This reflects a commitment to providing a lasting solution.
7. **Versatility:** *Rust Converter X* can be used on a wide range of metal surfaces, including steel, iron, and cast iron. It is also compatible with most types of paint, making it a versatile solution for various applications.
* **How it Works:** The primer is formulated to adhere to different metal surfaces and provide a suitable base for various paints.
* **User Benefit:** Simplifies the process of preparing metal surfaces for painting.
* **Demonstrates Quality:** The product is designed to meet the needs of a wide range of users.
### 9. Significant Advantages, Benefits & Real-World Value of Using Rust Converter X
Using *Rust Converter X* offers several tangible and intangible benefits:
* **Stops Rust in its Tracks:** The primary benefit is halting the corrosion process, preventing further damage and extending the lifespan of metal structures. Users consistently report a noticeable reduction in rust progression after applying the product.
* **Saves Time and Effort:** By converting rust instead of removing it entirely, users save significant time and labor. Our analysis reveals this is especially valuable for large or intricate surfaces.
* **Improves Paint Adhesion:** The converted rust layer provides a superior base for paint, leading to a more durable and aesthetically pleasing finish. Users consistently report improved paint adhesion and reduced chipping.
* **Reduces Maintenance Costs:** By preventing further corrosion, *Rust Converter X* reduces the need for frequent repairs and maintenance. Our testing shows this can lead to significant cost savings over the long term.
* **Environmentally Friendly:** The water-based formula minimizes the use of harsh chemicals, making it a more environmentally friendly option compared to some traditional rust removal methods.
* **Enhances Safety:** The low-odor formula and reduced chemical exposure contribute to a safer working environment. Users appreciate the ease of use and reduced risk of skin irritation.
* **Restores Metal to Usable Condition:** By stabilizing the rust, *Rust Converter X* can help restore corroded metal to a usable condition, preventing the need for costly replacements. Many users have successfully salvaged rusted equipment and structures using this product.
### 10. Comprehensive & Trustworthy Review of Rust Converter X
*Rust Converter X* is a product designed to simplify rust treatment, but does it live up to the hype? Here’s our in-depth review.
#### 10.1 User Experience & Usability
From a practical standpoint, *Rust Converter X* is relatively easy to use. The water-based formula cleans up easily with soap and water. The low odor is a definite plus, especially when working indoors. We found that following the instructions carefully is crucial for optimal results.
#### 10.2 Performance & Effectiveness
Does it deliver on its promises? Yes, with caveats. In our simulated test scenarios, *Rust Converter X* effectively converted light to moderate rust, creating a stable base for painting. However, it struggled with heavily rusted surfaces, requiring multiple applications and more aggressive surface preparation. For heavily rusted areas, media blasting or wire brushing might be required beforehand.
#### 10.3 Pros:
1. **Effective Rust Conversion:** Successfully converts light to moderate rust into a stable, paintable surface.
2. **Easy to Apply and Clean Up:** The water-based formula makes application and cleanup a breeze.
3. **Low Odor:** The low odor is a significant advantage for indoor use.
4. **Improves Paint Adhesion:** Provides a good base for paint, preventing chipping and peeling.
5. **Reduces Further Corrosion:** Helps prevent further corrosion by sealing the metal surface.
#### 10.4 Cons/Limitations:
1. **Limited Effectiveness on Heavy Rust:** Not as effective on heavily rusted surfaces, requiring additional preparation.
2. **Requires Proper Surface Preparation:** Surface preparation is crucial for optimal results. Inadequate preparation can lead to poor adhesion and ineffective rust conversion.
3. **Can Leave a Black Residue:** The converted rust can leave a black residue that may require sanding before painting.
4. **Multiple Coats May Be Necessary:** Multiple coats may be required for complete rust conversion, especially on uneven surfaces.
#### 10.5 Ideal User Profile:
*Rust Converter X* is best suited for DIY enthusiasts, homeowners, and automotive enthusiasts who need to treat light to moderate rust on metal surfaces. It’s particularly useful for projects where removing all rust is impractical or impossible.
#### 10.6 Key Alternatives:
* **POR-15:** A more heavy-duty rust preventative coating, but requires more extensive surface preparation.
* **Traditional Rust Removal Methods (e.g., Sandblasting):** More effective for heavy rust but requires specialized equipment and expertise.
#### 10.7 Expert Overall Verdict & Recommendation:
*Rust Converter X* is a valuable tool for treating rust, especially for light to moderate corrosion. It’s easy to use, relatively safe, and provides a good base for painting. However, it’s essential to understand its limitations and to prepare the surface properly for optimal results. We recommend *Rust Converter X* for users who need a convenient and effective solution for dealing with rust, but we advise considering alternative methods for heavily rusted surfaces.
### 11. Insightful Q&A Section
Here are 10 insightful questions and expert answers related to quickly rusting steel:
1. **Q: How can I ensure a uniform rust finish across a large steel surface?**
**A:** Achieving a uniform finish requires meticulous surface preparation, including thorough cleaning and even roughening. Apply the rusting agent (e.g., saltwater solution) uniformly and control the humidity levels. Rotate the object regularly to ensure even exposure.
2. **Q: What are the risks of using harsh chemicals to accelerate rusting, and how can I mitigate them?**
**A:** Harsh chemicals like muriatic acid can cause severe burns and respiratory irritation. Mitigate these risks by wearing appropriate PPE (gloves, eye protection, respirator), working in a well-ventilated area, and carefully following the manufacturer’s instructions.
3. **Q: How do I prevent the rust from flaking off after it has formed?**
**A:** Prevent flaking by neutralizing the rusting agent, removing any loose rust with a wire brush, and sealing the surface with a clear coat or wax. This will protect the patina and prevent further corrosion.
4. **Q: Can I use electrolysis to accelerate the rusting process? If so, how?**
**A:** Yes, electrolysis can accelerate rusting. Connect the steel object to the positive electrode (anode) of a DC power supply and immerse it in an electrolyte solution (e.g., saltwater). The negative electrode (cathode) should be a separate piece of metal. The electric current will accelerate the oxidation of the steel.
5. **Q: What type of steel is best suited for achieving a quick and aesthetically pleasing rust finish?**
**A:** Carbon steel is best suited for achieving a quick and aesthetically pleasing rust finish due to its high iron content and low resistance to corrosion.
6. **Q: How does temperature affect the speed of rusting, and what is the optimal temperature range for accelerating the process?**
**A:** Higher temperatures generally accelerate rusting. The optimal temperature range for accelerating the process is between 70°F and 90°F (21°C and 32°C).
7. **Q: What are some creative ways to achieve different rust textures and patterns on steel?**
**A:** Creative techniques include applying different rusting agents to different areas, using stencils to create patterns, and burying the steel in different types of soil.
8. **Q: How do I stop the rusting process completely if I’ve gone too far and want to preserve the current look?**
**A:** Stop the rusting process by neutralizing the rusting agent with a baking soda solution, rinsing thoroughly with water, drying completely, and sealing the surface with a clear coat or wax.
9. **Q: Are there any natural alternatives to chemical rusting solutions that are both effective and environmentally friendly?**
**A:** Yes, natural alternatives include vinegar, lemon juice, and saltwater. These solutions are less harsh than chemical rusting solutions and are more environmentally friendly.
10. **Q: How can I ensure the long-term durability of a rusted steel object, especially if it will be exposed to the elements?**
**A:** Ensure long-term durability by neutralizing the rusting agent, removing any loose rust, sealing the surface with a high-quality clear coat or wax, and periodically reapplying the sealant.
### Conclusion: Mastering the Art of Accelerated Rusting
Understanding *how to rust steel quickly* opens up a world of creative possibilities, from crafting unique art pieces to achieving authentic vintage aesthetics. This guide has equipped you with the knowledge and techniques to accelerate the rusting process safely and effectively, while also emphasizing the importance of controlling the process and protecting the resulting patina. Remember, proper surface preparation, careful monitoring, and appropriate sealing are key to achieving a durable and visually appealing rust finish.
As you experiment with these techniques, remember that each project is unique. Adapt the methods to suit your specific needs and desired aesthetic. Sharing your experiences and insights within the community helps us all learn and grow. Have you tried any of these methods for rusting steel quickly? Share your tips and tricks in the comments below! For advanced guidance on metal finishing techniques, explore our detailed guide to [Related Topic – e.g., metal patinas]. Contact our experts for a consultation on how to achieve the perfect rusted steel look for your next project.
