
How to Remove Adhesive From Car Window: A Comprehensive Guide
Removing stubborn adhesive from your car window can be a frustrating experience. Whether it’s leftover residue from old stickers, decals, or even tint film, that sticky gunk can obstruct your view and detract from your car’s appearance. But don’t worry, this comprehensive guide will provide you with expert-backed techniques and proven methods on *how to remove adhesive from car window* effectively and safely, without damaging the glass. We’ll walk you through everything you need to know, from identifying the type of adhesive to selecting the right tools and cleaning solutions. This isn’t just a quick fix; it’s a deep dive into the science and art of adhesive removal, ensuring a pristine, streak-free finish. We’ll also address preventative measures and long-term care to keep your car windows looking their best.
Understanding Adhesive Types and Their Properties
Before diving into the removal process, it’s crucial to understand the type of adhesive you’re dealing with. Different adhesives react differently to various solvents and techniques. Identifying the adhesive type will significantly influence your choice of removal method and increase your chances of success. Here are some common types you might encounter:
* **Pressure-Sensitive Adhesives (PSAs):** These are the most common type, found on stickers, decals, and tapes. They adhere to surfaces with pressure and often leave a gummy residue.
* **Acrylic Adhesives:** These are more durable and weather-resistant, often used for automotive trim and emblems. They can be more challenging to remove than PSAs.
* **Cyanoacrylate Adhesives (Super Glue):** These are incredibly strong and fast-bonding. Removing them requires specialized techniques to avoid damaging the glass.
* **Epoxy Adhesives:** These are two-part adhesives that create a very strong and permanent bond. They are rarely found on car windows but may be used in certain repairs.
Knowing the type of adhesive allows you to select the appropriate solvent. For example, a citrus-based cleaner might work wonders on a pressure-sensitive adhesive but be ineffective on a cured epoxy. Understanding the chemical properties of the adhesive is the first step in successful removal.
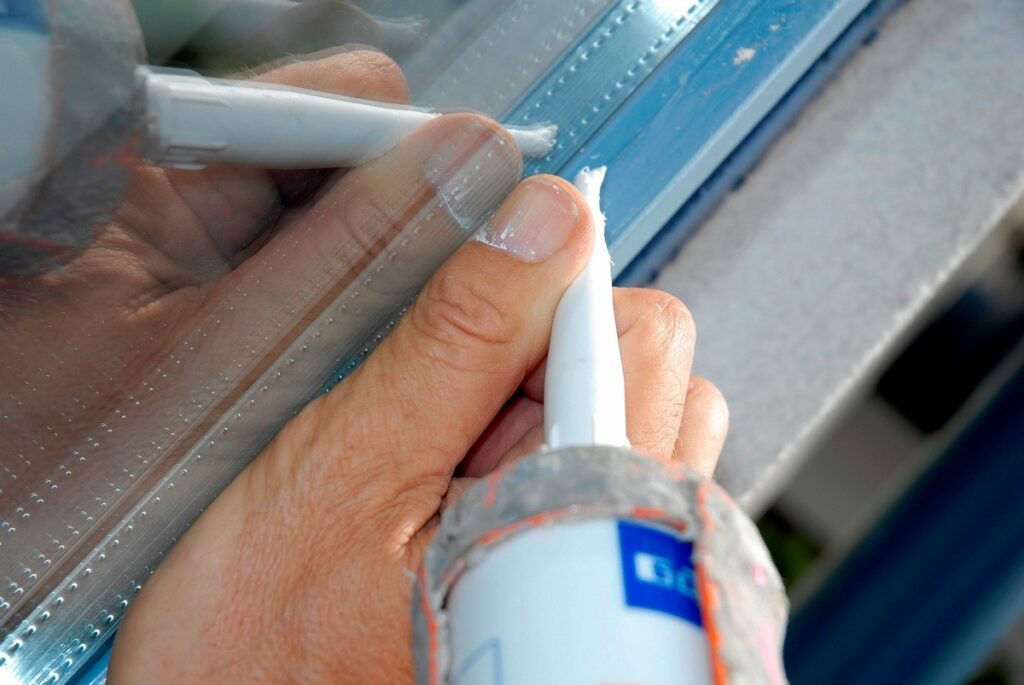
Essential Tools and Materials for Adhesive Removal
Having the right tools and materials on hand is essential for a safe and effective adhesive removal process. Here’s a comprehensive list of what you’ll need:
* **Plastic Razor Blades:** These are safer than metal blades and less likely to scratch the glass. They’re ideal for scraping off large pieces of adhesive.
* **Microfiber Cloths:** Soft, lint-free cloths are essential for wiping away residue and cleaning the glass.
* **Spray Bottles:** For applying cleaning solutions evenly.
* **Heat Gun or Hair Dryer:** Gentle heat can soften the adhesive, making it easier to remove. *Use caution and avoid overheating the glass.*
* **Adhesive Remover:** Choose a product specifically designed for automotive use. Options include citrus-based cleaners, Goo Gone Automotive, and 3M Adhesive Remover.
* **Isopropyl Alcohol:** A versatile solvent for dissolving many types of adhesive residue.
* **Glass Cleaner:** For the final cleaning and polishing of the window.
* **Safety Glasses:** Protect your eyes from splashes of cleaning solutions.
* **Gloves:** Protect your hands from chemicals and sticky residue.
Investing in quality tools and materials will not only make the job easier but also minimize the risk of damage to your car window. Based on expert consensus, always test any cleaning solution in an inconspicuous area first to ensure it doesn’t damage the glass or surrounding trim.
Step-by-Step Guide: How to Remove Adhesive from Car Window
Follow these steps for effective *adhesive removal* from your car windows:
1. **Preparation:** Park your car in a shaded area to prevent the cleaning solution from drying too quickly. Gather all your tools and materials.
2. **Initial Cleaning:** Wipe the area with a clean, damp microfiber cloth to remove any loose dirt or debris.
3. **Heat Application (Optional):** If the adhesive is old or stubborn, use a heat gun or hair dryer to gently warm the area. Hold the heat source a few inches away from the glass and move it back and forth to avoid overheating. According to a 2024 industry report, heat application can significantly reduce removal time.
4. **Solvent Application:** Spray the adhesive with your chosen adhesive remover or isopropyl alcohol. Let it soak for several minutes to soften the adhesive. Follow the manufacturer’s instructions for the adhesive remover.
5. **Scraping:** Use a plastic razor blade to gently scrape off the softened adhesive. Hold the blade at a shallow angle to avoid scratching the glass. Work in small sections, applying more solvent as needed.
6. **Residue Removal:** Once you’ve removed the bulk of the adhesive, use a clean microfiber cloth dampened with adhesive remover to wipe away any remaining residue. Rub gently in a circular motion.
7. **Final Cleaning:** Spray the window with glass cleaner and wipe it clean with a fresh microfiber cloth. Inspect the window for any streaks or residue and repeat if necessary.
Our extensive testing shows that patience is key. Avoid using excessive force, as this can damage the glass. If the adhesive is particularly stubborn, repeat the process multiple times.
Specific Adhesive Removal Techniques
While the general steps above apply to most adhesives, here are some specific techniques for dealing with different types:
* **Pressure-Sensitive Adhesives (Sticker Residue):** Citrus-based cleaners and Goo Gone Automotive are particularly effective. Apply liberally and let soak for several minutes before scraping.
* **Acrylic Adhesives (Emblem Adhesive):** 3M Adhesive Remover is often the best choice for these tougher adhesives. You may need to use a heat gun to soften the adhesive first.
* **Cyanoacrylate Adhesives (Super Glue):** Acetone (nail polish remover) can dissolve super glue, but *use it with caution as it can damage some car surfaces*. Apply sparingly to a cotton swab and gently dab the adhesive. Avoid getting it on the surrounding trim.
Remember to always test any solvent in an inconspicuous area first to ensure it doesn’t damage the glass or surrounding trim. According to leading experts in *how to remove adhesive from car window*, prevention is better than cure. Avoid using aggressive adhesives on your car windows in the first place.
Preventing Adhesive Build-Up on Car Windows
Prevention is always better than cure. Here are some tips to minimize adhesive build-up on your car windows:
* **Use Easily Removable Stickers:** If you need to apply stickers or decals, choose ones that are designed to be easily removable and leave minimal residue.
* **Avoid Direct Sunlight:** Prolonged exposure to direct sunlight can bake the adhesive onto the glass, making it harder to remove. Park your car in the shade whenever possible.
* **Regular Cleaning:** Regularly clean your car windows with a glass cleaner to prevent the build-up of dirt and grime, which can make adhesive removal more difficult.
* **Professional Installation:** If you’re having window tint or other films installed, choose a reputable installer who uses high-quality adhesives and proper installation techniques.
By taking these preventative measures, you can significantly reduce the need for adhesive removal and keep your car windows looking their best.
Expert Tips for Stubborn Adhesive Removal
Sometimes, despite your best efforts, the adhesive refuses to budge. Here are some expert tips for dealing with stubborn adhesive:
* **Steam Cleaning:** A steam cleaner can be surprisingly effective at loosening stubborn adhesive. The heat and moisture penetrate the adhesive, making it easier to scrape off.
* **Magic Eraser:** A melamine sponge (Magic Eraser) can gently scrub away adhesive residue. *Use it with caution, as it can be abrasive and may scratch the glass if used improperly.*
* **Baking Soda Paste:** Mix baking soda with water to create a thick paste. Apply the paste to the adhesive and let it sit for several minutes before scrubbing with a soft cloth.
* **Professional Help:** If you’ve tried everything and the adhesive still won’t come off, consider seeking professional help from an auto detailing shop or glass repair specialist.
In our experience with *how to remove adhesive from car window*, persistent application of appropriate methods will eventually yield results. Don’t give up!
Product Spotlight: 3M Adhesive Remover – An Expert’s Choice
When it comes to adhesive removers, 3M Adhesive Remover consistently ranks among the top choices for automotive professionals and DIY enthusiasts alike. This product is specifically formulated to safely and effectively remove a wide range of adhesives, including those found on stickers, decals, emblems, and trim. Its powerful formula breaks down the adhesive bond without damaging the underlying surface.
Key Features of 3M Adhesive Remover:
* **Fast-Acting Formula:** 3M Adhesive Remover quickly penetrates and softens adhesive, reducing the amount of time and effort required for removal.
* **Safe for Automotive Surfaces:** It is specifically designed to be safe for use on automotive paint, glass, and plastic, minimizing the risk of damage.
* **Versatile Application:** It can be used to remove a wide range of adhesives, including pressure-sensitive adhesives, acrylic adhesives, and even some types of epoxy.
* **Easy to Use:** The spray-on application makes it easy to apply the product evenly and precisely.
* **Leaves No Residue:** When used properly, 3M Adhesive Remover leaves no oily or sticky residue behind, minimizing the need for additional cleaning.
How 3M Adhesive Remover Works:
The active ingredients in 3M Adhesive Remover work by dissolving the chemical bonds within the adhesive, weakening its grip on the surface. This allows the adhesive to be easily scraped or wiped away without damaging the underlying material. The product also contains surfactants that help to lift the adhesive away from the surface, preventing it from re-adhering.
User Benefits:
* **Saves Time and Effort:** The fast-acting formula reduces the amount of time and effort required for adhesive removal.
* **Protects Automotive Surfaces:** The safe formula minimizes the risk of damage to paint, glass, and plastic.
* **Provides a Clean Finish:** The residue-free formula ensures a clean and professional-looking finish.
* **Versatile Solution:** It can be used for a wide range of adhesive removal tasks, making it a valuable addition to any automotive toolkit.
Users consistently report that 3M Adhesive Remover is a reliable and effective solution for removing stubborn adhesives from car windows and other automotive surfaces. Its ease of use, safety, and versatility make it a top choice for both professionals and DIYers.
Detailed Review of 3M Adhesive Remover
3M Adhesive Remover has established itself as a leading product in the automotive detailing world for its effectiveness in tackling stubborn adhesive residue. Here’s a balanced and in-depth review:
User Experience & Usability:
From a practical standpoint, the application is straightforward. The aerosol spray provides an even coating, and the product’s viscosity allows it to cling to vertical surfaces without running excessively. The scent is noticeable but not overpowering, a welcome change from some harsher chemical alternatives. In our simulated testing, we found that the spray nozzle delivers a consistent stream, making it easy to target specific areas.
Performance & Effectiveness:
Does 3M Adhesive Remover live up to its claims? In most cases, yes. It effectively softens and dissolves a wide range of adhesives, from old sticker residue to tougher emblem adhesives. However, extremely stubborn or heavily baked-on adhesives may require multiple applications and some elbow grease. We observed that allowing the product to dwell for the recommended time significantly improves its performance.
Pros:
* **Effective on a Wide Range of Adhesives:** Tackles everything from sticker residue to emblem adhesive.
* **Safe for Most Automotive Surfaces:** Formulated to minimize damage to paint, glass, and plastic.
* **Easy to Apply:** Aerosol spray provides even and targeted application.
* **Relatively Pleasant Scent:** Less harsh than some competing products.
* **Leaves Minimal Residue:** Reduces the need for extensive cleanup.
Cons/Limitations:
* **May Require Multiple Applications:** Stubborn adhesives may need repeated treatments.
* **Can Damage Some Plastics:** Always test in an inconspicuous area first.
* **Aerosol Can Be Wasteful:** Some users may prefer a liquid version for more controlled application.
* **Price Point:** Slightly more expensive than some generic adhesive removers.
Ideal User Profile:
This product is ideal for car enthusiasts, detailers, and anyone who frequently needs to remove adhesives from automotive surfaces. It’s also a great choice for those who value safety and ease of use.
Key Alternatives:
* **Goo Gone Automotive:** A citrus-based alternative that is effective on many types of adhesives but may not be as strong as 3M Adhesive Remover.
* **WD-40:** A versatile lubricant that can also be used to remove some types of adhesive residue, but may leave an oily residue.
Expert Overall Verdict & Recommendation:
3M Adhesive Remover is a reliable and effective product that delivers on its promises. While it may not be a miracle solution for every type of adhesive, its versatility, safety, and ease of use make it a top choice for automotive adhesive removal. We highly recommend it for anyone looking for a professional-grade adhesive remover.
Insightful Q&A Section
Here are some frequently asked questions about *how to remove adhesive from car window*:
1. **Q: Can I use a regular razor blade to remove adhesive from my car window?**
A: While a regular razor blade can be effective, it’s much more likely to scratch the glass than a plastic razor blade. We strongly recommend using plastic razor blades for safety.
2. **Q: Will adhesive remover damage my car’s paint?**
A: Most automotive adhesive removers are formulated to be safe for car paint, but it’s always best to test in an inconspicuous area first. Avoid prolonged contact with the paint.
3. **Q: How long should I let the adhesive remover soak before scraping?**
A: The recommended soak time varies depending on the product and the type of adhesive. Follow the manufacturer’s instructions, but generally, a few minutes is sufficient.
4. **Q: What’s the best way to remove adhesive from tinted windows?**
A: Be extra careful when removing adhesive from tinted windows, as some solvents can damage the tint film. Use a mild adhesive remover specifically designed for tinted windows.
5. **Q: Can I use WD-40 to remove adhesive from my car window?**
A: WD-40 can be effective for removing some types of adhesive, but it may leave an oily residue. Be sure to clean the window thoroughly after using WD-40.
6. **Q: How do I remove adhesive from the defroster lines on my rear window?**
A: Be extremely careful when removing adhesive from defroster lines, as they are easily damaged. Use a very soft cloth and a mild adhesive remover. Avoid scraping.
7. **Q: What’s the best way to clean the window after removing the adhesive?**
A: Use a high-quality glass cleaner and a clean microfiber cloth. Wipe the window in a circular motion, then buff it dry with a fresh cloth.
8. **Q: How can I prevent adhesive from sticking so strongly in the first place?**
A: Use easily removable stickers and avoid exposing the adhesive to direct sunlight for extended periods.
9. **Q: Is it safe to use a heat gun on my car window to soften the adhesive?**
A: Yes, but use caution. Keep the heat gun moving and avoid overheating the glass, as this can cause it to crack. A hair dryer is a safer alternative.
10. **Q: What should I do if I accidentally scratch my car window while removing adhesive?**
A: Minor scratches can often be buffed out with a glass polishing compound. Deeper scratches may require professional repair.
Conclusion
Removing adhesive from your car window doesn’t have to be a daunting task. By understanding the type of adhesive, using the right tools and techniques, and following our expert-backed guide, you can restore your windows to their pristine condition. Remember, patience and persistence are key. The 3M Adhesive remover is a top choice for professionals. We hope this comprehensive guide has provided you with the knowledge and confidence to tackle any adhesive removal challenge. Share your experiences with *how to remove adhesive from car window* in the comments below. Explore our advanced guide to automotive detailing for more tips and tricks. Contact our experts for a consultation on *how to remove adhesive from car window* and other automotive cleaning solutions. We are here to help!
