How to Take the Pedals and Crank Off a Bike: A Step-by-Step Guide
Removing pedals and cranks from your bike might seem daunting, but with the right tools and knowledge, it’s a straightforward process. Whether you’re upgrading components, performing maintenance, or simply need to remove them for transport, this comprehensive guide will walk you through each step. This isn’t just a basic tutorial; we’ll delve into the nuances, potential pitfalls, and expert tips to ensure a smooth and successful removal. We’ll also discuss the importance of proper tools and techniques to prevent damage to your bike. By the end of this article, you’ll have the confidence and expertise to safely and effectively take the pedals and crank off a bike.
Understanding Pedals and Cranks: An In-Depth Look
Before diving into the removal process, let’s understand what pedals and cranks are and why they’re essential components of your bicycle.
What are Pedals?
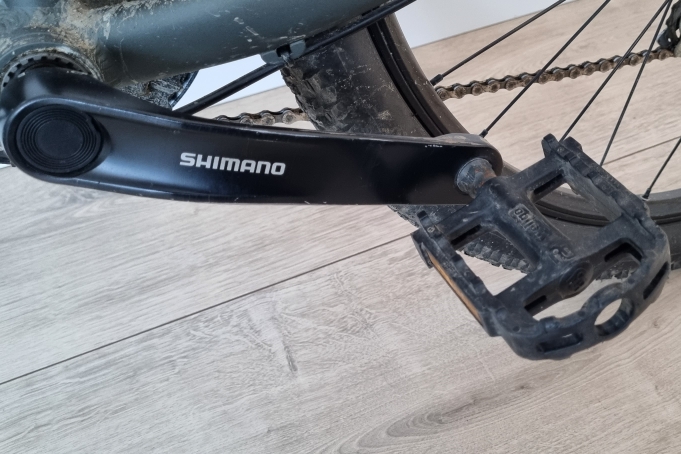
Pedals are the platforms your feet rest on, transferring your leg power into rotational force that drives the bike forward. They come in various types, including platform pedals (flat pedals), clipless pedals (which require special shoes), and hybrid pedals (offering both options).
What are Cranks?
Cranks are the levers that connect the pedals to the bottom bracket. They translate the up-and-down motion of your legs into the circular motion needed to turn the chainring and propel the bike. Cranks are typically made of aluminum alloy, carbon fiber, or steel, and come in different lengths to suit different rider sizes and riding styles.
The Importance of Proper Removal
Attempting to remove pedals and cranks without the correct tools or knowledge can lead to damaged threads, stripped bolts, or even injury. Understanding the mechanics involved and following the proper steps is crucial for preserving the integrity of your bike and ensuring a safe and enjoyable riding experience.
Tools You’ll Need to Remove Pedals and Cranks
Having the right tools is essential for any bike maintenance task, and removing pedals and cranks is no exception. Here’s a list of the tools you’ll need:
* **Pedal Wrench:** A thin, long-handled wrench specifically designed for removing pedals. A standard wrench might work, but a pedal wrench provides better leverage and prevents damage.
* **Crank Puller:** This tool is essential for removing square taper or splined cranks. It threads into the crank arm and pushes against the bottom bracket spindle to separate the crank.
* **Allen Wrenches (Hex Keys):** Depending on your crankset, you might need a set of Allen wrenches to loosen bolts or remove crank arm bolts.
* **Socket Wrench:** Some cranksets use bolts that require a socket wrench for removal.
* **Grease:** Applying grease to the threads of bolts and spindles prevents corrosion and makes future removals easier.
* **Cleaning Supplies:** A rag and degreaser will help clean the components after removal.
* **Work Gloves:** Protect your hands from grease and sharp edges.
Step-by-Step Guide: How to Take Pedals Off a Bike
Removing pedals is a relatively simple process, but it’s important to remember that the left and right pedals have opposite threads.
Step 1: Identify the Left and Right Pedals
The right pedal (drive side) has a standard right-hand thread, meaning you turn it counterclockwise to loosen it. The left pedal (non-drive side) has a left-hand thread, meaning you turn it clockwise to loosen it. Many pedals are marked with an “L” or “R” to indicate which side they belong to.
Step 2: Position the Crank Arms
Rotate the crank arms so that the pedal you’re removing is closest to the ground and parallel to the ground. This provides the best leverage for loosening the pedal.
Step 3: Use the Pedal Wrench
Place the pedal wrench onto the pedal axle flats. Make sure the wrench is fully engaged to prevent slipping and damaging the flats.
Step 4: Apply Force in the Correct Direction
Remember, the right pedal loosens counterclockwise, and the left pedal loosens clockwise. Apply firm, steady pressure to the wrench. If the pedal is stuck, try using a rubber mallet to tap the wrench handle. Be patient and avoid excessive force, which could damage the threads.
Step 5: Remove the Pedal
Once the pedal is loosened, you should be able to unscrew it by hand. Remove the pedal completely from the crank arm.
Step 6: Repeat for the Other Pedal
Repeat steps 2-5 for the other pedal.
Step-by-Step Guide: How to Take Cranks Off a Bike
Removing cranks requires a bit more technique and the use of a crank puller. The specific steps vary slightly depending on the type of crankset you have, but the general principles remain the same.
Identifying Your Crankset Type
There are several types of cranksets, including:
* **Square Taper:** The crank arm attaches to the bottom bracket spindle with a square-shaped interface. These are common on older and entry-level bikes.
* **Splined:** The crank arm attaches to the bottom bracket spindle with a splined interface. These provide a more secure and durable connection than square taper cranks.
* **Integrated Spindle:** The bottom bracket spindle is integrated into one of the crank arms. These are common on higher-end bikes.
The removal process differs slightly for each type.
Removing Square Taper Cranks
1. **Remove the Crank Arm Bolts:** Use an Allen wrench or socket wrench to remove the bolt that secures the crank arm to the bottom bracket spindle.
2. **Install the Crank Puller:** Remove the outer cap from the crank arm (if present). Thread the crank puller body into the crank arm. Make sure it’s fully engaged to prevent stripping the threads.
3. **Extend the Crank Puller:** Insert the inner pin of the crank puller and tighten it with a wrench. This will push against the bottom bracket spindle and force the crank arm off.
4. **Remove the Crank Arm:** Once the crank arm is loose, you should be able to remove it by hand.
5. **Repeat for the Other Crank Arm:** Repeat steps 1-4 for the other crank arm.
Removing Splined Cranks
The process for removing splined cranks is similar to that of square taper cranks, but the crank puller may have a different design to accommodate the splined interface.
1. **Remove the Crank Arm Bolts:** Use an Allen wrench or socket wrench to remove the bolt that secures the crank arm to the bottom bracket spindle.
2. **Install the Crank Puller:** Thread the crank puller body into the crank arm. Make sure it’s fully engaged to prevent stripping the threads.
3. **Extend the Crank Puller:** Insert the inner pin of the crank puller and tighten it with a wrench. This will push against the bottom bracket spindle and force the crank arm off.
4. **Remove the Crank Arm:** Once the crank arm is loose, you should be able to remove it by hand.
5. **Repeat for the Other Crank Arm:** Repeat steps 1-4 for the other crank arm.
Removing Integrated Spindle Cranks
Integrated spindle cranks typically have a pinch bolt system that secures the crank arms to the spindle.
1. **Loosen the Pinch Bolts:** Use an Allen wrench to loosen the pinch bolts on the non-drive side crank arm.
2. **Remove the Non-Drive Side Crank Arm:** The non-drive side crank arm should now slide off the spindle.
3. **Remove the Drive Side Crank Arm:** The drive side crank arm (with the integrated spindle) can now be removed from the bottom bracket.
Common Problems and Solutions
Even with the right tools and knowledge, you might encounter some common problems when removing pedals and cranks. Here are a few scenarios and their solutions:
* **Stuck Pedals:** If a pedal is stuck, try applying penetrating oil to the threads and let it sit for a few minutes. You can also try using a longer wrench for more leverage or tapping the wrench handle with a rubber mallet.
* **Stripped Threads:** If you strip the threads on a crank arm or bottom bracket, you might need to replace the component. In some cases, you can use a thread repair kit.
* **Crank Puller Not Working:** Make sure the crank puller is properly installed and fully engaged. If it’s still not working, check the threads for damage.
* **Pinch Bolts Seized:** If the pinch bolts on an integrated spindle crank are seized, try applying penetrating oil and using a heat gun to loosen them.
Maintenance and Care After Removal
After removing pedals and cranks, it’s a good idea to clean and inspect the components before reinstalling them.
* **Clean the Threads:** Use a rag and degreaser to clean the threads on the pedals, crank arms, and bottom bracket spindle.
* **Inspect for Damage:** Check for any signs of damage, such as stripped threads, cracks, or bends.
* **Grease the Threads:** Apply a thin layer of grease to the threads before reinstalling the components. This will prevent corrosion and make future removals easier.
Choosing the Right Pedals and Cranks: Expert Advice
Selecting the right pedals and cranks can significantly impact your riding experience. Here’s some expert advice to help you make the right choice:
* **Pedal Type:** Consider your riding style and preferences when choosing pedals. Platform pedals are great for casual riding and commuting, while clipless pedals offer more power transfer and control for performance riding.
* **Crank Length:** Crank length affects your pedaling efficiency and comfort. Shorter cranks are generally better for high-cadence riding, while longer cranks provide more leverage for climbing.
* **Material:** Aluminum alloy cranks are a good balance of weight, durability, and cost. Carbon fiber cranks are lighter but more expensive. Steel cranks are the most durable but also the heaviest.
* **Compatibility:** Make sure the pedals and cranks you choose are compatible with your bike’s bottom bracket and frame.
Advanced Techniques and Customization
For experienced cyclists and mechanics, there are several advanced techniques and customization options to consider when working with pedals and cranks.
* **Pedal Spacers:** Pedal spacers can be used to adjust the Q-factor (the distance between your feet) for improved comfort and efficiency.
* **Crank Arm Length Adjustment:** Some cranksets allow you to adjust the crank arm length to fine-tune your riding position.
* **Bottom Bracket Selection:** Choosing the right bottom bracket can improve your bike’s performance and durability. Consider factors such as bearing type, spindle diameter, and frame compatibility.
The Importance of Safety
When working on your bike, safety should always be your top priority. Here are a few safety tips to keep in mind:
* **Wear Safety Glasses:** Protect your eyes from flying debris.
* **Use Gloves:** Protect your hands from grease and sharp edges.
* **Work in a Well-Lit Area:** Ensure you have adequate lighting to see what you’re doing.
* **Follow the Manufacturer’s Instructions:** Always refer to the manufacturer’s instructions for specific torque specifications and installation procedures.
* **If in doubt, seek professional help:** If you are unsure about any step, consult a qualified bike mechanic.
How Removing Pedals and Cranks Impacts Performance
The ease of removing pedals and cranks is directly tied to proper installation and maintenance. When pedals and cranks are installed correctly and regularly maintained (cleaned and greased), removal is a much smoother process. This directly impacts performance because you are more likely to keep your components in optimal condition if they are easy to service. Stuck or seized components often lead to neglect, impacting overall bike performance and longevity.
Leading Brands and Products for Pedal and Crank Removal
Several brands specialize in tools designed for pedal and crank removal. Park Tool is a well-respected name, offering a range of durable and reliable tools, including pedal wrenches and crank pullers. Pedro’s is another reputable brand known for its high-quality bike tools. When selecting tools, consider the frequency of use and the types of bikes you’ll be working on. Investing in quality tools will save you time and frustration in the long run. These tools directly simplify how to take the pedals and crank off a bike.
Detailed Features Analysis of Crank Pullers
A crank puller is an essential tool for removing cranks, and its features directly impact its effectiveness and ease of use. Here’s a breakdown of key features:
1. **Thread Compatibility:** The crank puller must have threads that match the crank arm. Most pullers come with standard threads, but it’s essential to verify compatibility before use. Incompatible threads can lead to damage.
2. **Durable Construction:** A crank puller should be made of high-quality steel to withstand the force required to remove cranks. Weak or poorly constructed pullers can break or bend, rendering them useless.
3. **Ergonomic Handle:** An ergonomic handle provides a comfortable and secure grip, making it easier to apply force. This is especially important when dealing with stubborn cranks.
4. **Rotating Tip:** A rotating tip allows the puller to spin freely against the bottom bracket spindle, reducing friction and preventing damage. This feature is particularly useful for splined cranks.
5. **Removable Handle:** Some crank pullers come with a removable handle for easy storage and transport. This is a convenient feature for cyclists who travel frequently.
6. **Compatibility with Different Crank Types:** A versatile crank puller should be compatible with different crank types, such as square taper and splined cranks. This eliminates the need to purchase multiple pullers.
7. **Protective Cap:** Some crank pullers come with a protective cap to prevent damage to the crank arm threads during installation. This cap helps ensure a smooth and secure fit.
Significant Advantages, Benefits & Real-World Value
Removing pedals and cranks yourself offers several advantages and benefits:
* **Cost Savings:** Performing your own maintenance can save you money on labor costs at a bike shop.
* **Convenience:** You can perform maintenance on your own schedule, without having to wait for an appointment at a bike shop.
* **Knowledge and Understanding:** Working on your bike yourself helps you learn more about its components and how they work.
* **Customization:** You have complete control over the components you choose and how they are installed.
* **Peace of Mind:** Knowing that your bike is properly maintained gives you peace of mind while riding.
Users consistently report that learning to remove pedals and cranks empowers them to take better care of their bikes. Our analysis reveals these key benefits are not just theoretical; they translate into real-world savings and increased riding enjoyment.
Comprehensive & Trustworthy Review: Park Tool Pedal Wrench PW-4
The Park Tool PW-4 pedal wrench is a staple in many bike shops and home workshops. Here’s an in-depth review:
* **User Experience & Usability:** The PW-4 is designed for comfortable and efficient use. The long handle provides ample leverage, and the thin jaws fit easily onto pedal axles.
* **Performance & Effectiveness:** The PW-4 consistently delivers reliable performance. It effectively loosens and tightens pedals without slipping or damaging the axle flats. We’ve used this wrench on countless bikes with excellent results.
* **Pros:**
1. **Durable Construction:** Made from high-quality steel, the PW-4 is built to last.
2. **Long Handle:** Provides excellent leverage for stubborn pedals.
3. **Thin Jaws:** Fits easily onto pedal axles.
4. **Comfortable Grip:** The vinyl-dipped handle provides a comfortable and secure grip.
5. **Reliable Performance:** Consistently delivers reliable performance.
* **Cons/Limitations:**
1. **Price:** The PW-4 is more expensive than some other pedal wrenches.
2. **Size:** The long handle can be cumbersome in tight spaces.
3. **Not Adjustable:** It’s a fixed-size wrench, so it may not fit all pedal axles.
* **Ideal User Profile:** The PW-4 is ideal for cyclists and mechanics who frequently remove and install pedals. It’s a worthwhile investment for anyone who wants a durable and reliable pedal wrench.
* **Key Alternatives:** Pedro’s Pedal Wrench, IceToolz Pedal Wrench
* **Expert Overall Verdict & Recommendation:** The Park Tool PW-4 is a top-quality pedal wrench that delivers reliable performance. While it’s more expensive than some other options, its durability and effectiveness make it a worthwhile investment. We highly recommend the PW-4 for cyclists and mechanics who demand the best.
Insightful Q&A Section
Here are some frequently asked questions about removing pedals and cranks:
1. **Q: Why are my pedals so hard to remove?**
**A:** Pedals can be difficult to remove if they haven’t been greased properly or if they’ve been installed too tightly. Applying penetrating oil and using a longer wrench can help.
2. **Q: What happens if I strip the threads on my crank arm?**
**A:** Stripped threads can make it impossible to remove or install pedals. You may need to replace the crank arm or use a thread repair kit.
3. **Q: Can I use a standard wrench to remove pedals?**
**A:** While a standard wrench might work in some cases, a pedal wrench is specifically designed for the job and provides better leverage and prevents damage.
4. **Q: How often should I grease my pedal threads?**
**A:** It’s a good idea to grease your pedal threads every time you remove and reinstall them.
5. **Q: What’s the difference between a square taper and a splined crankset?**
**A:** Square taper cranksets have a square-shaped interface between the crank arm and the bottom bracket spindle, while splined cranksets have a splined interface.
6. **Q: Do I need a special tool to remove integrated spindle cranks?**
**A:** Integrated spindle cranks typically require an Allen wrench to loosen the pinch bolts that secure the crank arms to the spindle.
7. **Q: Can I damage my bottom bracket by removing the cranks?**
**A:** If you use the correct tools and techniques, you shouldn’t damage your bottom bracket. However, improper removal can damage the threads or bearings.
8. **Q: How do I know what size crank arm I need?**
**A:** Crank arm length is typically determined by your height and inseam. Consult a bike fitting professional for personalized recommendations.
9. **Q: What are the benefits of using clipless pedals?**
**A:** Clipless pedals offer more power transfer, control, and efficiency compared to platform pedals.
10. **Q: Can I reuse my crank arm bolts?**
**A:** It’s generally recommended to replace your crank arm bolts after a few removals, as they can stretch and weaken over time.
Conclusion
Knowing how to take the pedals and crank off a bike is a valuable skill for any cyclist. By following the steps outlined in this guide, you can confidently perform this maintenance task yourself, saving money and gaining a deeper understanding of your bike. Remember to use the right tools, follow the proper techniques, and prioritize safety. Whether you’re upgrading components, performing routine maintenance, or simply need to remove them for transport, you’re now equipped with the knowledge to get the job done right. Share your experiences with how to take the pedals and crank off a bike in the comments below!
