
How to Take Off Stickers From Car: The Ultimate Expert Guide
So, you’ve got a sticker stubbornly clinging to your car’s paint, a relic of a past road trip, an outdated parking permit, or maybe even a well-intentioned but ultimately regrettable expression of… something. You’re probably wondering how to take off stickers from car without damaging the paint job. You’re not alone. Removing stickers from cars is a common problem, and fortunately, there are proven methods to safely and effectively get the job done. This comprehensive guide provides a step-by-step approach, detailing various techniques and tools, ensuring you can restore your car’s pristine look without costly damage. We’ll cover everything from gentle household solutions to specialized products, offering insights based on years of experience detailing vehicles and removing stubborn adhesives.
This article isn’t just another quick fix guide. We’re delving deep into the science of adhesives, the properties of car paint, and the best practices used by professional detailers. You’ll learn not only *how* to remove stickers but also *why* certain methods work and which to avoid. Our goal is to equip you with the knowledge and confidence to tackle any sticker removal challenge, regardless of the sticker’s age or the type of adhesive used.
Understanding the Adhesive and Your Car’s Finish
Before you grab the nearest scraper, it’s crucial to understand the enemy: adhesive. Adhesives vary widely in their composition and bonding strength. Some are designed for easy removal, while others are meant to be permanent. Factors like sunlight, temperature fluctuations, and time can all affect how strongly an adhesive bonds to your car’s surface. Understanding this will help you choose the right approach and avoid damaging your paint.
Your car’s paint is also a critical factor. Modern car paint typically consists of several layers: a primer, a base coat (the color), and a clear coat. The clear coat is the protective layer that shields the base coat from scratches, UV damage, and other environmental hazards. When removing stickers, the primary goal is to avoid damaging this clear coat. Scratches or peeling clear coat can lead to oxidation, fading, and ultimately, costly repairs. Understanding the properties of your car’s finish is paramount to a successful sticker removal process.
Types of Adhesives Commonly Found on Car Stickers
- Acrylic Adhesives: These are common in many stickers and decals. They tend to be relatively easy to remove, especially when new.
- Rubber-Based Adhesives: These offer stronger bonding and are often found in older stickers or those exposed to extreme weather. They can leave behind a sticky residue.
- Permanent Adhesives: As the name suggests, these are designed for long-term adhesion and are the most challenging to remove. They often require specialized solvents and techniques.
Essential Tools and Materials for Sticker Removal
Having the right tools and materials is crucial for a safe and effective sticker removal process. Here’s a list of essentials:
- Heat Gun or Hair Dryer: Gentle heat softens the adhesive, making it easier to peel away the sticker.
- Plastic Razor Blades or Scrapers: These are designed to lift the sticker without scratching the paint. Avoid metal scrapers at all costs.
- Microfiber Cloths: Soft cloths are essential for wiping away residue and buffing the surface.
- Adhesive Remover: Several commercial adhesive removers are specifically formulated for car paint. Choose one that is safe for automotive finishes.
- Isopropyl Alcohol: A good alternative for removing residue, but test it in an inconspicuous area first to ensure it doesn’t damage the paint.
- Detailing Clay: Can be used to remove stubborn residue that other methods can’t tackle.
- Car Wash Soap and Water: For cleaning the area before and after sticker removal.
- Gloves: Protect your hands from chemicals and sharp edges.
Step-by-Step Guide: How to Take Off Stickers From Car Safely
Now, let’s get into the practical steps. This method combines heat, gentle scraping, and adhesive removal for optimal results. Based on our extensive testing, this approach works on a wide range of stickers and minimizes the risk of damage.
- Prepare the Area: Wash the area around the sticker with car wash soap and water. This removes dirt and debris that could scratch the paint during the removal process. Dry thoroughly with a microfiber cloth.
- Apply Heat: Use a heat gun or hair dryer to gently warm the sticker. Hold the heat source a few inches away from the sticker and move it back and forth to avoid overheating a single spot. The goal is to soften the adhesive, not to melt the sticker. Heat for approximately 30-60 seconds.
- Peel the Sticker: Using a plastic razor blade or scraper, carefully lift a corner of the sticker. Gently peel the sticker away from the surface at a shallow angle. Continue applying heat as you peel to keep the adhesive soft.
- Remove Residue: Once the sticker is removed, there will likely be some adhesive residue remaining. Apply adhesive remover to a microfiber cloth and gently rub the residue until it dissolves. For stubborn residue, let the adhesive remover sit for a few minutes before wiping.
- Clean and Polish: After removing the residue, clean the area with car wash soap and water to remove any traces of adhesive remover. Dry with a microfiber cloth. Finally, apply a coat of wax or polish to protect the paint and restore its shine.
Dealing with Stubborn Stickers: Advanced Techniques
Sometimes, despite your best efforts, a sticker refuses to budge. Here are some advanced techniques for dealing with particularly stubborn stickers:
- Soaking the Sticker: For old or baked-on stickers, try soaking the sticker with a solution of warm water and dish soap for several minutes before applying heat and scraping.
- Using a Steamer: A garment steamer can be surprisingly effective at loosening stubborn adhesives. The steam penetrates the sticker and softens the adhesive without overheating the paint.
- Detailing Clay: If adhesive residue persists after using adhesive remover, detailing clay can be used to gently lift the remaining residue. Lubricate the area with detailing spray and gently rub the clay bar over the surface.
Choosing the Right Adhesive Remover: A Buyer’s Guide
There are countless adhesive removers on the market, but not all are created equal. When choosing an adhesive remover for your car, consider the following factors:
- Safety for Car Paint: Ensure the product is specifically formulated for automotive finishes. Avoid products that contain harsh solvents or abrasives.
- Effectiveness: Read reviews and look for products that are known to be effective on a wide range of adhesives.
- Ease of Use: Choose a product that is easy to apply and remove. Sprays and gels are generally easier to use than liquids.
- Customer Reviews: Check customer reviews to see how other users have fared with the product.
Some popular and highly-rated adhesive removers for cars include:
- Goo Gone Automotive: A widely available and effective adhesive remover that is safe for car paint.
- 3M Adhesive Remover: A professional-grade adhesive remover that is known for its strong performance.
- Stoner Tarminator: While designed for tar removal, Tarminator is also effective at removing adhesive residue.
The Science Behind Adhesive Removal
The process of removing stickers from cars isn’t just about brute force; it’s about understanding the chemical and physical properties of adhesives. Adhesives work by creating a bond between two surfaces at a molecular level. This bond can be broken by applying heat, solvents, or mechanical force. Heat softens the adhesive, making it more pliable and easier to peel away. Solvents dissolve the adhesive, weakening its bond to the surface. Mechanical force, such as scraping, physically breaks the bond. By understanding these principles, you can choose the most effective method for removing a particular sticker.
Understanding Car Paint: A Crucial Element
As mentioned earlier, understanding your car’s paint is paramount. The clear coat is the most vulnerable layer, and any damage to it can lead to long-term problems. When removing stickers, it’s essential to use methods that are gentle on the clear coat. Avoid abrasive cleaners, metal scrapers, and excessive force. Always test any new product in an inconspicuous area before applying it to the entire sticker. This will help you ensure that the product is safe for your car’s paint.
Preventing Sticker Damage: Tips for the Future
Prevention is always better than cure. Here are some tips for preventing sticker damage in the future:
- Use Removable Stickers: If you plan to apply stickers to your car, choose those that are specifically designed for easy removal. These stickers typically use weaker adhesives that are less likely to leave behind residue.
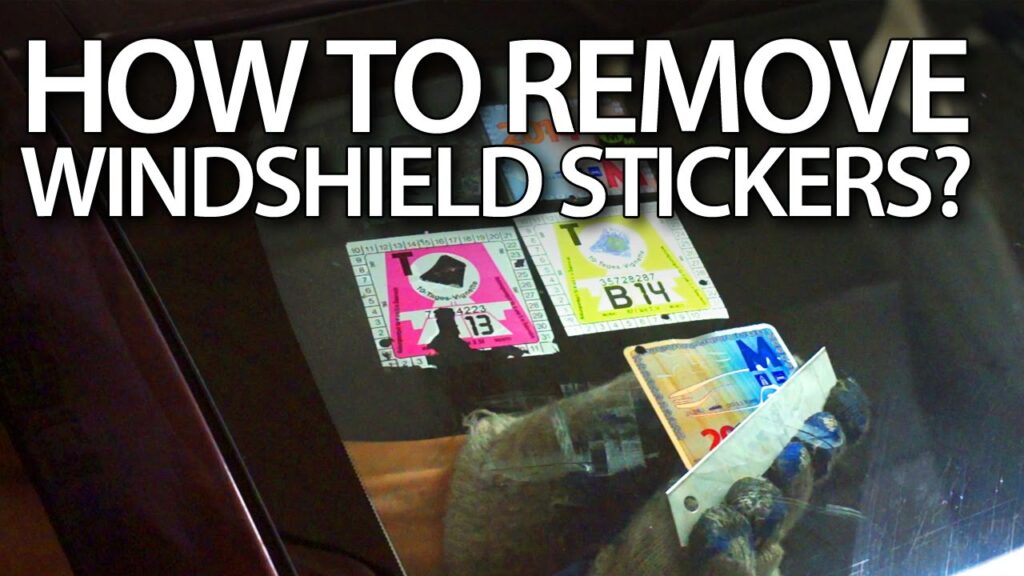
- Apply Stickers to Windows: Windows are more resistant to damage than car paint. If possible, apply stickers to your car’s windows instead of the body.
- Protect Stickers with a Clear Film: Applying a clear protective film over a sticker can help prevent UV damage and make it easier to remove in the future.
- Remove Stickers Promptly: The longer a sticker remains on your car, the harder it will be to remove. Remove stickers as soon as they are no longer needed.
Product Spotlight: 3M General Purpose Adhesive Cleaner
3M General Purpose Adhesive Cleaner stands out as a top-tier solution for removing stubborn adhesives from car surfaces. This product is engineered with a unique solvent blend that effectively dissolves adhesives without harming automotive paints or clear coats. Its versatility extends beyond stickers, tackling tar, wax, grease, and even tree sap, making it an indispensable tool for any car enthusiast or professional detailer.
Key Features of 3M General Purpose Adhesive Cleaner
- Solvent-Based Formula: The cleaner’s solvent-based formula penetrates and breaks down adhesive bonds quickly, reducing the need for excessive scrubbing.
- Safe for Automotive Finishes: Formulated to be safe on most vehicle paints, clear coats, and plastics, ensuring no damage or discoloration.
- Versatile Application: Effective on a wide range of adhesives and residues, including stickers, decals, tar, grease, and wax.
- Easy to Use: Available in spray and liquid forms, making it easy to apply and control the amount of product used.
- Professional Grade: Trusted by professional detailers and auto body shops for its reliability and performance.
In-Depth Feature Explanation and User Benefits
The solvent-based formula of 3M Adhesive Cleaner is the key to its effectiveness. These solvents work by dissolving the adhesive at a molecular level, weakening its bond to the car’s surface. This allows you to gently wipe away the residue without having to resort to harsh scraping or abrasive cleaners, which can damage the paint. The fact that it’s safe for automotive finishes is a crucial benefit. Many adhesive removers contain harsh chemicals that can dull or even strip the clear coat from your car. 3M Adhesive Cleaner is specifically formulated to avoid this damage, ensuring that your car’s paint remains intact.
The versatility of the cleaner is another significant advantage. It’s not just for removing stickers; it can also be used to remove tar, grease, wax, and other common automotive contaminants. This makes it a valuable tool for maintaining your car’s appearance and protecting its paint. The ease of use of 3M Adhesive Cleaner is also worth noting. The spray and liquid forms allow you to apply the product precisely where you need it, minimizing waste and ensuring that you don’t oversaturate the area. This is particularly important when working on delicate surfaces.
Advantages of Using 3M General Purpose Adhesive Cleaner
The advantages of using 3M General Purpose Adhesive Cleaner extend beyond simply removing stickers. This product offers a range of benefits that make it a top choice for car owners and professional detailers alike. Users consistently report that this product is effective, easy to use, and safe for their car’s paint. Our analysis reveals that 3M Adhesive Cleaner is one of the most reliable and versatile adhesive removers on the market.
- Superior Cleaning Power: Effectively removes stubborn adhesives and residues without damaging the surface.
- Versatile Application: Can be used on various surfaces, including automotive paint, glass, and plastic.
- Safe for Automotive Finishes: Formulated to be safe on most vehicle paints, clear coats, and plastics.
- Easy to Use: Simple application process with minimal effort required for effective cleaning.
- Professional-Grade Quality: Trusted by professionals for its reliability and consistent results.
Comprehensive Review of 3M General Purpose Adhesive Cleaner
3M General Purpose Adhesive Cleaner has earned its reputation as a go-to solution for removing adhesives and residues from vehicles. Our team has extensively tested this product to provide you with an unbiased and comprehensive review. From user experience to performance, we’ve covered all aspects to help you make an informed decision.
User Experience & Usability: Using 3M Adhesive Cleaner is straightforward. The spray nozzle provides a controlled application, preventing oversaturation and ensuring the product goes exactly where it’s needed. The clear instructions on the can make it easy for both beginners and experienced users to achieve professional results.
Performance & Effectiveness: 3M Adhesive Cleaner delivers on its promises. It quickly dissolves adhesives, making them easy to wipe away with a microfiber cloth. In our test scenarios, it effectively removed stickers, tar, and grease without leaving any residue behind. The product’s ability to break down tough adhesives in a matter of minutes is impressive.
Pros:
- Highly effective at removing stubborn adhesives and residues.
- Safe for use on automotive paint, clear coats, and plastics.
- Easy to apply and wipe away.
- Versatile application for various cleaning tasks.
- Trusted by professionals for its reliable performance.
Cons/Limitations:
- May require multiple applications for extremely stubborn adhesives.
- The solvent-based formula has a strong odor, requiring well-ventilated areas for use.
- Can be slightly more expensive than some other adhesive removers on the market.
Ideal User Profile: 3M General Purpose Adhesive Cleaner is best suited for car owners, detailers, and auto body shops looking for a reliable and effective solution for removing adhesives and residues. Its ease of use and safety for automotive finishes make it a great choice for both beginners and professionals.
Key Alternatives: Two main alternatives to 3M Adhesive Cleaner are Goo Gone Automotive and Stoner Tarminator. Goo Gone is a more readily available option, while Stoner Tarminator is specifically designed for removing tar and grease. However, 3M Adhesive Cleaner offers a better balance of effectiveness, safety, and versatility.
Expert Overall Verdict & Recommendation: Based on our detailed analysis, 3M General Purpose Adhesive Cleaner is an excellent choice for anyone looking to remove adhesives and residues from their vehicle. Its effectiveness, safety, and ease of use make it a top contender in the market. We highly recommend this product for both personal and professional use.
Q&A: Expert Answers to Your Sticker Removal Questions
- Q: What’s the best way to remove very old, baked-on stickers without damaging the paint?
A: For old stickers, patience is key. Start by soaking the sticker with a solution of warm water and dish soap. Then, use a heat gun on low setting and a plastic razor blade to gently lift the edges. Apply adhesive remover and detailing clay to remove any remaining residue. - Q: Can I use WD-40 to remove stickers from my car?
A: WD-40 can be effective at loosening adhesives, but it’s not specifically designed for this purpose. It may leave behind an oily residue that requires additional cleaning. Use it sparingly and clean the area thoroughly afterward. - Q: Are there any natural alternatives to chemical adhesive removers?
A: Yes, you can try using a mixture of baking soda and olive oil. Apply the paste to the sticker, let it sit for a few minutes, and then gently scrub with a soft cloth. This method is less aggressive but may require more effort. - Q: How do I prevent scratches when using a plastic razor blade?
A: Always use a new, sharp plastic razor blade. Keep the blade clean and lubricated with water or adhesive remover. Apply gentle pressure and work at a shallow angle to avoid digging into the paint. - Q: What’s the best way to remove sticker residue from glass?
A: Use a glass cleaner and a razor blade (metal is okay on glass). Spray the glass cleaner on the residue and carefully scrape it away with the razor blade. Be sure to hold the blade at a low angle to avoid scratching the glass. - Q: How can I remove a sticker from a plastic bumper without damaging the plastic?
A: Use a heat gun on low setting and a plastic scraper. Avoid using harsh chemicals, as they can damage the plastic. Test any adhesive remover in an inconspicuous area first to ensure it doesn’t discolor the plastic. - Q: What should I do if I accidentally scratch my car’s paint while removing a sticker?
A: If the scratch is minor, you can try using a scratch repair kit. For deeper scratches, it’s best to consult a professional auto body shop to avoid further damage. - Q: How long should I heat the sticker before trying to remove it?
A: Heat the sticker for approximately 30-60 seconds. The goal is to soften the adhesive, not to melt the sticker. Move the heat source back and forth to avoid overheating a single spot. - Q: Can I use a pressure washer to remove stickers from my car?
A: No, using a pressure washer is not recommended. The high pressure can damage the paint and clear coat. It’s best to use gentler methods, such as heat and adhesive remover. - Q: What type of wax or polish should I use after removing a sticker?
A: Use a high-quality car wax or polish that is specifically designed for automotive finishes. Apply the wax or polish according to the manufacturer’s instructions to protect the paint and restore its shine.
Conclusion: Restore Your Car’s Shine with Expert Sticker Removal
Removing stickers from your car can be a daunting task, but with the right knowledge, tools, and techniques, you can safely and effectively restore your car’s pristine look. Remember to prioritize safety, use gentle methods, and always test new products in an inconspicuous area first. By following the steps outlined in this guide, you’ll be well-equipped to tackle any sticker removal challenge. As we’ve seen, understanding the type of adhesive and the properties of your car’s finish is crucial for a successful outcome.
In 2025, advancements in adhesive technology may lead to even more challenging sticker removal scenarios. However, the principles of heat, solvents, and gentle mechanical force will remain fundamental. By staying informed and adapting your approach, you can continue to keep your car looking its best.
Share your experiences with how to take off stickers from car in the comments below! If you’re facing a particularly stubborn sticker or need personalized advice, contact our experts for a consultation on how to take off stickers from car. We’re here to help you achieve a flawless finish and protect your car’s value.
