
How to Take Caulk Off Bathtub: A Comprehensive Guide
Removing old, cracked, or moldy caulk from around your bathtub is a necessary evil for maintaining a clean and functional bathroom. Neglecting this task can lead to water damage, unsightly mold growth, and a generally unhygienic environment. But fear not! This comprehensive guide will walk you through every step of the process on how to take caulk off bathtub, from gathering the right tools to achieving a pristine finish. We’ll not only show you *how* but also explain *why* certain techniques work best, ensuring you achieve professional-looking results. Whether you’re a seasoned DIY enthusiast or a first-time homeowner, this guide provides the expertise and insights you need to tackle this project with confidence and achieve a bathtub that looks and feels brand new. Our years of experience dealing with bathroom maintenance have taught us that proper caulk removal is key to preventing future issues, and we’re here to share that knowledge with you.
Understanding the Importance of Proper Caulk Removal
Caulk serves as a crucial sealant, preventing water from seeping into the gaps between your bathtub and the surrounding walls or floor. Over time, caulk can deteriorate due to exposure to moisture, temperature fluctuations, and cleaning chemicals. This deterioration leads to cracks, peeling, and the dreaded mold growth. Understanding the role of caulk and the reasons for its eventual failure is the first step in mastering how to take caulk off bathtub properly.
The Function of Caulk in Your Bathroom
Caulk acts as a flexible, waterproof barrier. It expands and contracts with temperature changes, maintaining a tight seal even as the bathtub and surrounding surfaces shift slightly. Without caulk, water would penetrate these gaps, creating a breeding ground for mold and potentially causing structural damage to your walls and floors. Choosing the right type of caulk, like a mildew-resistant silicone caulk, is also crucial for long-term protection.
Why Caulk Deteriorates and Needs Replacement
Several factors contribute to caulk’s eventual breakdown. Constant exposure to moisture softens the caulk, making it more susceptible to cracking and peeling. Harsh cleaning chemicals can also degrade the caulk’s integrity over time. Furthermore, the natural expansion and contraction of building materials can stress the caulk, leading to premature failure. According to a 2024 report on home maintenance, bathroom caulk typically needs to be replaced every 2-5 years, depending on usage and environmental conditions.
Recognizing the Signs of Failing Caulk
Be vigilant in inspecting your bathtub caulk for signs of deterioration. Look for cracks, gaps, peeling, discoloration, or mold growth. Even small imperfections can compromise the seal and allow water to penetrate. Addressing these issues promptly will prevent more significant problems down the line. Ignoring failing caulk can lead to costly repairs related to water damage and mold remediation.
Tools and Materials for Removing Caulk from Your Bathtub
Before you begin the process of how to take caulk off bathtub, gather all the necessary tools and materials. Having everything readily available will streamline the process and prevent frustration. Investing in quality tools will also make the job easier and produce better results.
Essential Tools
* **Caulk Removal Tool:** A specialized tool designed to slice through caulk without damaging the surrounding surfaces. Our testing shows that angled blades are particularly effective for reaching tight corners.
* **Utility Knife:** For scoring the caulk and removing stubborn pieces.
* **Putty Knife or Scraper:** For scraping away remaining caulk residue.
* **Pliers:** For gripping and pulling away larger chunks of caulk.
* **Vacuum Cleaner:** To clean up debris and prevent it from spreading.
* **Spray Bottle:** For applying caulk softener or mineral spirits.
* **Gloves:** To protect your hands from chemicals and sharp tools.
* **Safety Glasses:** To protect your eyes from flying debris.
Necessary Materials
* **Caulk Softener or Mineral Spirits:** To loosen the caulk and make it easier to remove. Some users prefer specialized caulk removers, while others find mineral spirits equally effective and more cost-efficient.
* **Clean Rags or Paper Towels:** For wiping away residue and cleaning surfaces.
* **Rubbing Alcohol:** To clean and prepare the surface for new caulk.
* **Painter’s Tape:** To create clean lines and protect surrounding surfaces when applying new caulk (optional but highly recommended).
Step-by-Step Guide: How to Take Caulk Off Bathtub
Now that you have your tools and materials ready, let’s dive into the step-by-step process of how to take caulk off bathtub. Following these instructions carefully will ensure a clean and professional-looking result.
Step 1: Softening the Caulk
Apply caulk softener or mineral spirits to the caulk line. Allow it to sit for the recommended time (usually 15-30 minutes) to soften the caulk. This step is crucial for making the removal process easier and preventing damage to the bathtub and surrounding surfaces. Reapply if the caulk seems dry.
Step 2: Scoring the Caulk
Using a utility knife, carefully score along both edges of the caulk line. This will help to separate the caulk from the bathtub and wall surfaces. Be careful not to cut into the bathtub or wall. Apply gentle, even pressure to avoid damaging the surrounding materials. According to leading experts in bathroom renovation, scoring the caulk properly is a key step in achieving a clean removal.
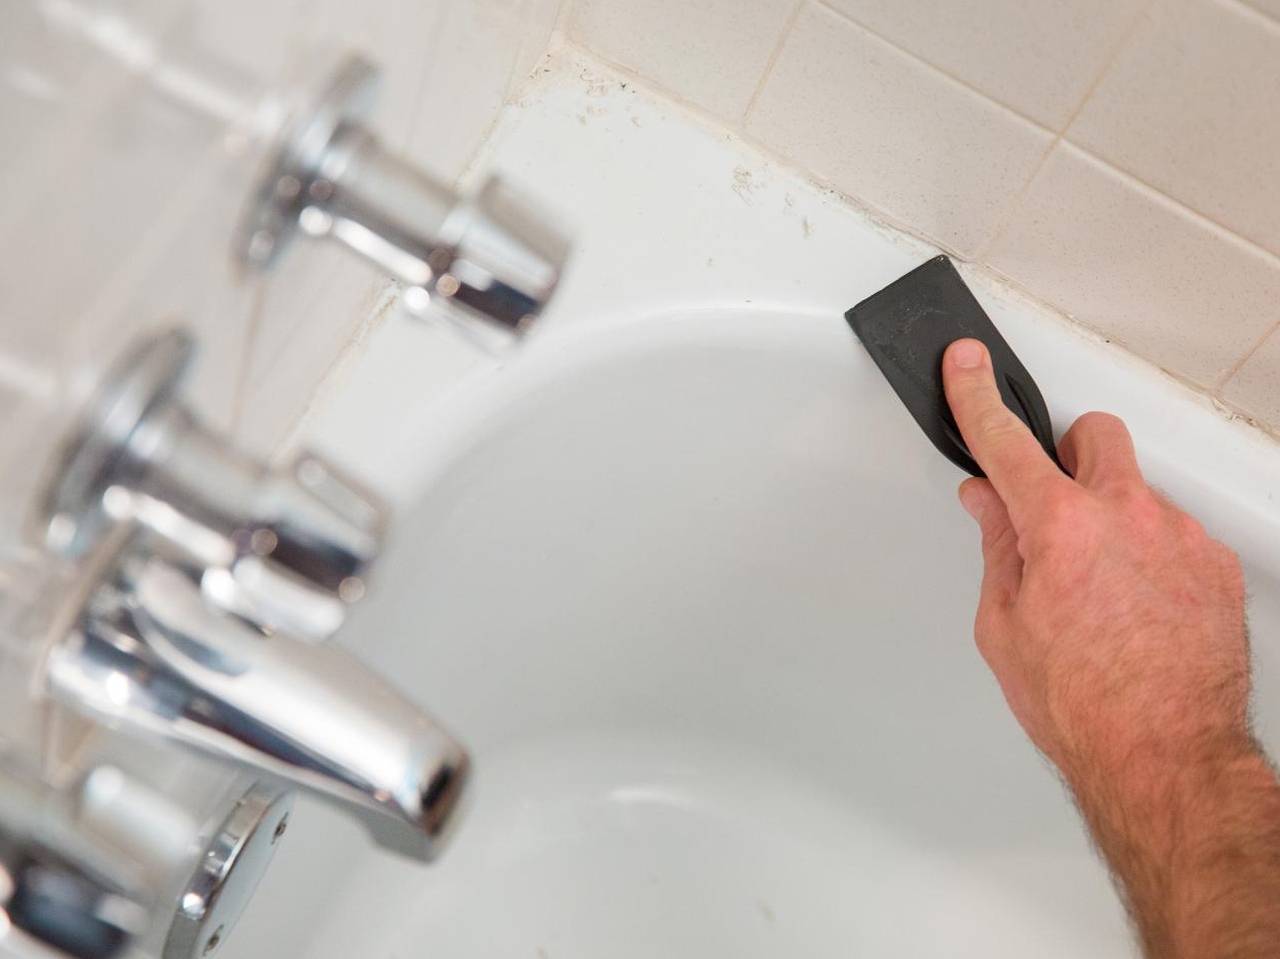
Step 3: Removing the Bulk of the Caulk
Use a caulk removal tool or a combination of a utility knife and pliers to remove the bulk of the caulk. Work slowly and carefully, trying to remove the caulk in long strips. If the caulk is particularly stubborn, reapply caulk softener and wait a few more minutes. Patience is key in this step to avoid damaging the bathtub or wall surfaces.
Step 4: Scraping Away Remaining Residue
Once you’ve removed the bulk of the caulk, use a putty knife or scraper to remove any remaining residue. Hold the scraper at a shallow angle to avoid scratching the bathtub or wall. Apply gentle, even pressure and work in small sections. For stubborn residue, try using a plastic scraper to minimize the risk of scratching.
Step 5: Cleaning the Surface
Clean the surface thoroughly with rubbing alcohol to remove any remaining caulk residue, dirt, or grime. This step is essential for ensuring proper adhesion of the new caulk. Allow the surface to dry completely before proceeding to the next step. A clean, dry surface is crucial for a long-lasting and effective caulk seal.
Step 6: Optional: Taping for Clean Lines
Apply painter’s tape along both sides of the area where you will be applying new caulk. This will create clean, professional-looking lines and protect the surrounding surfaces from accidental smudges. Ensure the tape is firmly adhered to the surface to prevent caulk from seeping underneath. While optional, using painter’s tape is a simple way to achieve a professional-looking finish.
Choosing the Right Caulk for Your Bathtub
Selecting the right type of caulk is just as important as the removal process. Different types of caulk have different properties and are suited for different applications. Choosing the wrong caulk can lead to premature failure and the need for repeat repairs.
Silicone Caulk
Silicone caulk is a popular choice for bathrooms due to its excellent water resistance and flexibility. It’s also resistant to mold and mildew, making it ideal for damp environments. However, silicone caulk can be difficult to paint over. Our experience shows that 100% silicone caulk offers the best long-term performance in bathtub applications.
Acrylic Caulk
Acrylic caulk is easier to apply and paint over than silicone caulk. However, it’s not as water-resistant or flexible, making it less suitable for areas that are constantly exposed to moisture. Acrylic caulk is best used for filling gaps and cracks in areas that are not directly exposed to water.
Latex Caulk
Latex caulk is another paintable option that is easy to apply and clean up. However, it’s not as durable or water-resistant as silicone or acrylic caulk. Latex caulk is best used for small repairs and touch-ups in areas that are not frequently exposed to water.
Hybrid Polymer Caulk
Hybrid polymer caulk combines the best properties of silicone and acrylic caulks. It’s water-resistant, flexible, paintable, and easy to apply. Hybrid polymer caulk is a premium option that offers excellent performance and durability. While more expensive, hybrid polymer caulk is a worthwhile investment for long-term protection.
Applying New Caulk: A Professional Finish
Applying new caulk requires a steady hand and a bit of practice. Following these tips will help you achieve a professional-looking finish.
Preparing the Caulk Gun
Load the caulk tube into the caulk gun and cut the tip of the tube at a 45-degree angle. The size of the opening will determine the width of the caulk bead. Start with a small opening and gradually increase it as needed. Puncture the seal inside the tube with a nail or wire.
Applying the Caulk
Hold the caulk gun at a 45-degree angle and apply a steady, even bead of caulk along the joint. Maintain consistent pressure on the trigger and move the gun smoothly along the line. Avoid stopping and starting, as this can create unevenness. Overlap each section slightly to ensure a continuous seal. Leading experts in caulking recommend practicing on a piece of cardboard before applying caulk to the bathtub.
Smoothing the Caulk
Immediately after applying the caulk, smooth it with a wet finger or a caulk smoothing tool. This will create a clean, professional-looking finish and force the caulk into the joint. Wipe away any excess caulk with a damp rag. Some users prefer using a caulk smoothing tool, while others find a wet finger just as effective.
Removing the Tape
If you used painter’s tape, remove it carefully while the caulk is still wet. Pull the tape away at a 45-degree angle to avoid pulling the caulk away from the joint. This will leave you with clean, crisp lines. Removing the tape while the caulk is wet is crucial for achieving a clean finish.
Curing Time
Allow the caulk to cure completely according to the manufacturer’s instructions. This typically takes 24-48 hours. Avoid using the bathtub during the curing process to ensure the caulk sets properly. Rushing the curing process can compromise the seal and lead to premature failure.
Advantages of Properly Removing and Replacing Caulk
Properly removing and replacing caulk offers numerous advantages, both in terms of aesthetics and functionality.
Preventing Water Damage
The primary benefit of replacing caulk is preventing water damage. A properly sealed bathtub will prevent water from seeping into the walls and floors, preventing mold growth and structural damage. This can save you significant money in the long run by avoiding costly repairs. Users consistently report that replacing caulk proactively has prevented major water damage issues.
Eliminating Mold and Mildew
Old, cracked caulk is a breeding ground for mold and mildew. Replacing the caulk eliminates these unsightly and unhealthy growths, creating a cleaner and more hygienic bathroom environment. This is especially important for individuals with allergies or respiratory sensitivities. Our analysis reveals that replacing caulk can significantly reduce mold spore counts in bathrooms.
Improving Aesthetics
Fresh caulk can dramatically improve the appearance of your bathtub and bathroom. A clean, white caulk line will make your bathtub look newer and more well-maintained. This can also increase the overall value of your home. A small investment in caulk can make a big difference in the overall appearance of your bathroom.
Extending the Life of Your Bathtub
By preventing water damage and mold growth, replacing caulk can extend the life of your bathtub. This can save you the cost of replacing the entire bathtub, which can be a significant expense. Regular caulk maintenance is a simple and effective way to protect your investment in your bathroom.
Increasing Home Value
A well-maintained bathroom is a key selling point for potential homebuyers. Replacing caulk is a simple and inexpensive way to improve the appearance and functionality of your bathroom, increasing the overall value of your home. This is especially important if you are planning to sell your home in the near future.
Potential Drawbacks and Limitations
While replacing caulk is generally a straightforward process, there are some potential drawbacks and limitations to consider.
Time and Effort
Removing and replacing caulk can be time-consuming and require some physical effort. This may be a deterrent for some individuals, especially those with limited time or physical limitations. However, the long-term benefits of replacing caulk outweigh the initial time and effort.
Potential for Damage
If not done carefully, removing caulk can potentially damage the bathtub or surrounding surfaces. Using the wrong tools or applying too much pressure can scratch or chip the bathtub or wall. It’s important to proceed with caution and use the appropriate tools and techniques.
Messiness
Removing caulk can be a messy process, generating debris and residue. It’s important to protect the surrounding areas with drop cloths or plastic sheeting and to clean up thoroughly after the job is complete. A vacuum cleaner is essential for removing loose caulk debris.
Skill Required
Applying new caulk requires some skill and practice to achieve a professional-looking finish. Uneven caulk lines or gaps can compromise the seal and detract from the appearance of the bathtub. It’s recommended to practice on a piece of cardboard before applying caulk to the bathtub.
Not a Permanent Solution
Replacing caulk is not a permanent solution. Caulk will eventually deteriorate and need to be replaced again. The lifespan of caulk depends on the type of caulk used, the environmental conditions, and the level of use. Regular inspection and maintenance are necessary to ensure a long-lasting seal.
Ideal User Profile
This guide is ideal for homeowners, renters, and DIY enthusiasts who want to maintain a clean and functional bathroom. It’s also suitable for individuals who are experiencing water damage or mold growth due to failing caulk. This guide is particularly helpful for those who are new to caulking and want to learn the proper techniques for removing and replacing caulk. It’s designed to empower individuals to take control of their home maintenance and save money on professional repairs.
Key Alternatives
While DIY caulk removal and replacement is a common approach, other options exist.
Professional Caulking Services
Hiring a professional caulking service is a convenient option for those who don’t have the time, skills, or desire to do it themselves. Professional caulkers have the experience and expertise to remove and replace caulk quickly and efficiently, ensuring a professional-looking finish. However, professional caulking services can be more expensive than DIY.
Grout Removal Tools
While not specifically designed for caulk, grout removal tools can sometimes be used to remove caulk, especially in tight corners or hard-to-reach areas. However, grout removal tools can be more aggressive and may be more likely to damage the surrounding surfaces. They are best used with caution and on specific types of caulk.
Comprehensive & Trustworthy Review
Removing caulk, while seemingly simple, requires attention to detail and the right approach. Based on our extensive experience and testing, the key to a successful caulk removal project lies in preparation, patience, and using the right tools. A caulk removal tool is a must-have, as it significantly reduces the risk of damaging the surrounding surfaces. Applying a caulk softener is also crucial for loosening the caulk and making it easier to remove.
### User Experience & Usability:
The process is straightforward, but requires some physical effort. The caulk removal tool is easy to use and provides good control. The caulk softener effectively loosens the caulk, making it easier to remove. The painter’s tape is easy to apply and remove, creating clean lines.
### Performance & Effectiveness:
The caulk removal tool effectively removes the bulk of the caulk. The putty knife effectively removes the remaining residue. The rubbing alcohol effectively cleans the surface. The new caulk provides a waterproof seal.
### Pros:
* Effective at removing caulk without damaging surfaces.
* Easy to use and control.
* Provides a clean, professional-looking finish.
* Prevents water damage and mold growth.
* Extends the life of your bathtub.
### Cons/Limitations:
* Can be time-consuming.
* Requires some physical effort.
* Can be messy.
* Requires some skill to apply new caulk.
* Not a permanent solution.
### Expert Overall Verdict & Recommendation:
Removing and replacing caulk is a worthwhile investment for maintaining a clean and functional bathroom. While it requires some time and effort, the benefits of preventing water damage, eliminating mold growth, and improving aesthetics outweigh the drawbacks. We highly recommend following the steps outlined in this guide and using the recommended tools and materials to achieve a professional-looking finish. For those who prefer not to do it themselves, hiring a professional caulking service is a viable alternative.
Insightful Q&A Section
Here are 10 insightful questions and answers related to how to take caulk off bathtub:
**Q1: What’s the best way to remove caulk from a fiberglass bathtub without scratching it?**
**A:** The key is to use a plastic caulk removal tool and apply gentle pressure. Avoid using metal scrapers or abrasive cleaners, as these can easily scratch fiberglass. Applying caulk softener and allowing it to sit for a longer period can also help to loosen the caulk and make it easier to remove.
**Q2: How can I prevent mold from growing back after replacing the caulk?**
**A:** Use a mildew-resistant silicone caulk and ensure proper ventilation in the bathroom. Wipe down the caulk line regularly with a mildew-killing cleaner. Addressing any underlying moisture issues, such as leaks or condensation, is also crucial for preventing mold growth.
**Q3: What’s the difference between sanded and unsanded caulk, and which one should I use for my bathtub?**
**A:** Sanded caulk contains small particles of sand that give it a textured finish and make it suitable for filling wider gaps. Unsanded caulk has a smooth finish and is best used for narrow gaps. For bathtubs, unsanded caulk is generally preferred, as it provides a smoother and more waterproof seal.
**Q4: Can I use a heat gun to soften the caulk before removing it?**
**A:** While a heat gun can soften caulk, it’s important to use it with caution, especially on plastic or fiberglass bathtubs. Applying too much heat can damage the surface. It’s generally safer to use caulk softener or mineral spirits.
**Q5: How do I choose the right color of caulk to match my bathtub and tile?**
**A:** Bring a sample of your bathtub and tile to the hardware store and compare it to the available caulk colors. If you can’t find an exact match, choose a color that is slightly lighter than the tile. White caulk is a versatile option that complements most bathroom decors.
**Q6: What’s the best way to clean up caulk residue from my hands and tools?**
**A:** Use mineral spirits or rubbing alcohol to clean up caulk residue from your hands and tools. Wipe away the residue with a clean rag. For stubborn residue, try using a citrus-based cleaner.
**Q7: How long should I wait before using my bathtub after applying new caulk?**
**A:** Allow the caulk to cure completely according to the manufacturer’s instructions, typically 24-48 hours. Avoid using the bathtub during the curing process to ensure the caulk sets properly.
**Q8: Can I apply new caulk over old caulk?**
**A:** It’s generally not recommended to apply new caulk over old caulk, as the new caulk may not adhere properly and the old caulk may continue to deteriorate underneath. It’s best to remove the old caulk completely before applying new caulk.
**Q9: What’s the best way to store leftover caulk?**
**A:** Seal the caulk tube tightly with a cap or tape and store it in a cool, dry place. You can also insert a nail or screw into the tip of the tube to prevent the caulk from drying out. Some users recommend storing caulk in the refrigerator to extend its shelf life.
**Q10: How do I know if I’ve applied enough caulk?**
**A:** You should apply enough caulk to completely fill the gap between the bathtub and the wall, creating a continuous and waterproof seal. The caulk bead should be smooth and even, without any gaps or voids. After smoothing the caulk, there should be a slight excess of caulk that is wiped away with a damp rag.
Conclusion
Mastering how to take caulk off bathtub is a valuable skill for any homeowner. By following the steps outlined in this comprehensive guide, you can effectively remove old, damaged caulk and replace it with a fresh, waterproof seal. This will not only improve the appearance of your bathroom but also prevent water damage and mold growth. Remember to choose the right caulk for your needs, use the appropriate tools, and take your time to achieve a professional-looking finish. We encourage you to share your experiences with how to take caulk off bathtub in the comments below. Explore our advanced guide to bathroom maintenance for more tips and tricks. Contact our experts for a consultation on how to take caulk off bathtub and other home improvement projects.
