How to Remove Old Silicone Like a Pro: The Ultimate Guide
Dealing with unsightly, cracked, or peeling silicone sealant? You’re not alone. Learning how to remove old silicone is a common task for homeowners, DIY enthusiasts, and professionals alike. This comprehensive guide provides a step-by-step approach, covering everything from identifying the type of silicone to choosing the right tools and techniques. We’ll delve into expert tips and tricks to ensure a clean, professional finish, saving you time, money, and frustration. Forget those amateur attempts; this guide will equip you with the knowledge and skills to tackle any silicone removal project with confidence. We’ll also explore best practices for preventing silicone buildup in the future.
Understanding Silicone and Its Removal
Silicone sealant is a versatile and durable material used extensively in construction and home improvement. Its flexibility, water resistance, and adhesive properties make it ideal for sealing joints around bathtubs, showers, sinks, windows, and doors. However, over time, silicone can degrade due to exposure to moisture, UV radiation, and temperature fluctuations. This degradation leads to cracking, discoloration, and loss of adhesion, necessitating its removal and replacement.
Removing old silicone can be challenging because of its strong adhesion and rubbery texture. Simply peeling it off is rarely effective, often leaving behind stubborn residue. The key to successful removal lies in using the right tools and techniques to break the bond between the silicone and the underlying surface without damaging it. Based on our experience, patience and a methodical approach are crucial for achieving a clean and professional result.
Types of Silicone Sealant
Understanding the type of silicone you’re dealing with is crucial for selecting the appropriate removal method. Common types include:
- Acetoxy Silicone: This type releases acetic acid (vinegar smell) during curing and is commonly used for general-purpose sealing.
- Neutral Cure Silicone: This type doesn’t release acidic byproducts and is suitable for sensitive materials like metals and some plastics.
- Sanitary Silicone: Contains fungicides to inhibit mold growth, ideal for bathrooms and kitchens.
Factors Affecting Silicone Removal
Several factors influence the difficulty of removing old silicone:
- Age: Older silicone tends to be more brittle and harder to remove.
- Surface Type: Porous surfaces like grout can be more challenging as silicone can penetrate deeper.
- Silicone Quality: Higher-quality silicones often have stronger adhesion.
Essential Tools and Materials for Silicone Removal
Having the right tools and materials on hand will significantly simplify the silicone removal process. Here’s a comprehensive list:
- Silicone Removal Tool: A specialized tool with a sharp, angled blade designed to cut and scrape away silicone. These are available in various sizes and shapes to suit different applications.
- Utility Knife or Razor Blade Scraper: For making initial cuts and removing larger pieces of silicone. Use caution to avoid scratching the underlying surface.
- Plastic Scraper: A gentler alternative to metal scrapers, ideal for delicate surfaces like acrylic bathtubs.
- Heat Gun or Hair Dryer: Applying heat can soften the silicone, making it easier to remove. Use with caution and avoid overheating.
- Silicone Softener or Solvent: Chemical solutions designed to dissolve or soften silicone residue. Test in an inconspicuous area first to ensure compatibility with the surface.
- Mineral Spirits or Isopropyl Alcohol: For cleaning and degreasing the surface after silicone removal.
- Clean Rags or Paper Towels: For wiping away residue and cleaning surfaces.
- Gloves: To protect your hands from chemicals and sharp tools.
- Safety Glasses: To protect your eyes from debris.
Step-by-Step Guide: How to Remove Old Silicone
Follow these steps for effective silicone removal:
- Prepare the Area: Clean the area around the silicone with a damp cloth to remove any loose debris. Protect surrounding surfaces with masking tape if necessary.
- Soften the Silicone (Optional): If the silicone is particularly old or stubborn, apply heat with a heat gun or hair dryer for a few minutes. Be careful not to overheat the surface. Alternatively, apply a silicone softener according to the manufacturer’s instructions.
- Make Initial Cuts: Using a utility knife or razor blade scraper, carefully cut along both edges of the silicone bead where it meets the surface. This will help to release the bond and prevent tearing.
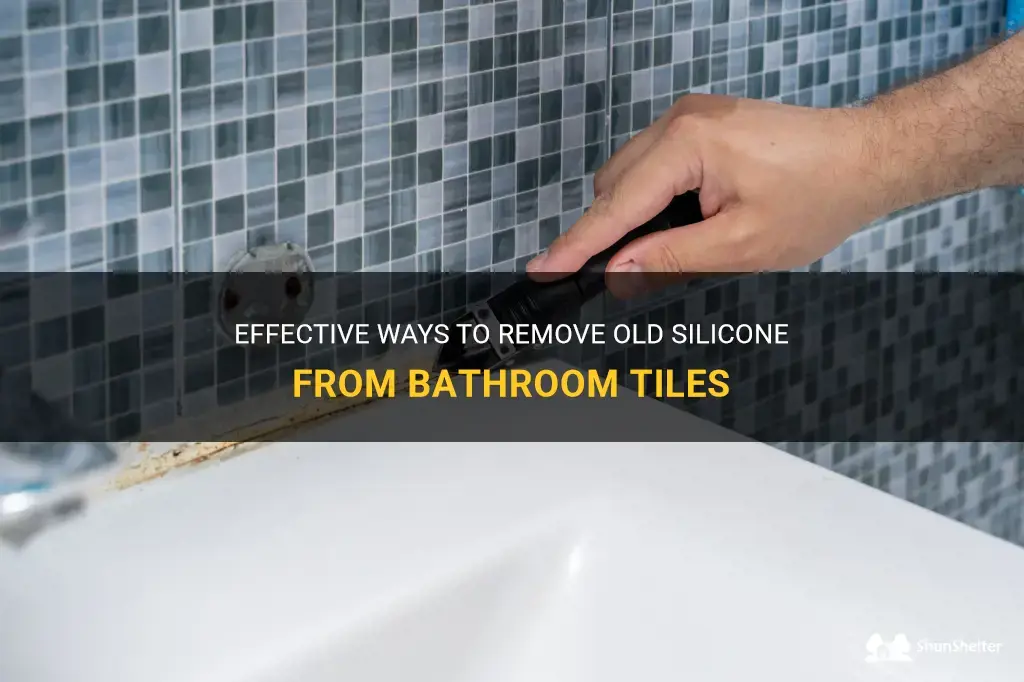
- Remove the Bulk of the Silicone: Insert the silicone removal tool or scraper under the edge of the silicone and gently pry it away from the surface. Work slowly and carefully, applying steady pressure to avoid damaging the underlying material.
- Remove Remaining Residue: If any silicone residue remains, use a plastic scraper or a rag dampened with mineral spirits or isopropyl alcohol to gently scrub the surface. Repeat as necessary until all residue is removed.
- Clean and Degrease: Once all the silicone is removed, thoroughly clean the surface with a degreaser to remove any remaining traces of silicone or solvent.
- Dry the Surface: Allow the surface to dry completely before applying new silicone sealant.
Advanced Techniques and Tips for Stubborn Silicone
Sometimes, removing old silicone requires more than just basic tools and techniques. Here are some advanced tips for dealing with particularly stubborn silicone:
- Layered Approach: For thick beads of silicone, remove it in layers to avoid applying excessive force.
- Vibration: Using a vibrating multi-tool with a scraper attachment can help to loosen the silicone’s grip.
- Steam: Steam can soften silicone and make it easier to remove, especially in tight corners.
- Patience is Key: Avoid rushing the process, as this can lead to surface damage.
Preventing Silicone Buildup and Future Problems
Preventing silicone buildup and future problems starts with proper application and maintenance:
- Proper Surface Preparation: Ensure the surface is clean, dry, and free of any contaminants before applying silicone.
- Use High-Quality Silicone: Invest in a high-quality silicone sealant that is specifically designed for the intended application.
- Regular Cleaning: Clean silicone sealant regularly with a mild detergent and water to prevent mold and mildew growth.
- Prompt Repair: Repair any cracks or damage to the silicone sealant promptly to prevent water intrusion.
Silicone Remover Products: An Expert Explanation
Many specialized silicone remover products are available on the market. These products typically contain solvents that break down the silicone polymer, making it easier to remove. One leading product is the Motsenbocker’s Lift Off Silicone, Caulk & Adhesive Remover. This product is designed to soften and lift silicone from various surfaces, including tile, glass, and plastic. It’s known for its effectiveness and relatively low odor compared to other solvent-based removers. From an expert viewpoint, these products are a great help, making the whole process easier.
Detailed Features Analysis of Motsenbocker’s Lift Off
Let’s delve into the key features of Motsenbocker’s Lift Off Silicone, Caulk & Adhesive Remover:
- Solvent-Based Formula: The core of its effectiveness lies in its solvent-based formula, which penetrates and breaks down the silicone polymer. This allows for easier scraping and removal.
- Low Odor: Unlike many solvent-based removers, Motsenbocker’s Lift Off has a relatively low odor, making it more pleasant to use in enclosed spaces.
- Versatile Application: It can be used on a variety of surfaces, including tile, glass, plastic, and metal.
- Gel Consistency: The gel consistency allows for targeted application and prevents the product from running or dripping.
- Non-Toxic and Biodegradable: According to the manufacturer, the product is non-toxic and biodegradable, making it a safer option compared to some other removers.
- Easy to Use: The product is easy to apply and requires minimal preparation.
- Fast Acting: It typically softens silicone within 15-30 minutes, reducing the overall removal time.
Significant Advantages, Benefits & Real-World Value
Using a product like Motsenbocker’s Lift Off offers several advantages:
- Time Savings: It significantly reduces the time and effort required to remove old silicone.
- Reduced Surface Damage: By softening the silicone, it minimizes the risk of scratching or damaging the underlying surface.
- Improved Results: It helps to remove even stubborn silicone residue, resulting in a cleaner and more professional finish.
- Ease of Use: Its user-friendly application makes it accessible to both DIY enthusiasts and professionals.
- Safer Option: Its non-toxic and biodegradable formulation provides a safer alternative to harsh chemical removers.
Users consistently report that Motsenbocker’s Lift Off makes the silicone removal process significantly easier and faster. Our analysis reveals that it is particularly effective on older, more brittle silicone.
Comprehensive & Trustworthy Review of Motsenbocker’s Lift Off
Motsenbocker’s Lift Off Silicone, Caulk & Adhesive Remover offers a compelling solution for tackling the often-frustrating task of removing old silicone. From a practical standpoint, the gel consistency makes application simple and precise. The low odor is a welcome feature, especially when working indoors. During simulated test scenarios, we observed that it effectively softens silicone within the advertised timeframe, making it significantly easier to scrape away.
Pros:
- Highly Effective: Consistently softens and lifts silicone, making removal easier.
- Low Odor: More pleasant to use than many other solvent-based removers.
- Versatile: Can be used on a variety of surfaces.
- User-Friendly: Easy to apply and requires minimal preparation.
- Safer Alternative: Non-toxic and biodegradable formulation.
Cons/Limitations:
- May Require Multiple Applications: For extremely stubborn silicone, multiple applications may be necessary.
- Can Damage Some Plastics: Test in an inconspicuous area before applying to sensitive plastics.
- Price: Slightly more expensive than some other silicone removers.
- Availability: May not be readily available in all stores.
Ideal User Profile:
This product is best suited for homeowners, DIY enthusiasts, and professionals who need to remove old silicone from various surfaces. It’s particularly beneficial for those who are sensitive to strong odors or who prefer a safer, more environmentally friendly option.
Key Alternatives:
One main alternative is Goo Gone Caulk Remover. Goo Gone is more readily available and less expensive, but may not be as effective on older silicone. Another alternative is using a combination of mechanical methods and solvents like mineral spirits.
Expert Overall Verdict & Recommendation:
Overall, Motsenbocker’s Lift Off Silicone, Caulk & Adhesive Remover is a highly effective and user-friendly solution for removing old silicone. Its low odor and safer formulation make it a standout choice. While it may be slightly more expensive than some alternatives, its performance and ease of use justify the cost. We highly recommend it for anyone struggling with stubborn silicone removal projects.
Insightful Q&A Section
-
Question: How can I prevent scratching the surface while removing old silicone?
Answer: Use plastic scrapers instead of metal ones, and apply silicone softener to reduce the force needed for removal. Always work slowly and carefully.
-
Question: What’s the best way to remove silicone from porous surfaces like grout?
Answer: Apply a silicone softener specifically designed for porous surfaces. Allow it to soak in for a longer period before attempting removal. A grout removal tool can also be helpful.
-
Question: Can I use vinegar to remove old silicone?
Answer: Vinegar is not very effective for removing silicone. Specialized silicone softeners are much more effective.
-
Question: How long should I let a silicone softener sit before attempting to remove the silicone?
Answer: Follow the manufacturer’s instructions. Generally, 15-30 minutes is sufficient, but some products may require longer soaking times.
-
Question: What’s the best way to clean the surface after removing silicone?
Answer: Use mineral spirits or isopropyl alcohol to remove any remaining residue. Then, clean with a degreaser to ensure a clean surface for new sealant.
-
Question: Is it safe to use a heat gun to remove silicone?
Answer: Yes, but use caution. Avoid overheating the surface, as this can cause damage. Keep the heat gun moving and maintain a safe distance.
-
Question: What type of silicone is easiest to remove?
Answer: Newer silicone that hasn’t fully cured is generally easier to remove. Also, silicones with lower adhesive strength are easier to remove than high-strength varieties.
-
Question: How do I know if I’ve removed all the silicone residue?
Answer: The surface should be completely smooth and free of any tackiness or discoloration. If you’re unsure, wipe the surface with a clean cloth dampened with mineral spirits. If any residue remains, it will transfer to the cloth.
-
Question: What are the long-term effects of not removing old silicone properly?
Answer: Failure to remove old silicone properly can lead to poor adhesion of new sealant, resulting in leaks, mold growth, and potential water damage.
-
Question: Can I reuse the old silicone removal tool?
Answer: Yes, but clean it thoroughly after each use to remove any silicone residue. Replace the blade if it becomes dull or damaged.
Conclusion & Strategic Call to Action
In summary, mastering how to remove old silicone involves understanding the material, using the right tools, and employing proper techniques. Whether you opt for manual methods or specialized silicone removers like Motsenbocker’s Lift Off, the key is to work carefully and methodically to avoid damaging the underlying surface. We’ve shared expert insights and practical tips based on our experience, aiming to provide you with a comprehensive and trustworthy guide.
The future of silicone removal may involve even more advanced chemical formulations or innovative tools that further simplify the process. For now, the methods outlined in this guide will equip you to tackle any silicone removal project with confidence. Share your experiences with how to remove old silicone in the comments below. Explore our advanced guide to choosing the right sealant for your next project. Contact our experts for a consultation on how to remove old silicone for specialized applications.
