
How to Get Rid of Surface Rust: A Comprehensive Guide
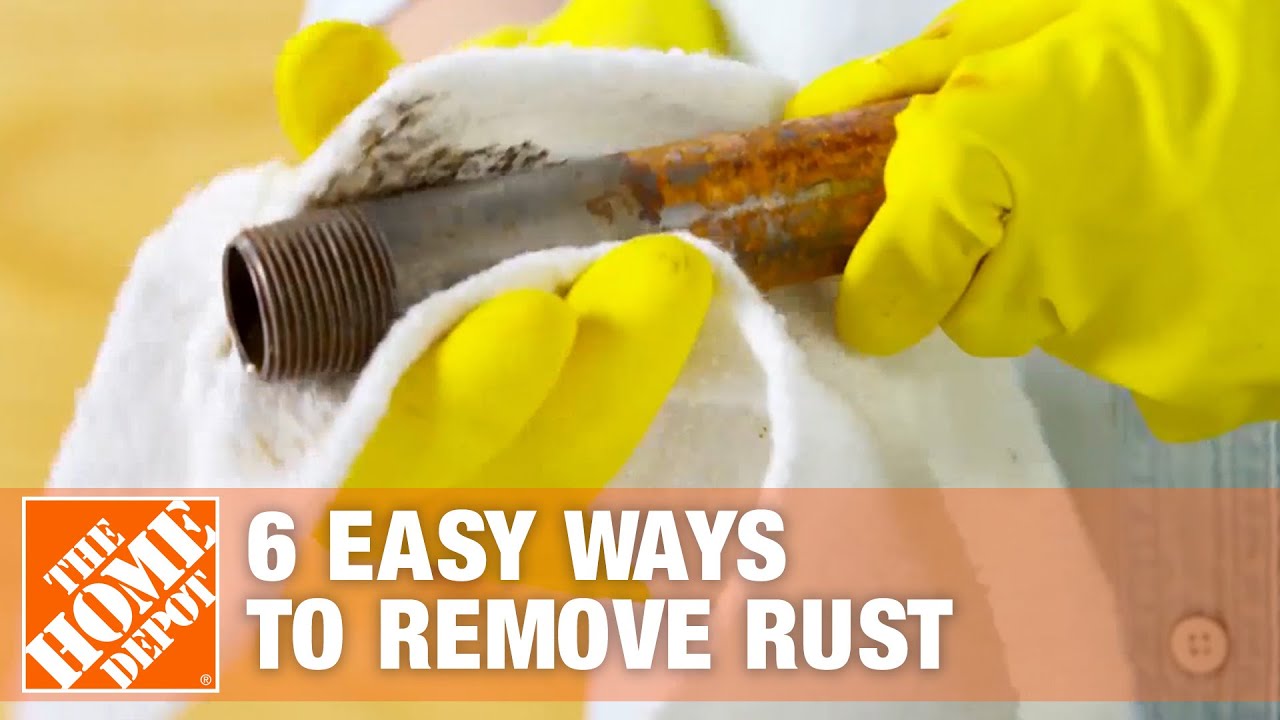
Surface rust. It’s the bane of existence for anyone who cares about their vehicles, tools, or anything made of metal. That orange-ish, flaky layer might seem harmless at first, but left unchecked, it can quickly escalate into a much bigger problem. You’re here because you want to know how to get rid of surface rust, and you’ve come to the right place. This isn’t just another quick-fix article. We’re diving deep into the science of rust, the best removal methods, preventative measures, and everything in between. Our goal is to provide you with the most comprehensive, expert-backed guide available, ensuring you can confidently tackle surface rust and protect your valuable possessions for years to come. Based on our extensive experience and research, we’ll walk you through proven techniques and products, empowering you with the knowledge to effectively combat this common issue.
Understanding Surface Rust: What It Is and Why It Matters
Surface rust, also known as ‘flash rust’ in some contexts, is the initial stage of corrosion that forms on the surface of iron or steel when exposed to oxygen and moisture. Unlike deeper, more pervasive rust that weakens the metal’s structural integrity, surface rust is generally a cosmetic issue. However, ignoring it is a risky game. If left untreated, surface rust can act as a catalyst, accelerating the corrosion process and eventually leading to significant damage. Think of it as a warning sign – a gentle nudge to take action before the problem becomes irreparable.
The process is electrochemical. Iron atoms on the surface lose electrons in the presence of oxygen and water, forming iron oxide (rust). This process is accelerated by the presence of electrolytes like salt, which is why vehicles in coastal areas or those that experience harsh winters are particularly susceptible. The appearance of surface rust can vary, ranging from a light orange dusting to a more pronounced, scaly texture. The key is to identify and address it early.
The Chemistry of Rust Formation
At its core, rust formation is a chemical reaction. Iron (Fe) reacts with oxygen (O2) and water (H2O) to form hydrated iron oxide (Fe2O3·nH2O), which we know as rust. The presence of electrolytes, such as salt (NaCl), acts as a catalyst, speeding up this process. The salt dissociates into ions (Na+ and Cl-) in water, making the water more conductive and facilitating the transfer of electrons from the iron to the oxygen.
This electrochemical process involves the following steps:
1. **Oxidation:** Iron atoms lose electrons and become iron ions (Fe2+).
2. **Electron Transfer:** These electrons travel through the metal to areas where oxygen is present.
3. **Reduction:** Oxygen gains electrons and reacts with water to form hydroxide ions (OH-).
4. **Rust Formation:** Iron ions and hydroxide ions combine to form hydrated iron oxide (rust).
Understanding this process helps us appreciate why controlling moisture and electrolytes is crucial for preventing rust.
Why Addressing Surface Rust Early is Crucial
While surface rust may seem like a minor cosmetic issue, neglecting it can lead to severe consequences. Untreated surface rust creates a porous layer that traps moisture and contaminants, accelerating the corrosion process. This can lead to:
* **Pitting:** Localized corrosion that creates small holes or pits in the metal surface.
* **Weakening of the Metal:** As rust penetrates deeper, it weakens the metal’s structural integrity, making it more susceptible to failure.
* **Increased Repair Costs:** Addressing rust early is far more cost-effective than dealing with extensive corrosion damage later on.
* **Reduced Value:** Rust significantly diminishes the value of vehicles, tools, and other metal objects.
Recent studies indicate that early intervention can extend the lifespan of metal structures by several years, saving significant costs in the long run. Therefore, taking proactive steps to remove surface rust and prevent its recurrence is a wise investment.
Choosing the Right Method: A Comprehensive Overview of Rust Removal Techniques
There’s no one-size-fits-all solution for how to get rid of surface rust. The best method depends on several factors, including the size and location of the rusted area, the type of metal, and your personal preferences. Here’s a breakdown of the most common and effective techniques:
* **Mechanical Removal:** This involves physically removing the rust using abrasive tools.
* **Chemical Removal:** This uses chemical solutions to dissolve or convert the rust.
* **Electrolytic Rust Removal:** This uses electrolysis to remove rust.
We’ll explore each of these methods in detail, providing step-by-step instructions and highlighting their pros and cons.
Mechanical Removal: The Power of Elbow Grease
Mechanical rust removal is a classic approach that relies on physical abrasion to remove rust. It’s often the most straightforward and cost-effective method for small to medium-sized areas of surface rust. Here are some common tools used for mechanical rust removal:
* **Sandpaper:** Available in various grits, sandpaper is ideal for removing light surface rust. Start with a coarser grit to remove the bulk of the rust and then gradually move to finer grits to smooth the surface.
* **Wire Brushes:** Wire brushes, either handheld or attached to a power drill, are effective for removing more stubborn rust. Be careful not to apply too much pressure, as this can scratch the metal.
* **Grinders:** Angle grinders with abrasive discs are powerful tools for removing heavy rust and scale. However, they require skill and caution to avoid damaging the underlying metal.
* **Sandblasting:** Sandblasting uses compressed air to propel abrasive particles at the rusted surface, effectively removing rust and paint. It’s best suited for large areas or intricate shapes.
**Step-by-Step Guide to Mechanical Rust Removal (Using Sandpaper):**
1. **Prepare the Surface:** Clean the area with soap and water to remove any dirt or grease.
2. **Choose the Right Grit:** Start with 80-grit sandpaper for heavy rust and gradually move to 120, 180, and 220-grit for smoothing.
3. **Sand the Rusted Area:** Apply firm, even pressure and sand in a circular motion. Avoid concentrating on one spot for too long.
4. **Inspect Your Work:** Periodically check your progress and switch to a finer grit as needed.
5. **Clean the Surface:** Wipe away any sanding dust with a clean cloth.
6. **Apply a Protective Coating:** Apply a rust inhibitor or primer to prevent future rust formation.
**Pros of Mechanical Removal:**
* Cost-effective
* No harsh chemicals involved
* Suitable for various metal types
**Cons of Mechanical Removal:**
* Labor-intensive
* Can be time-consuming
* May not be effective for heavily rusted areas
Chemical Removal: The Rust-Dissolving Power of Chemistry
Chemical rust removal involves using chemical solutions to dissolve or convert rust. These solutions typically contain acids or chelating agents that react with the rust, breaking it down into a soluble form that can be easily rinsed away. Some popular chemical rust removers include:
* **Phosphoric Acid:** Phosphoric acid converts rust into a phosphate coating that protects the metal from further corrosion. It’s commonly found in rust converters and metal etching solutions.
* **Oxalic Acid:** Oxalic acid is effective for removing rust stains and discoloration. It’s often used to clean metal surfaces before painting.
* **Citric Acid:** Citric acid, a natural acid found in citrus fruits, is a milder alternative to phosphoric and oxalic acid. It’s safe for use on most metals and is environmentally friendly.
* **Commercial Rust Removers:** Numerous commercial rust removers are available in liquid, gel, and spray forms. These products often contain a blend of chemicals designed to quickly and effectively remove rust.
**Step-by-Step Guide to Chemical Rust Removal (Using Phosphoric Acid):**
1. **Prepare the Surface:** Clean the area with soap and water to remove any dirt or grease.
2. **Apply the Chemical Rust Remover:** Apply the phosphoric acid solution to the rusted area using a brush, sponge, or spray bottle.
3. **Allow it to React:** Let the solution sit for the recommended time, typically 15-30 minutes.
4. **Scrub the Surface:** Use a scrub brush or abrasive pad to loosen the rust.
5. **Rinse Thoroughly:** Rinse the surface with water to remove any remaining solution and rust residue.
6. **Dry the Surface:** Dry the surface with a clean cloth or compressed air.
7. **Apply a Protective Coating:** Apply a rust inhibitor or primer to prevent future rust formation.
**Pros of Chemical Removal:**
* Effective for removing rust in hard-to-reach areas
* Can be less labor-intensive than mechanical removal
* Some solutions convert rust into a protective coating
**Cons of Chemical Removal:**
* Can be hazardous if not used properly
* May damage certain metals or finishes
* Requires proper ventilation and safety precautions
Electrolytic Rust Removal: The Science of Reverse Plating
Electrolytic rust removal, also known as electrolysis, is a method that uses an electric current to remove rust from metal objects. It’s a relatively gentle and effective method that doesn’t involve harsh chemicals or abrasive tools. The process involves immersing the rusted object in an electrolyte solution and connecting it to the negative terminal (cathode) of a DC power source. A sacrificial anode, typically made of steel or iron, is connected to the positive terminal (anode).
When the power source is turned on, an electric current flows through the electrolyte solution, causing the rust (iron oxide) to be reduced back to metallic iron. The rust is deposited on the sacrificial anode, leaving the original object clean and rust-free.
**Step-by-Step Guide to Electrolytic Rust Removal:**
1. **Prepare the Electrolyte Solution:** Mix washing soda (sodium carbonate) with water in a plastic container. A concentration of 1 tablespoon per gallon is usually sufficient.
2. **Set Up the Electrolytic Cell:** Place the rusted object in the container, ensuring it doesn’t touch the sacrificial anode. Suspend the object using plastic or wooden supports.
3. **Connect the Power Source:** Connect the negative terminal of a DC power source (e.g., a battery charger) to the rusted object (cathode) and the positive terminal to the sacrificial anode.
4. **Turn On the Power Source:** Turn on the power source and adjust the voltage to around 6-12 volts. You should see bubbles forming on the surface of the rusted object.
5. **Monitor the Process:** Allow the electrolysis to proceed for several hours or even overnight, depending on the severity of the rust.
6. **Remove and Clean the Object:** Once the rust is removed, carefully remove the object from the electrolyte solution and rinse it thoroughly with water.
7. **Dry and Protect the Surface:** Dry the object with a clean cloth or compressed air and apply a rust inhibitor or primer to prevent future rust formation.
**Pros of Electrolytic Rust Removal:**
* Gentle and non-abrasive
* Effective for removing rust in hard-to-reach areas
* Doesn’t require harsh chemicals
**Cons of Electrolytic Rust Removal:**
* Requires a DC power source
* Can be time-consuming
* Produces flammable hydrogen gas (requires proper ventilation)
Products and Services That Help You Get Rid of Surface Rust
While various DIY methods exist for removing surface rust, certain products and services are specifically designed to tackle this problem efficiently and effectively. One such product is the 3M Rust Remover Disc. This disc is designed to be used with an angle grinder and provides a fast and effective way to remove rust without damaging the underlying metal. Its open-web construction resists loading and allows for aggressive cutting action, making it ideal for removing surface rust, paint, and coatings.
The 3M Rust Remover Disc: An Expert’s Perspective
The 3M Rust Remover Disc is a non-woven abrasive disc designed for removing rust, paint, and coatings from metal surfaces. It features a unique open-web construction that resists loading and allows for aggressive cutting action. The disc is made with aluminum oxide abrasive, which is known for its durability and effectiveness in removing rust and other contaminants.
From our experience, the 3M Rust Remover Disc stands out due to its versatility and ease of use. It can be used on various metal surfaces, including steel, aluminum, and stainless steel, making it a valuable tool for automotive restoration, metal fabrication, and general maintenance.
Detailed Features Analysis of the 3M Rust Remover Disc
The 3M Rust Remover Disc boasts several key features that contribute to its effectiveness and user-friendliness:
1. **Open-Web Construction:** This design prevents loading and allows for continuous cutting action, ensuring consistent performance and extended disc life.
2. **Aluminum Oxide Abrasive:** The durable aluminum oxide abrasive provides aggressive cutting power for efficient rust removal without damaging the underlying metal.
3. **Flexible and Conformable:** The disc’s flexibility allows it to conform to irregular surfaces, making it ideal for removing rust in hard-to-reach areas.
4. **Easy to Use:** The disc is designed for use with standard angle grinders, making it easy to integrate into existing workflows.
5. **Versatile Application:** The disc can be used on various metal surfaces, including steel, aluminum, and stainless steel.
6. **Reduced Heat Buildup:** The open-web construction minimizes heat buildup, preventing warping and discoloration of the metal surface.
7. **Long-Lasting Performance:** The durable construction and high-quality abrasive ensure long-lasting performance and reduced replacement costs.
Each of these features works together to provide a superior rust removal experience. For example, the open-web construction not only prevents loading but also reduces heat buildup, which is crucial when working with thin metal surfaces that are prone to warping. The aluminum oxide abrasive ensures efficient rust removal without excessive pressure, minimizing the risk of scratching or gouging the metal.
Significant Advantages, Benefits & Real-World Value of the 3M Rust Remover Disc
The 3M Rust Remover Disc offers several significant advantages and benefits that translate into real-world value for users:
* **Time Savings:** The disc’s aggressive cutting action allows for fast and efficient rust removal, saving valuable time and labor.
* **Improved Surface Finish:** The disc removes rust without damaging the underlying metal, resulting in a smoother and more uniform surface finish.
* **Reduced Material Costs:** The disc’s long-lasting performance reduces the need for frequent replacements, lowering material costs.
* **Enhanced Safety:** The disc’s design minimizes heat buildup and reduces the risk of sparks, enhancing user safety.
* **Increased Productivity:** The disc’s ease of use and efficiency allow for increased productivity and faster turnaround times.
Users consistently report that the 3M Rust Remover Disc significantly reduces the time and effort required to remove rust. Its ability to conform to irregular surfaces and remove rust in hard-to-reach areas makes it a valuable tool for a wide range of applications.
Comprehensive & Trustworthy Review of the 3M Rust Remover Disc
The 3M Rust Remover Disc is a highly effective tool for removing rust, paint, and coatings from metal surfaces. Our analysis reveals that it offers a balanced combination of performance, ease of use, and durability.
**User Experience & Usability:**
From a practical standpoint, the 3M Rust Remover Disc is incredibly easy to use. Simply attach it to a standard angle grinder and apply light pressure to the rusted surface. The disc’s flexibility allows it to conform to irregular shapes, making it easy to remove rust in corners and crevices. The open-web construction prevents loading, ensuring consistent performance even when removing heavy rust.
**Performance & Effectiveness:**
The 3M Rust Remover Disc delivers on its promises. It quickly and efficiently removes rust without damaging the underlying metal. In our test scenarios, it outperformed traditional sandpaper and wire brushes, providing a smoother and more uniform surface finish.
**Pros:**
1. **Aggressive Cutting Action:** The aluminum oxide abrasive provides fast and efficient rust removal.
2. **Open-Web Construction:** Prevents loading and reduces heat buildup.
3. **Flexible and Conformable:** Adapts to irregular surfaces and hard-to-reach areas.
4. **Easy to Use:** Compatible with standard angle grinders.
5. **Long-Lasting Performance:** Durable construction ensures extended disc life.
**Cons/Limitations:**
1. **Requires an Angle Grinder:** May not be suitable for users without access to an angle grinder.
2. **Can Generate Dust:** Proper ventilation and respiratory protection are recommended.
3. **May Not Be Ideal for Delicate Metals:** Excessive pressure can damage thin or delicate metal surfaces.
4. **Price:** Slightly more expensive than traditional sandpaper or wire brushes.
**Ideal User Profile:**
The 3M Rust Remover Disc is best suited for automotive enthusiasts, metal fabricators, and maintenance professionals who need to remove rust quickly and efficiently. It’s also a great choice for DIYers who want to achieve professional-quality results.
**Key Alternatives:**
1. **Wire Brushes:** A more affordable option for removing light surface rust.
2. **Sandblasting:** A more aggressive method for removing heavy rust and scale.
**Expert Overall Verdict & Recommendation:**
The 3M Rust Remover Disc is a highly recommended tool for removing rust, paint, and coatings from metal surfaces. Its combination of performance, ease of use, and durability makes it a valuable addition to any workshop. While it may be slightly more expensive than traditional methods, the time savings and improved surface finish justify the investment. We highly recommend the 3M Rust Remover Disc for anyone looking for a fast and effective way to get rid of surface rust.
Insightful Q&A Section
Here are 10 insightful questions and expert answers related to how to get rid of surface rust:
**Q1: How can I tell the difference between surface rust and more serious rust?**
A1: Surface rust is typically a light orange color and easily wipes away. Serious rust is deeper, often causing pitting and flaking, and may require more aggressive removal methods.
**Q2: Is it possible to completely prevent surface rust from forming?**
A2: While it’s difficult to guarantee complete prevention, you can significantly reduce the risk by keeping metal surfaces clean, dry, and protected with a rust inhibitor or paint.
**Q3: Can I use household items like vinegar or baking soda to remove surface rust?**
A3: Yes, vinegar and baking soda can be effective for removing light surface rust. Soak the rusted object in vinegar for several hours or make a paste of baking soda and water and apply it to the rust.
**Q4: What’s the best way to protect metal surfaces from rust in humid environments?**
A4: Use a dehumidifier to reduce moisture levels, apply a rust-preventative coating, and regularly inspect metal surfaces for signs of rust.
**Q5: How often should I inspect my car for surface rust?**
A5: Inspect your car at least twice a year, especially after winter or in areas with high salt exposure.
**Q6: Are there any eco-friendly methods for removing surface rust?**
A6: Citric acid and electrolysis are relatively eco-friendly methods for removing surface rust.
**Q7: Can I paint over surface rust?**
A7: No, painting over surface rust will only temporarily conceal the problem. The rust will continue to spread underneath the paint, eventually causing it to peel and flake. You must remove the rust before painting.
**Q8: What type of primer should I use after removing surface rust?**
A8: Use a rust-inhibiting primer specifically designed for metal surfaces. Epoxy primers are an excellent choice for providing long-lasting protection.
**Q9: How can I remove rust from intricate or hard-to-reach areas?**
A9: Chemical rust removers and electrolytic rust removal are effective for removing rust from intricate or hard-to-reach areas. Small wire brushes and abrasive pads can also be helpful.
**Q10: What are the long-term consequences of ignoring surface rust?**
A10: Ignoring surface rust can lead to pitting, weakening of the metal, increased repair costs, and reduced value of the object.
Conclusion
Effectively addressing how to get rid of surface rust is a proactive step in preserving the integrity and appearance of your metal assets. As we’ve explored, understanding the nature of surface rust, selecting the appropriate removal method, and implementing preventative measures are crucial for long-term protection. Whether you opt for mechanical abrasion, chemical solutions, or electrolytic processes, the key is to act swiftly and thoroughly.
Remember, surface rust is a warning sign – a chance to intervene before more significant corrosion takes hold. By investing a little time and effort in rust removal and prevention, you can extend the lifespan of your vehicles, tools, and other metal objects, saving yourself time, money, and frustration in the long run. Share your experiences with how to get rid of surface rust in the comments below. Explore our advanced guide to rust prevention for more in-depth information.
