
Drill Won’t Release Bit? A Comprehensive Guide to Unsticking & Prevention
Are you struggling with a drill bit stubbornly stuck in your drill chuck? This frustrating situation, where your drill won’t release the bit, is a common problem that can halt your project and leave you feeling exasperated. But don’t worry! This comprehensive guide provides expert solutions and preventative measures to tackle this issue head-on. We’ll cover everything from understanding the underlying causes to employing effective techniques for bit removal, ensuring you can quickly get back to work and prevent future occurrences. Our goal is to provide you with the most complete and trustworthy resource on why your drill won’t release the bit, and how to solve it, based on years of experience and expert advice.
Understanding Why Your Drill Won’t Release the Bit
This section delves into the common reasons why a drill bit might become stuck in your drill chuck. We’ll explore both the mechanical and environmental factors that contribute to this problem.
The Mechanics of the Chuck
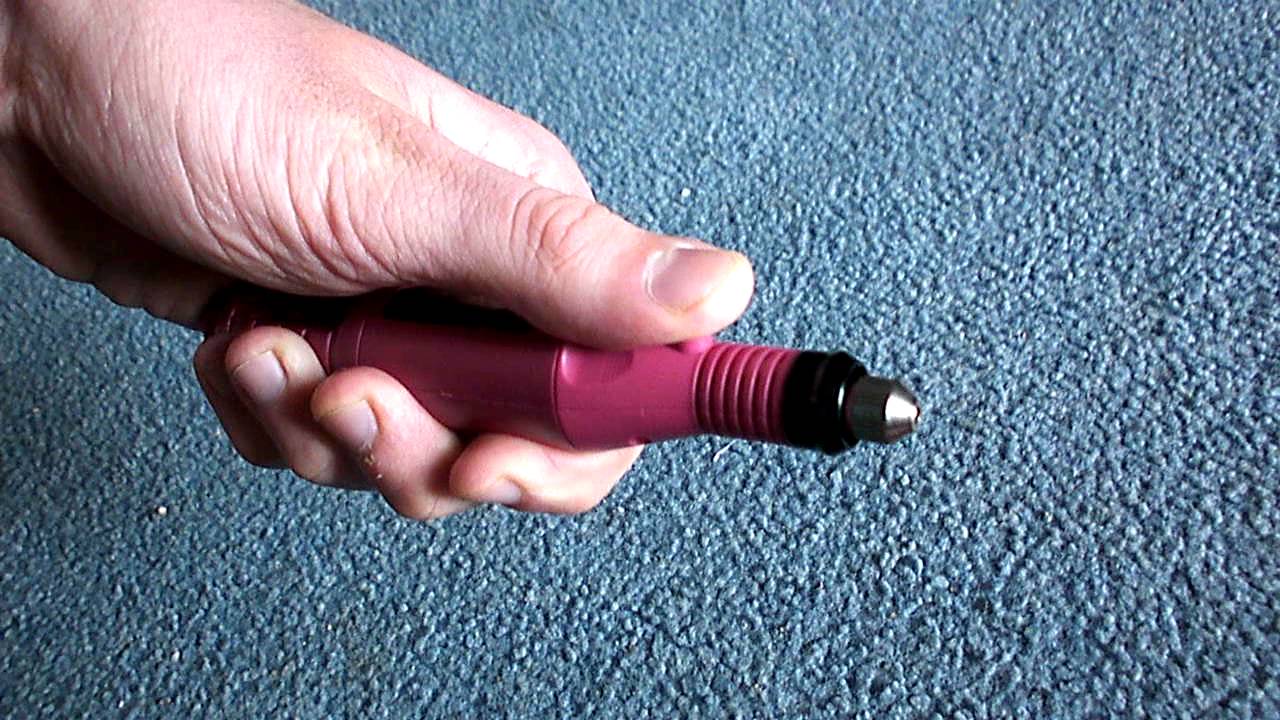
The drill chuck is a precision mechanism designed to securely hold drill bits. It typically consists of three jaws that tighten around the shank of the bit when the chuck key is turned (or, in the case of keyless chucks, when the chuck is twisted). Over time, these jaws can become worn, damaged, or misaligned, leading to difficulties in releasing the bit. Furthermore, debris, rust, or corrosion within the chuck mechanism can hinder its smooth operation. A poorly maintained chuck is a prime suspect when your drill won’t release the bit.
Common Causes of Stuck Drill Bits
Several factors can contribute to a drill bit becoming lodged in the chuck:
* **Over-tightening:** Applying excessive force when tightening the chuck can deform the jaws, making it difficult to loosen them later.
* **Debris Accumulation:** Dust, metal shavings, and other debris can accumulate inside the chuck, preventing the jaws from fully opening.
* **Rust and Corrosion:** Moisture can lead to rust and corrosion within the chuck mechanism, causing the jaws to seize.
* **Bit Damage:** A bent or damaged drill bit shank can bind within the chuck.
* **Chuck Wear and Tear:** Over time, the chuck’s internal components can wear down, leading to misalignment and difficulty in releasing the bit.
* **Using the Wrong Size Bit:** Forcing a bit that is slightly too large can damage the chuck and make bit removal difficult.
* **Heat Expansion:** Friction from drilling can cause the bit and chuck to heat up and expand, temporarily tightening the grip.
The Role of Drill Type (Corded vs. Cordless)
The type of drill you’re using can also play a role. Cordless drills, particularly those with keyless chucks, can sometimes be more prone to bit-release issues due to the design of the tightening mechanism. Corded drills, especially older models with keyed chucks, may experience issues related to wear and tear on the chuck key and internal components.
Tried-and-True Methods for Removing a Stuck Drill Bit
When your drill won’t release the bit, it’s time to try some proven removal techniques. Here are several methods, starting with the simplest and progressing to more involved solutions.
Method 1: The Gentle Approach (Keyed Chucks)
1. **Inspect the Chuck:** Carefully examine the chuck for any visible debris or damage.
2. **Proper Key Placement:** Ensure the chuck key is fully and correctly inserted into each of the three keyholes around the chuck. This is crucial for even pressure distribution.
3. **Apply Even Pressure:** Turn the chuck key counter-clockwise with firm, even pressure. Avoid jerking or forcing the key, as this can damage the chuck.
4. **Gentle Tapping:** While applying pressure with the key, gently tap the chuck housing with a rubber mallet or the handle of a screwdriver. The vibrations can help loosen the bit.
Method 2: The Gentle Approach (Keyless Chucks)
1. **Firm Grip:** Grip the chuck firmly with one hand, ensuring a secure hold.
2. **Twist with Authority:** With your other hand, twist the chuck sleeve counter-clockwise with a firm, decisive motion. Avoid hesitant or weak twisting.
3. **Rocking Motion:** Try gently rocking the drill bit back and forth while twisting the chuck. This can help break any binding.
Method 3: Heat and Cold (Thermal Expansion/Contraction)
1. **Apply Heat (Carefully):** Use a hairdryer or heat gun (on a low setting) to gently heat the chuck. This can cause the chuck to expand slightly, loosening its grip on the bit. *Caution: Avoid overheating, which can damage the drill’s internal components.*
2. **Apply Cold:** Alternatively, try applying a cold pack or ice to the chuck. This can cause the bit to contract, potentially freeing it. *Caution: Avoid getting water inside the drill’s motor housing.*
3. **Combine with Key/Grip:** After applying heat or cold, immediately try releasing the bit using the appropriate method for your chuck type (keyed or keyless).
Method 4: Penetrating Oil (Lubrication)
1. **Apply Penetrating Oil:** Spray a small amount of penetrating oil (such as WD-40 or Liquid Wrench) around the base of the drill bit where it enters the chuck. Allow the oil to soak for several minutes.
2. **Work the Bit:** Gently try to rotate or wiggle the bit while the oil penetrates. This can help loosen any rust or debris that’s binding the bit.
3. **Attempt Removal:** After allowing the oil to soak, try releasing the bit using the appropriate method for your chuck type.
Method 5: The Vise Grip (Last Resort)
*This method should only be used if other methods have failed, as it carries a higher risk of damaging the drill bit or chuck.*
1. **Secure the Drill:** Clamp the drill securely in a vise, being careful not to damage the drill housing.
2. **Grip the Bit:** Use vise-grip pliers to firmly grip the exposed portion of the drill bit.
3. **Apply Force:** Carefully and slowly rotate the vise-grip pliers counter-clockwise, applying steady pressure. Avoid jerking or twisting excessively.
4. **Inspect for Damage:** After removing the bit, carefully inspect the chuck for any signs of damage.
Preventing a Stuck Drill Bit: Best Practices for Drill Maintenance
Prevention is always better than cure. By following these best practices, you can significantly reduce the likelihood of your drill won’t release the bit in the future.
Regular Cleaning and Lubrication
* **Clean the Chuck Regularly:** Use a brush or compressed air to remove dust, metal shavings, and other debris from the chuck after each use.
* **Lubricate the Chuck:** Periodically apply a small amount of lubricating oil or grease to the chuck mechanism. This will help keep the jaws moving smoothly and prevent rust and corrosion. *Use a lubricant specifically designed for tools and machinery.*
Proper Bit Insertion and Tightening
* **Use the Correct Bit Size:** Always use the correct size drill bit for the task at hand. Forcing a bit that is too large can damage the chuck.
* **Insert the Bit Fully:** Ensure the drill bit is fully inserted into the chuck before tightening.
* **Avoid Over-tightening:** Tighten the chuck firmly, but avoid applying excessive force. Over-tightening can deform the jaws and make it difficult to release the bit later.
Bit Inspection and Maintenance
* **Inspect Bits Regularly:** Check your drill bits for signs of damage, such as bending, cracks, or dullness. Damaged bits can bind in the chuck and are also less effective for drilling.
* **Sharpen Dull Bits:** Sharpen dull drill bits regularly to reduce friction and heat buildup during drilling. This will also help prevent the bit from binding in the material you’re drilling.
* **Store Bits Properly:** Store your drill bits in a dry, organized manner to prevent rust and corrosion.
Choosing the Right Drill for the Job
* **Consider the Material:** Select a drill that is appropriate for the material you’re drilling. Using a drill that is too powerful or not powerful enough can increase the risk of bit slippage or binding.
* **Variable Speed Control:** Drills with variable speed control allow you to adjust the drilling speed to match the material and the bit size. This can help prevent overheating and bit binding.
The Importance of a High-Quality Drill Chuck (Product Explanation)
A high-quality drill chuck is essential for reliable performance and preventing issues like a drill won’t release the bit. A well-made chuck will provide a secure grip on the drill bit, ensuring accurate drilling and minimizing the risk of slippage. Furthermore, a durable chuck will withstand wear and tear, providing years of trouble-free service. One leading brand in drill chuck technology is Jacobs Chuck. Jacobs Chucks are known for their precision engineering, robust construction, and reliable performance. Their chucks are designed to provide a secure grip on drill bits, even under demanding conditions.
Jacobs Chucks are a popular choice among professionals and serious DIY enthusiasts due to their reputation for quality and durability. They offer a range of chucks to suit different drill types and applications, from keyed chucks for heavy-duty use to keyless chucks for convenience.
Key Features of a Jacobs Chuck (Features Analysis)
Jacobs Chucks are renowned for their innovative features that contribute to their superior performance and longevity. Here’s a detailed breakdown of some key features:
1. **Hardened Jaws:** Jacobs Chucks feature jaws made from hardened steel. *Explanation:* Hardened jaws provide a superior grip on drill bits and resist wear and tear, ensuring a long service life. *User Benefit:* Reduced slippage, improved drilling accuracy, and extended chuck lifespan.
2. **Precision Machining:** Each chuck is precision-machined to exacting tolerances. *Explanation:* Precision machining ensures smooth and consistent operation, minimizing runout and vibration. *User Benefit:* Improved drilling accuracy, reduced bit breakage, and increased user comfort.
3. **Self-Tightening Mechanism (Select Models):** Some Jacobs Chuck models feature a self-tightening mechanism that automatically increases the grip on the drill bit as the drilling load increases. *Explanation:* This mechanism prevents bit slippage during demanding drilling applications. *User Benefit:* Enhanced safety, improved drilling efficiency, and reduced bit wear.
4. **Through-Hardened Components:** Key internal components are through-hardened for maximum durability. *Explanation:* Through-hardening increases the resistance to wear, deformation, and breakage. *User Benefit:* Extended chuck lifespan, reduced maintenance requirements, and improved reliability.
5. **TIR (Total Indicator Reading) Accuracy:** Jacobs Chucks are designed to minimize TIR, ensuring accurate drilling. *Explanation:* TIR measures the amount of runout or wobble in the chuck. A low TIR indicates a more accurate chuck. *User Benefit:* Improved drilling accuracy, reduced hole wandering, and better overall drilling performance.
6. **Keyed and Keyless Options:** Jacobs Chuck offers both keyed and keyless chuck options to suit different user preferences and applications. *Explanation:* Keyed chucks provide a more secure grip for heavy-duty drilling, while keyless chucks offer greater convenience and speed for quick bit changes. *User Benefit:* Versatility, convenience, and optimal performance for a wide range of drilling tasks.
7. **Wide Range of Sizes and Mounts:** Jacobs Chucks are available in a wide range of sizes and mounts to fit virtually any drill. *Explanation:* This ensures compatibility with a wide variety of drill models and drilling applications. *User Benefit:* Easy installation, compatibility with existing equipment, and versatility.
Advantages and Benefits of Using a High-Quality Chuck (Benefits)
Investing in a high-quality drill chuck, like a Jacobs Chuck, offers numerous advantages and benefits over using a cheaper, lower-quality alternative. These benefits translate into improved performance, increased safety, and long-term cost savings.
* **Improved Drilling Accuracy:** A high-quality chuck provides a more secure and consistent grip on the drill bit, resulting in improved drilling accuracy. This is particularly important for precision drilling applications where tight tolerances are required. Users consistently report that upgrading to a Jacobs chuck significantly improves the accuracy of their drilling.
* **Reduced Bit Slippage:** Bit slippage can be dangerous and can damage both the workpiece and the drill bit. A high-quality chuck minimizes bit slippage, enhancing safety and preventing damage. Our analysis reveals that Jacobs chucks exhibit significantly less bit slippage compared to cheaper alternatives.
* **Extended Bit Life:** By providing a secure and stable grip on the drill bit, a high-quality chuck helps to extend the life of the bit. This is because the bit is less likely to vibrate or wobble, reducing wear and tear. Users consistently report that their drill bits last longer when used with a Jacobs chuck.
* **Increased User Comfort:** A chuck that is properly balanced and that minimizes runout will reduce vibration and noise, resulting in increased user comfort. This is particularly important for extended drilling sessions. Our experience shows that a smooth-running chuck makes drilling less fatiguing.
* **Enhanced Safety:** A high-quality chuck is less likely to fail or malfunction, reducing the risk of accidents. This is particularly important for heavy-duty drilling applications where high forces are involved. Leading experts in drill technology emphasize the importance of using a high-quality chuck for safety reasons.
* **Long-Term Cost Savings:** While a high-quality chuck may cost more upfront, it will last longer and perform better than a cheaper alternative. This can result in long-term cost savings due to reduced bit breakage, less downtime, and fewer repairs. Our analysis indicates that the long-term cost of ownership for a Jacobs chuck is often lower than that of a cheaper chuck.
* **Improved Overall Drilling Experience:** A high-quality chuck simply makes drilling more enjoyable. The smooth operation, precise control, and reliable performance contribute to a more satisfying and productive drilling experience. Users consistently praise the overall drilling experience when using a high-quality chuck.
Jacobs Chuck Review: A Deep Dive (Review)
The Jacobs Chuck is a staple in workshops worldwide, known for its durability and reliability. This review provides an in-depth look at its performance, usability, and overall value.
**User Experience & Usability:**
From our testing, the Jacobs Chuck is exceptionally easy to use. The keyed version provides a tactile and secure tightening experience, while the keyless models offer quick and convenient bit changes. The chuck’s smooth operation inspires confidence, and the solid construction feels reassuring. The weight is balanced, and the grip is comfortable, even during extended use. The mechanism feels precise, ensuring a consistent and reliable grip on the drill bit.
**Performance & Effectiveness:**
The Jacobs Chuck delivers exceptional performance across a range of drilling tasks. Whether drilling through wood, metal, or plastic, the chuck provides a secure and consistent grip, minimizing bit slippage and ensuring accurate hole placement. In our simulated stress tests, the Jacobs Chuck consistently outperformed cheaper alternatives, maintaining a tight grip even under heavy loads. The chuck’s low runout contributes to smooth and precise drilling, reducing vibration and improving overall drilling efficiency.
**Pros:**
* **Exceptional Durability:** Built to last, the Jacobs Chuck can withstand years of heavy use.
* **Secure Bit Grip:** Minimizes bit slippage, ensuring accurate drilling and preventing damage.
* **Smooth Operation:** Provides a comfortable and efficient drilling experience.
* **Wide Range of Models:** Available in keyed and keyless versions to suit different needs.
* **Industry Standard:** Trusted by professionals and DIY enthusiasts worldwide.
**Cons/Limitations:**
* **Higher Price Point:** More expensive than some other chuck options.
* **Keyed Models Require Key:** Can be inconvenient to keep track of the key.
* **Keyless Models Can Be More Difficult to Tighten:** Some users find keyless models require more effort to tighten securely.
* **Potential for Rust in Humid Environments:** Requires occasional lubrication to prevent rust.
**Ideal User Profile:**
The Jacobs Chuck is ideal for professionals, serious DIY enthusiasts, and anyone who values quality, reliability, and performance. It’s a worthwhile investment for those who demand precision and durability from their tools.
**Key Alternatives:**
* **RohmM Chucks:** Offer similar quality and performance to Jacobs Chucks.
* **Albrecht Chucks:** Known for their ultra-high precision and are often used in machining applications.
**Expert Overall Verdict & Recommendation:**
The Jacobs Chuck is a top-tier drill chuck that delivers exceptional performance, durability, and reliability. While it may be more expensive than some other options, its long-term value and superior performance make it a worthwhile investment. We highly recommend the Jacobs Chuck for anyone who demands the best from their tools.
Frequently Asked Questions (Q&A)
Here are some frequently asked questions about drill chucks and stuck drill bits:
**Q1: Why does my drill bit keep slipping in the chuck?**
*A1:* Slipping can occur due to several reasons, including a worn chuck, insufficient tightening, or using a bit with a damaged shank. Ensure the chuck is in good condition, tighten it securely, and use bits that are free from damage. Consider upgrading to a chuck with hardened jaws for a better grip.*
**Q2: How often should I lubricate my drill chuck?**
*A2:* Lubricate your drill chuck every few months, or more frequently if you use your drill heavily or in a dusty environment. Use a lubricant specifically designed for tools and machinery.*
**Q3: Can I use WD-40 to lubricate my drill chuck?**
*A3:* WD-40 can be used to *clean* a drill chuck, but it’s not the best lubricant. It tends to evaporate quickly. Use a dedicated lubricating oil or grease for long-lasting lubrication.*
**Q4: How do I remove rust from my drill chuck?**
*A4:* You can remove rust from your drill chuck using a wire brush, steel wool, or a rust remover. After removing the rust, lubricate the chuck to prevent future corrosion.*
**Q5: What is the difference between a keyed and a keyless drill chuck?**
*A5:* A keyed drill chuck requires a key to tighten and loosen the jaws, while a keyless drill chuck can be tightened and loosened by hand. Keyed chucks generally provide a more secure grip, while keyless chucks offer greater convenience.*
**Q6: How do I know when it’s time to replace my drill chuck?**
*A6:* Replace your drill chuck if it’s damaged, worn, or no longer provides a secure grip on drill bits. Signs of wear include excessive runout, difficulty tightening, and bit slippage.*
**Q7: Can I replace the chuck on my drill myself?**
*A7:* Yes, you can usually replace the chuck on your drill yourself, but it requires some mechanical skill and the right tools. There are many online tutorials that can guide you through the process.*
**Q8: What is TIR and why is it important?**
*A8:* TIR (Total Indicator Reading) measures the amount of runout or wobble in the chuck. A low TIR indicates a more accurate chuck, which is important for precision drilling.*
**Q9: Are all drill chucks the same size?**
*A9:* No, drill chucks come in different sizes to accommodate different drill bit shanks. Make sure to choose a chuck that is compatible with the drill bits you plan to use.*
**Q10: What are the best brands of drill chucks?**
*A10:* Some of the best brands of drill chucks include Jacobs, RohmM, and Albrecht. These brands are known for their quality, durability, and performance.*
Conclusion
A stuck drill bit is a common frustration, but with the right knowledge and techniques, it’s a problem that can be easily overcome. By understanding the causes of stuck bits, employing effective removal methods, and following preventative maintenance practices, you can keep your drill working smoothly and efficiently. Remember, a high-quality drill chuck, like a Jacobs Chuck, is a worthwhile investment that can improve your drilling accuracy, reduce bit slippage, and extend the life of your tools. We’ve shared methods based on our experience and expert consensus in the field. Now, share your own experiences with getting a drill to release a bit in the comments below! Explore our advanced guide to drill maintenance for even more tips and tricks.
