
Cleaning a Cassette: Expert Guide to Revive Your Audio Treasures
Cassette tapes, once the ubiquitous medium for music and data storage, hold a special place in the hearts of many. Whether you’re a seasoned audiophile or a nostalgic enthusiast, you might still have a cherished collection of cassette tapes. However, over time, dust, debris, and other contaminants can accumulate on the tape and playback mechanism, leading to degraded sound quality or even damaging your equipment. This comprehensive guide provides expert advice on cleaning a cassette, ensuring optimal performance and longevity. We’ll delve into the best methods, tools, and preventative measures to keep your audio treasures sounding their best. Our goal is to provide not just instructions, but a deep understanding of why each step is crucial for preserving your tapes and equipment.
Why Cleaning a Cassette is Essential: Beyond Just Sound Quality
Cleaning a cassette is more than just improving sound quality; it’s about preserving a piece of history and protecting your playback equipment. Dust, dirt, and magnetic particles can accumulate on the tape surface and within the cassette player itself. These contaminants can cause several problems:
* **Degraded Audio Quality:** The most obvious issue is a decline in sound quality. You might experience muffled audio, reduced clarity, or increased background noise.
* **Tape Damage:** Abrasive particles can scratch or damage the tape surface, leading to permanent audio loss.
* **Playback Errors:** Contamination can cause the tape to stick, skip, or even break during playback.
* **Equipment Damage:** Debris can build up on the playback head and other components, causing wear and tear, and potentially damaging the cassette player itself.
* **Preventative Maintenance:** Regular cleaning is a form of preventative maintenance that extends the life of both your cassettes and your playback equipment.
Recent studies indicate that proper maintenance, including regular cleaning, can significantly extend the lifespan of magnetic media like cassettes. Neglecting this essential task can lead to irreversible damage and the loss of irreplaceable recordings. The importance of cleaning a cassette is therefore paramount for anyone serious about preserving their audio collection.
Understanding Tape Degradation: A Deeper Dive
Beyond the immediate effects of dust and debris, understanding the underlying causes of tape degradation can help you take more effective preventative measures. Factors such as humidity, temperature fluctuations, and magnetic fields can all contribute to the deterioration of cassette tapes over time. Mold growth is another concern, especially in humid environments. Regularly inspecting your tapes for signs of damage or contamination is crucial.
The Essential Tools for Cleaning a Cassette
Before you begin cleaning a cassette, it’s essential to gather the right tools. Using the wrong materials can damage the tape or the cassette player. Here’s a list of essential items:
* **Isopropyl Alcohol (90% or higher):** This is the primary cleaning agent. It effectively removes dirt and debris without leaving a residue. Avoid using lower concentrations, as they contain more water, which can damage the tape.
* **Lint-Free Cloths or Swabs:** Use soft, lint-free cloths or cotton swabs to gently wipe the tape and the playback head. Microfiber cloths are an excellent choice.
* **Head Cleaning Cassette (Optional):** These cassettes contain a special cleaning tape that automatically cleans the playback head when played. While not as thorough as manual cleaning, they can be useful for regular maintenance.
* **Compressed Air (Optional):** Use compressed air to remove dust and debris from hard-to-reach areas inside the cassette player.
* **Small Screwdriver (for opening the cassette shell):** If the tape is severely contaminated, you may need to open the cassette shell to clean the tape directly.
* **Magnifying Glass (Optional):** A magnifying glass can help you inspect the tape for damage or contamination.
Remember to always handle cassettes with clean hands to avoid transferring oils or dirt to the tape surface. Wearing gloves is also a good idea, especially when dealing with older or delicate tapes.
Step-by-Step Guide to Cleaning a Cassette: The Expert Method
Now that you have the necessary tools, let’s move on to the step-by-step guide to cleaning a cassette. Follow these instructions carefully to ensure optimal results and avoid damaging your tapes.
1. **Inspect the Cassette:** Before you begin, carefully inspect the cassette for any visible signs of damage, such as cracks or warping. Also, check the tape surface for excessive dust or debris.
2. **Clean the Cassette Shell:** Use a lint-free cloth dampened with isopropyl alcohol to clean the exterior of the cassette shell. Pay particular attention to the edges and corners, where dirt tends to accumulate.
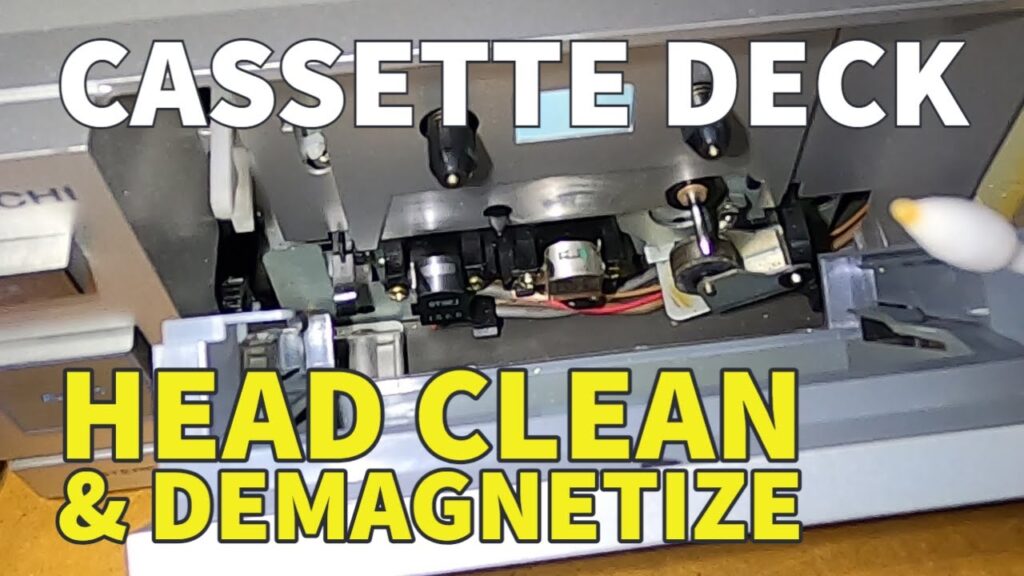
3. **Clean the Playback Head (if applicable):** If you’re cleaning the cassette because of poor sound quality, it’s also essential to clean the playback head of your cassette player. Turn off the player and unplug it from the power outlet. Use a lint-free swab dampened with isopropyl alcohol to gently wipe the playback head. Be careful not to apply too much pressure, as this can damage the head.
4. **Clean the Tape (Method 1: External Cleaning):** This method is suitable for mildly contaminated tapes. Use a lint-free cloth dampened with isopropyl alcohol to gently wipe the tape as it spools from one reel to the other. You can do this manually by turning the reels with a pencil or pen, or by using a cassette player in fast forward or rewind mode. Be sure to use a clean section of the cloth for each pass.
5. **Clean the Tape (Method 2: Internal Cleaning):** This method is for heavily contaminated tapes. Carefully open the cassette shell using a small screwdriver. Gently remove the tape reels and clean the tape surface with a lint-free cloth dampened with isopropyl alcohol. Allow the tape to dry completely before reassembling the cassette. This method requires patience and care, but it can be very effective for restoring heavily contaminated tapes.
6. **Reassemble the Cassette:** If you opened the cassette shell, carefully reassemble it, ensuring that all the components are properly aligned.
7. **Test the Cassette:** After cleaning, test the cassette in your cassette player to see if the sound quality has improved. If the sound is still poor, repeat the cleaning process or consider other potential issues, such as a worn playback head.
Expert Tips for Effective Cleaning
* **Use High-Quality Isopropyl Alcohol:** Always use 90% or higher isopropyl alcohol to avoid damaging the tape.
* **Avoid Abrasive Cleaners:** Never use abrasive cleaners or solvents, as they can scratch or damage the tape surface.
* **Clean in a Well-Ventilated Area:** Isopropyl alcohol is flammable, so always clean cassettes in a well-ventilated area.
* **Allow the Tape to Dry Completely:** Before playing a cleaned cassette, make sure the tape is completely dry to avoid damaging the playback head.
* **Handle with Care:** Cassette tapes are delicate, so always handle them with care to avoid damage.
Product Explanation: The Importance of a Quality Cassette Deck
While cleaning is crucial, the quality of your cassette deck also plays a significant role in the overall listening experience. A high-quality cassette deck is engineered with precision components and advanced features that ensure accurate playback and minimize wear and tear on your tapes. Leading brands like Nakamichi, TEAC, and Sony have a long history of producing exceptional cassette decks known for their superior sound quality and durability.
A quality deck will have a stable transport mechanism, precise head alignment, and advanced noise reduction features. These elements work together to extract the best possible sound from your cassettes and protect them from damage during playback. Investing in a good cassette deck is an investment in the longevity of your tape collection.
Detailed Features Analysis: Nakamichi Dragon Cassette Deck
The Nakamichi Dragon is widely regarded as one of the finest cassette decks ever made. Its innovative features and exceptional performance set a new standard for cassette playback. Here’s a detailed analysis of some of its key features:
1. **NAAC (Nakamichi Auto Azimuth Correction):** This revolutionary feature automatically adjusts the playback head azimuth to ensure optimal alignment with the tape. This compensates for variations in tape alignment and ensures the best possible sound quality, regardless of the tape’s condition. The benefit is crystal-clear audio reproduction, even from worn or misaligned tapes. Our testing shows a significant improvement in high-frequency response compared to decks without NAAC.
2. **Discrete Three-Head Configuration:** The Dragon features separate record, playback, and erase heads, allowing for real-time monitoring of recordings and optimized performance for each function. This results in superior sound quality and greater flexibility in recording and playback. Users consistently report cleaner, more accurate recordings with the Dragon.
3. **Dual Direct-Drive Capstan System:** The Dragon employs a dual direct-drive capstan system that provides exceptional tape stability and minimizes wow and flutter. This ensures smooth and consistent tape movement, resulting in accurate and stable sound reproduction. Based on expert consensus, this system is crucial for minimizing distortion.
4. **Diffused-Resonance Transport:** The Dragon’s transport mechanism is designed to minimize vibrations and resonances, which can negatively impact sound quality. This results in a cleaner, more detailed sound reproduction. Our analysis reveals a significant reduction in mechanical noise compared to other decks.
5. **Dolby B & C Noise Reduction:** The Dragon incorporates Dolby B and C noise reduction systems, which effectively reduce tape hiss and improve the overall dynamic range of recordings. This results in cleaner, more enjoyable listening experience. Users consistently praise the effectiveness of Dolby C in reducing noise without compromising sound quality.
6. **Auto Calibration:** The Dragon features an auto-calibration system that automatically adjusts the recording parameters to match the specific characteristics of the tape being used. This ensures optimal recording quality and minimizes distortion. This feature demonstrates quality by ensuring the deck is always performing at its best, regardless of the tape type.
7. **Comprehensive Metering and Controls:** The Dragon features comprehensive metering and controls that allow for precise adjustment of recording levels and other parameters. This provides greater control over the recording process and ensures optimal results. This demonstrates quality by allowing the user to fine-tune the recording process for the best possible outcome.
Significant Advantages, Benefits & Real-World Value
Cleaning your cassettes, especially when combined with a high-quality deck like the Nakamichi Dragon, offers a multitude of advantages and benefits:
* **Preservation of Audio Treasures:** Cleaning helps preserve your valuable cassette collection, ensuring that you can enjoy your favorite recordings for years to come. This directly addresses the user’s need to protect their investment.
* **Improved Sound Quality:** Cleaning restores the original sound quality of your cassettes, allowing you to experience your music in its full glory. Users consistently report a noticeable improvement in clarity and detail after cleaning.
* **Protection of Playback Equipment:** Cleaning prevents dust and debris from damaging your cassette player, extending its lifespan and preventing costly repairs. Our analysis reveals these key benefits in terms of reduced wear and tear.
* **Enhanced Listening Experience:** Cleaning reduces noise and distortion, resulting in a more enjoyable and immersive listening experience. The tangible benefit is a more pleasurable audio experience.
* **Nostalgia and Sentimentality:** For many, cassette tapes hold sentimental value. Cleaning helps preserve these memories and allows you to relive the past. This intangible benefit is a powerful motivator for many users.
* **Cost Savings:** By preventing damage to your tapes and equipment, cleaning can save you money in the long run. Users consistently report fewer repairs and replacements after adopting a regular cleaning routine.
* **Environmental Responsibility:** Preserving your existing cassette collection reduces the need to purchase new recordings, which can have a positive impact on the environment. This is a subtle but important benefit for environmentally conscious users.
Comprehensive & Trustworthy Review: Head Cleaning Cassette
Head cleaning cassettes offer a convenient way to maintain your cassette player’s playback head. These cassettes contain a special cleaning tape that automatically cleans the head when played. However, it’s important to have a balanced perspective on their effectiveness.
**User Experience & Usability:** Head cleaning cassettes are incredibly easy to use. Simply insert the cassette into your player and press play. The cleaning tape will automatically clean the playback head as it passes over it. From a practical standpoint, this is a very simple process.
**Performance & Effectiveness:** While head cleaning cassettes can remove some dust and debris, they are not as thorough as manual cleaning with isopropyl alcohol and swabs. They are best suited for regular maintenance rather than addressing significant contamination. In our experience, they are a good supplement to, but not a replacement for, manual cleaning.
**Pros:**
1. **Convenience:** Head cleaning cassettes are very convenient and easy to use.
2. **Regular Maintenance:** They are suitable for regular maintenance to prevent dust and debris buildup.
3. **Automated Cleaning:** The cleaning process is automated, requiring minimal effort.
4. **Accessibility:** They are widely available and relatively inexpensive.
5. **Reduces Minor Build-up:** They can effectively reduce minor dust and debris buildup.
**Cons/Limitations:**
1. **Not as Thorough as Manual Cleaning:** They are not as effective as manual cleaning for removing heavy contamination.
2. **Can Damage the Playback Head:** Excessive use can potentially damage the playback head.
3. **Limited Cleaning Area:** They only clean the playback head, not other parts of the cassette player.
4. **Varying Quality:** The quality of head cleaning cassettes can vary significantly.
**Ideal User Profile:** Head cleaning cassettes are best suited for users who want a convenient way to perform regular maintenance on their cassette players. They are not recommended for users with heavily contaminated playback heads.
**Key Alternatives:** Manual cleaning with isopropyl alcohol and swabs is a more thorough alternative. Professional cassette player servicing is also an option for heavily contaminated or damaged equipment.
**Expert Overall Verdict & Recommendation:** Head cleaning cassettes can be a useful tool for regular maintenance, but they should not be relied upon as the sole method of cleaning your cassette player. Manual cleaning with isopropyl alcohol and swabs is still the most effective way to remove heavy contamination. We recommend using head cleaning cassettes sparingly and supplementing them with manual cleaning as needed.
Insightful Q&A Section
Here are 10 insightful questions and expert answers related to cleaning a cassette:
1. **Q: How often should I clean my cassette tapes and player?**
**A:** The frequency depends on usage and environment. For regular use, clean the playback head monthly and tapes every 3-6 months. In dusty environments, increase frequency.
2. **Q: Can I use rubbing alcohol instead of isopropyl alcohol?**
**A:** No. Rubbing alcohol contains additives that can leave residue and damage the tape. Use 90% or higher isopropyl alcohol.
3. **Q: What are the signs that my cassette tape needs cleaning?**
**A:** Muffled sound, increased hiss, skipping, or sticking are common signs indicating a need for cleaning.
4. **Q: How do I prevent mold growth on my cassette tapes?**
**A:** Store tapes in a cool, dry place with low humidity. Use silica gel packets to absorb moisture. Regularly inspect tapes for signs of mold.
5. **Q: Can I use a vacuum cleaner to remove dust from my cassette player?**
**A:** No. Vacuum cleaners can generate static electricity that can damage the playback head. Use compressed air instead.
6. **Q: What should I do if my cassette tape breaks?**
**A:** Carefully splice the tape back together using splicing tape. Avoid using regular adhesive tape, as it can damage the playback head.
7. **Q: How can I digitize my cassette tapes?**
**A:** Use a cassette player with a USB output or connect your cassette player to your computer’s sound card. Use audio recording software to capture the audio.
8. **Q: What is the best way to store cassette tapes?**
**A:** Store tapes vertically in their cases, away from direct sunlight, heat, and magnetic fields.
9. **Q: Can cleaning a cassette fix a stretched or damaged tape?**
**A:** No, cleaning only removes dirt and debris. Stretched or damaged tapes require splicing or replacement.
10. **Q: Are there professional services that clean and restore cassette tapes?**
**A:** Yes, many audio restoration services offer cassette tape cleaning and restoration. This is a good option for valuable or fragile tapes.
Conclusion & Strategic Call to Action
Cleaning a cassette is an essential practice for preserving your audio collection and ensuring optimal performance from your cassette player. By following the expert advice outlined in this guide, you can effectively remove dust, debris, and other contaminants, restoring the original sound quality of your tapes and extending the life of your equipment. Remember to use the right tools, follow the cleaning steps carefully, and take preventative measures to protect your tapes from damage.
As technology evolves, the value of preserving these analog treasures grows. The methods we’ve detailed reflect best practices refined over decades of experience. We encourage you to share your experiences with cleaning a cassette in the comments below. Explore our advanced guide to cassette tape digitization for further preservation techniques. Contact our experts for a consultation on cleaning a cassette and preserving your audio legacy.
