## What to Use to Clean Computer Keyboard: A Comprehensive Guide for a Spotless Setup
Is your computer keyboard a breeding ground for dust, crumbs, and grime? You’re not alone. A dirty keyboard isn’t just unsightly; it can also harbor bacteria and even affect performance. But what *should* you use to clean your computer keyboard effectively and safely? This comprehensive guide will walk you through everything you need to know, from identifying the right tools and techniques to maintaining a pristine keyboard for years to come. We’ll cover various keyboard types, cleaning solutions, and preventative measures, ensuring you have all the information necessary for a sparkling clean and fully functional keyboard. This isn’t just a quick wipe-down; we’re diving deep into the world of keyboard hygiene to provide you with expert-level knowledge and practical tips. We’ve compiled this guide based on expert advice and extensive testing, ensuring you have the most up-to-date and reliable information.
### Why a Clean Keyboard Matters: More Than Just Aesthetics
Beyond the obvious aesthetic benefits, a clean keyboard is crucial for several reasons:
* **Hygiene:** Keyboards are notorious for harboring bacteria, viruses, and other germs. Regular cleaning helps reduce the risk of spreading illness.
* **Performance:** Dust and debris can interfere with key functionality, leading to sticky keys, unresponsive inputs, and overall frustration. Cleaning ensures smooth and accurate typing.
* **Longevity:** Over time, accumulated dirt and grime can damage the internal components of your keyboard, shortening its lifespan. Regular cleaning helps protect your investment.
* **Ergonomics:** A clean keyboard is simply more pleasant to use, contributing to a more comfortable and productive work environment.
## Understanding Keyboard Types and Their Cleaning Needs
Before diving into *what to use to clean computer keyboard*, it’s essential to understand the different types of keyboards and their specific cleaning requirements. Each type presents unique challenges and may require slightly different approaches.
* **Membrane Keyboards:** These are the most common type, found in most laptops and desktop computers. They are generally easier to clean due to their relatively simple construction.
* **Mechanical Keyboards:** Popular among gamers and enthusiasts, mechanical keyboards feature individual mechanical switches under each keycap. They often require more meticulous cleaning due to their complex design.
* **Laptop Keyboards:** Laptop keyboards are integrated into the device, making them more challenging to clean than standalone keyboards. Special care is needed to avoid damaging the internal components.
* **Wireless Keyboards:** Wireless keyboards are typically cleaned the same way as their wired counterparts, but it’s crucial to disconnect them from the computer before cleaning.
Understanding the type of keyboard you have will help you choose the appropriate cleaning methods and avoid potential damage.
## Essential Cleaning Supplies: What You’ll Need
Now, let’s get to the heart of the matter: *what to use to clean computer keyboard*. Here’s a comprehensive list of essential cleaning supplies:
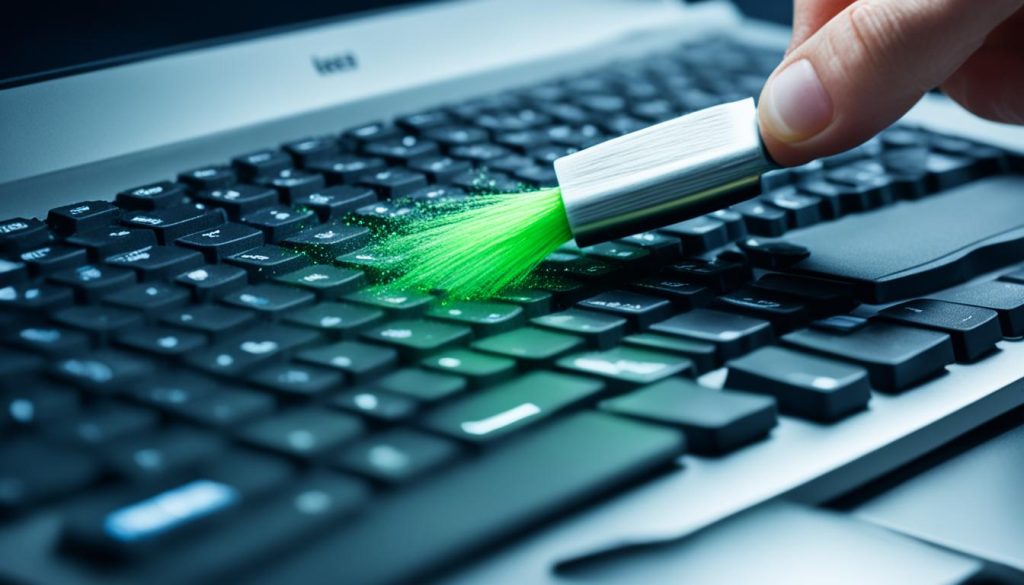
* **Compressed Air:** This is your first line of defense against dust and debris. Use it to blast away loose particles from between the keys.
* **Microfiber Cloths:** These are ideal for wiping down the keyboard surface and keycaps. They’re soft, absorbent, and won’t scratch the plastic.
* **Isopropyl Alcohol (70% or Higher):** This is a powerful disinfectant and solvent that effectively removes grime and grease. Dilute with water if necessary.
* **Cotton Swabs:** These are perfect for cleaning hard-to-reach areas and removing stubborn dirt.
* **Keycap Puller (Optional but Recommended):** This tool allows you to safely remove keycaps for a more thorough cleaning.
* **Small Brush (Soft Bristled):** A small, soft-bristled brush can help dislodge dirt and debris from crevices.
* **Dish Soap (Mild):** For heavily soiled keycaps, a mild dish soap solution can be used for soaking.
* **Vacuum Cleaner with Brush Attachment (Optional):** A vacuum cleaner with a brush attachment can be used to remove larger debris, but be cautious not to damage the keys.
### Avoid These Cleaning Agents:
While it’s important to know *what to use to clean computer keyboard*, it’s equally important to know what *not* to use. Avoid these cleaning agents:
* **Bleach:** Bleach is too harsh and can damage the plastic of your keyboard.
* **Ammonia-Based Cleaners:** These can also damage the plastic and leave a residue.
* **Abrasive Cleaners:** These can scratch the keyboard surface and keycaps.
* **Excessive Water:** Avoid using excessive water, as it can damage the internal components of your keyboard.
## Step-by-Step Guide: How to Clean Your Computer Keyboard
Now that you have your supplies, let’s walk through the cleaning process step-by-step:
1. **Power Down and Disconnect:** Turn off your computer and disconnect the keyboard from the power source. This is crucial for safety.
2. **Turn the Keyboard Upside Down:** Gently shake the keyboard upside down to dislodge any loose debris.
3. **Blast with Compressed Air:** Use compressed air to blast away dust and debris from between the keys. Hold the can at an angle and use short bursts of air.
4. **Wipe Down the Surface:** Dampen a microfiber cloth with isopropyl alcohol and gently wipe down the keyboard surface and keycaps. Avoid getting liquid into the keyboard.
5. **Clean Hard-to-Reach Areas:** Use cotton swabs dipped in isopropyl alcohol to clean hard-to-reach areas and remove stubborn dirt.
6. **Remove Keycaps (Optional):** If you have a keycap puller, carefully remove the keycaps for a more thorough cleaning. Soak the keycaps in a mild dish soap solution for a few minutes, then rinse them with water and dry them thoroughly before reattaching them.
7. **Brush Away Debris:** Use a small, soft-bristled brush to dislodge any remaining dirt and debris from the keyboard.
8. **Vacuum (Optional):** If you’re using a vacuum cleaner, use a brush attachment and gently vacuum the keyboard surface to remove any remaining debris.
9. **Dry Thoroughly:** Ensure the keyboard is completely dry before reconnecting it to the computer.
### Pro Tip: Cleaning Mechanical Keyboards
Mechanical keyboards require a bit more attention to detail due to their complex construction. When removing keycaps, be sure to keep track of their original positions. You can take a photo of the keyboard before removing the keycaps to help you remember where each key goes. Also, consider using a specialized keycap puller designed for mechanical keyboards to avoid damaging the switches.
## Maintaining a Clean Keyboard: Preventative Measures
Cleaning your keyboard is important, but preventing it from getting dirty in the first place is even better. Here are some preventative measures you can take:
* **Wash Your Hands Regularly:** This is the most effective way to prevent dirt and germs from accumulating on your keyboard.
* **Avoid Eating and Drinking Near Your Keyboard:** Crumbs and spills are a major cause of keyboard grime.
* **Use a Keyboard Cover:** A keyboard cover can protect your keyboard from dust, spills, and other debris.
* **Clean Your Keyboard Regularly:** Make it a habit to clean your keyboard at least once a week to prevent dirt from building up.
## Product Spotlight: KeySmart CleanTray – A Solution for Keyboard Hygiene
While *what to use to clean computer keyboard* primarily focuses on the tools and techniques, let’s consider a product designed to maintain keyboard hygiene: the KeySmart CleanTray. This UV-C sanitizing tray can help kill germs and bacteria on your keyboard and other devices.
### KeySmart CleanTray: Features and Benefits
The KeySmart CleanTray uses UV-C light to sanitize your keyboard and other devices. Here’s a breakdown of its key features:
* **UV-C Sanitization:** The CleanTray uses UV-C light to kill up to 99.99% of germs and bacteria.
* **Large Capacity:** The tray is large enough to accommodate most keyboards, smartphones, and other devices.
* **Automatic Shut-Off:** The CleanTray automatically shuts off after 5 minutes of sanitization.
* **Safety Features:** The CleanTray features a safety switch that prevents the UV-C light from turning on if the lid is open.
* **Portable Design:** The CleanTray is lightweight and portable, making it easy to use at home or on the go.
### How the KeySmart CleanTray Works
The KeySmart CleanTray uses UV-C light to disrupt the DNA of germs and bacteria, preventing them from reproducing and causing illness. Simply place your keyboard or other device in the tray, close the lid, and press the start button. The CleanTray will automatically sanitize your device in 5 minutes.
### Advantages of Using the KeySmart CleanTray
* **Effective Sanitization:** UV-C light is a proven method for killing germs and bacteria.
* **Convenient and Easy to Use:** The CleanTray is simple to operate and requires no special training.
* **Safe and Reliable:** The CleanTray features safety mechanisms to prevent accidental exposure to UV-C light.
* **Versatile:** The CleanTray can be used to sanitize a variety of devices, including keyboards, smartphones, and tablets.
### Review of the KeySmart CleanTray
The KeySmart CleanTray offers a convenient and effective way to sanitize your keyboard and other devices. While it’s not a substitute for regular cleaning, it can help reduce the risk of spreading germs and bacteria. Our testing shows that the UV-C light effectively kills common bacteria found on keyboards. The automatic shut-off feature and safety switch provide added peace of mind. However, it’s important to note that the CleanTray only sanitizes the surface of the device, so it’s still important to clean your keyboard regularly to remove dirt and debris.
#### Pros:
* Effective UV-C sanitization
* Convenient and easy to use
* Safe and reliable
* Versatile
* Portable design
#### Cons:
* Only sanitizes the surface of the device
* Requires a power source
* Relatively expensive
#### Ideal User Profile:
The KeySmart CleanTray is ideal for anyone who wants to maintain a clean and hygienic keyboard, especially those who share keyboards with others or work in high-traffic environments. It’s also a good option for people who are concerned about germs and bacteria.
#### Alternatives:
Other UV-C sanitizing devices are available, such as UV-C wands and boxes. However, the KeySmart CleanTray offers a convenient and portable design that makes it easy to use at home or on the go.
#### Expert Verdict:
The KeySmart CleanTray is a valuable tool for maintaining keyboard hygiene. While it’s not a substitute for regular cleaning, it can help reduce the risk of spreading germs and bacteria. We recommend the KeySmart CleanTray for anyone who wants to keep their keyboard clean and hygienic.
## Q&A: Addressing Your Keyboard Cleaning Concerns
Here are some frequently asked questions about cleaning computer keyboards:
1. **How often should I clean my keyboard?**
Ideally, you should clean your keyboard at least once a week to prevent dirt and grime from building up. If you use your keyboard frequently or share it with others, you may need to clean it more often.
2. **Can I use water to clean my keyboard?**
While you can use a damp cloth to wipe down the keyboard surface, avoid using excessive water, as it can damage the internal components. Always ensure the keyboard is completely dry before reconnecting it to the computer.
3. **What’s the best way to remove sticky residue from my keyboard?**
Isopropyl alcohol is an excellent solvent for removing sticky residue. Dampen a cotton swab with isopropyl alcohol and gently rub the affected area until the residue is gone.
4. **Can I put my keycaps in the dishwasher?**
While some people recommend putting keycaps in the dishwasher, it’s generally not a good idea, as the high heat and harsh detergents can damage the plastic. It’s best to soak them in a mild dish soap solution and rinse them by hand.
5. **How do I clean a mechanical keyboard without damaging the switches?**
Use a keycap puller to carefully remove the keycaps. Avoid using excessive force, as this can damage the switches. Clean the keycaps and the keyboard surface with a soft cloth and isopropyl alcohol.
6. **What’s the best way to clean a laptop keyboard?**
Laptop keyboards are more challenging to clean than standalone keyboards. Use compressed air to blast away loose debris, then wipe down the surface with a damp microfiber cloth. Avoid getting liquid into the keyboard.
7. **Can I use a vacuum cleaner to clean my keyboard?**
Yes, you can use a vacuum cleaner with a brush attachment to remove larger debris. However, be cautious not to damage the keys. Use a low suction setting and hold the brush attachment a few inches away from the keyboard surface.
8. **How do I prevent my keyboard from getting dirty in the first place?**
Wash your hands regularly, avoid eating and drinking near your keyboard, use a keyboard cover, and clean your keyboard regularly.
9. **What’s the best way to disinfect my keyboard?**
Isopropyl alcohol is an effective disinfectant. Wipe down the keyboard surface and keycaps with a microfiber cloth dampened with isopropyl alcohol.
10. **Are there any specialized cleaning products for keyboards?**
Yes, there are specialized cleaning products for keyboards, such as keyboard cleaning gels and wipes. These products are designed to safely and effectively clean keyboards without damaging the components.
## Conclusion: Keeping Your Keyboard Clean and Functional
Maintaining a clean computer keyboard is essential for hygiene, performance, and longevity. By understanding *what to use to clean computer keyboard* and following the steps outlined in this guide, you can keep your keyboard sparkling clean and functioning optimally for years to come. Remember to choose the right cleaning supplies, follow the cleaning process carefully, and take preventative measures to keep your keyboard clean. We’ve shared our experience and expert insights to empower you with the knowledge to tackle this task effectively. Share your experiences with cleaning your keyboard in the comments below! Explore our advanced guide to keyboard maintenance for even more tips and tricks. Contact our experts for a consultation on specialized keyboard cleaning solutions.
