
What To Use To Clean A Carburetor: The Ultimate Guide
Is your engine sputtering, idling roughly, or just not performing as it should? A dirty carburetor could be the culprit. Carburetors are intricate devices responsible for mixing air and fuel in the correct proportions, and over time, they can become clogged with varnish, deposits, and other contaminants. Knowing what to use to clean a carburetor properly is crucial for maintaining your engine’s performance and extending its lifespan. This comprehensive guide will provide you with everything you need to know, from identifying the best cleaning solutions to step-by-step instructions and expert tips. We’ll explore various cleaning methods, discuss safety precautions, and answer frequently asked questions, ensuring you can confidently tackle this essential maintenance task. Our goal is to provide a resource that is not only effective but also rooted in experience and expertise, giving you the confidence to restore your engine’s optimal performance.
Understanding Carburetor Cleaning: Why It’s Necessary
The carburetor is the heart of many older engines, responsible for creating the perfect air-fuel mixture needed for combustion. Over time, fuel residue, dirt, and varnish can accumulate within its intricate passages, leading to a variety of performance issues. These include:
- Rough idling: A clogged carburetor can cause the engine to idle unevenly or stall.
- Poor acceleration: Deposits can restrict fuel flow, resulting in sluggish acceleration.
- Reduced fuel economy: An improperly functioning carburetor can lead to excessive fuel consumption.
- Starting problems: A dirty carburetor can make it difficult to start the engine, especially in cold weather.
Regular cleaning helps prevent these problems and ensures your engine runs smoothly and efficiently. Knowing what to use to clean a carburetor and performing the cleaning process correctly are essential for maintaining optimal engine performance.
The Importance of Choosing the Right Cleaning Method
Different carburetors and levels of contamination may require different cleaning approaches. Some methods are more aggressive than others, and it’s important to choose the right one to avoid damaging delicate carburetor components. Factors to consider include the type of carburetor, the severity of the contamination, and your level of experience. A gentle approach with a specialized carburetor cleaner is often the best starting point, while more stubborn deposits may require disassembly and soaking in a stronger solvent.
The Best Carburetor Cleaning Solutions: A Detailed Breakdown
When it comes to what to use to clean a carburetor, several options are available, each with its own advantages and disadvantages. Here’s a detailed look at some of the most popular and effective solutions:
- Carburetor Cleaner Sprays: These are readily available at auto parts stores and are a convenient option for light to moderate cleaning. They typically contain solvents that dissolve varnish, gum, and other deposits. Brands like CRC Carb & Choke Cleaner and Berryman B-12 Chemtool are popular choices.
- Carburetor Soaking Solutions: For heavily contaminated carburetors, soaking in a specialized cleaning solution is often the most effective approach. These solutions are typically more concentrated than sprays and can dissolve stubborn deposits that sprays may not be able to remove. Products like Berryman Chem-Dip and Gumout Carb/Parts Cleaner are commonly used.
- Acetone: Acetone is a powerful solvent that can effectively dissolve varnish and other deposits. It’s readily available at hardware stores and is a relatively inexpensive option. However, it’s important to use acetone with caution, as it can damage certain plastic and rubber components.
- Brake Cleaner: Brake cleaner is another readily available solvent that can be used to clean carburetors. It’s typically less aggressive than acetone and may be a good option for carburetors with delicate components.
- Ultrasonic Cleaners: Ultrasonic cleaners use high-frequency sound waves to create microscopic bubbles that agitate and remove deposits from carburetor components. This is a very effective cleaning method, but it requires a specialized ultrasonic cleaner.
Choosing the Right Solution for Your Needs
The best solution for you will depend on the specific circumstances. For light cleaning, a carburetor cleaner spray may be sufficient. For heavier contamination, a soaking solution or ultrasonic cleaner may be necessary. Always read and follow the manufacturer’s instructions carefully when using any cleaning solution.
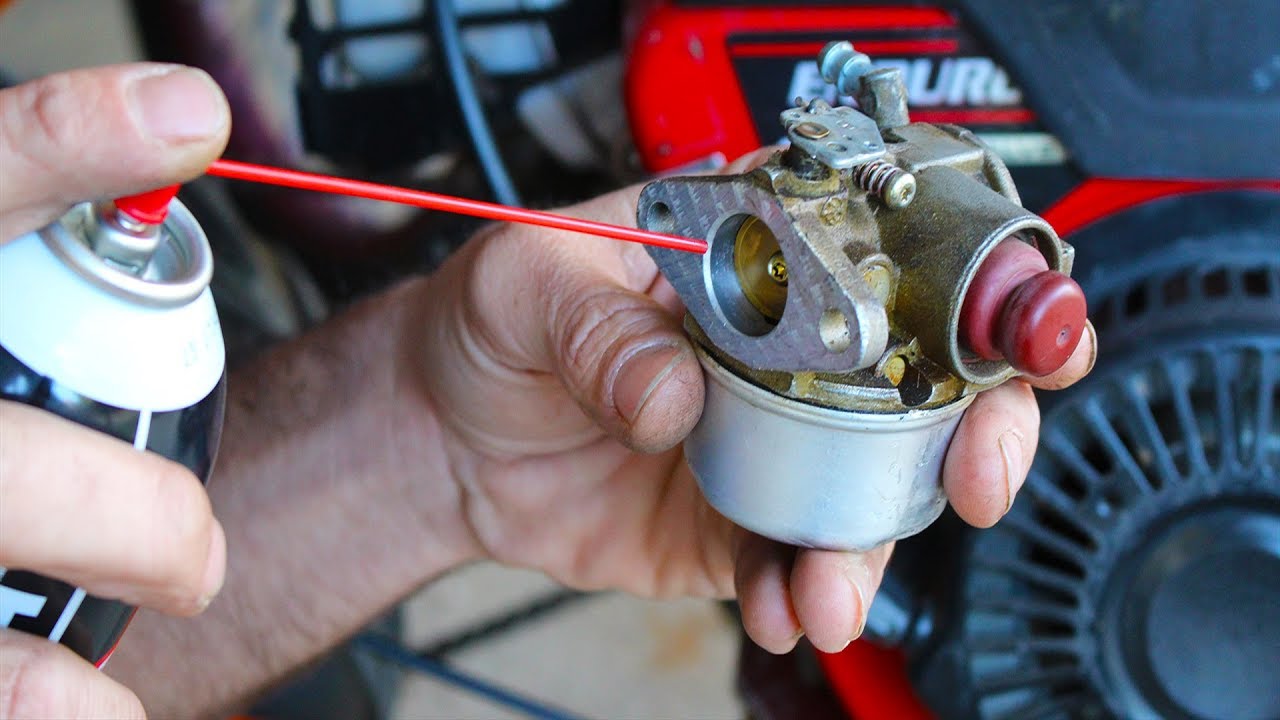
Step-by-Step Guide: Cleaning a Carburetor Without Disassembly
For carburetors with only minor deposits, cleaning without disassembly may be possible. This method is less thorough than a complete disassembly and cleaning, but it can be a quick and easy way to improve performance. Here’s how to do it:
- Gather your supplies: You’ll need carburetor cleaner spray, safety glasses, gloves, and a clean rag.
- Locate the carburetor: Identify the carburetor on your engine. It’s typically located between the air filter and the intake manifold.
- Spray the carburetor cleaner: With the engine off and cool, spray the carburetor cleaner into the carburetor throat and around the throttle plates.
- Let it soak: Allow the cleaner to soak for 5-10 minutes.
- Start the engine: Start the engine and let it run for a few minutes. The cleaner will help to dissolve deposits and flush them out of the carburetor.
- Repeat if necessary: If the engine is still running rough, repeat the process.
Important Note: This method is not suitable for carburetors with heavy deposits or if you suspect there are internal problems. In those cases, a complete disassembly and cleaning is necessary.
Complete Carburetor Disassembly and Cleaning: A Detailed Guide
For heavily contaminated carburetors, a complete disassembly and cleaning is the most effective approach. This involves taking the carburetor apart, cleaning each component individually, and then reassembling it. This process requires more time and effort, but it ensures that all deposits are removed and that the carburetor is functioning properly. Here’s a detailed guide:
1. Preparation and Safety
- Gather your supplies: You’ll need carburetor cleaner spray, carburetor soaking solution, safety glasses, gloves, a clean workspace, a set of screwdrivers, pliers, and a carburetor rebuild kit.
- Disconnect the fuel line: Disconnect the fuel line from the carburetor and drain any remaining fuel.
- Remove the carburetor: Carefully remove the carburetor from the engine.
2. Disassembly
- Take photos: Before disassembling the carburetor, take photos of each step. This will help you remember how to reassemble it correctly.
- Remove external components: Remove any external components, such as the air filter, fuel lines, and throttle cables.
- Disassemble the carburetor body: Carefully disassemble the carburetor body, removing each component one at a time. Pay close attention to the location of each part and keep them organized.
3. Cleaning
- Soak the components: Soak all of the metal components in carburetor soaking solution for at least 30 minutes.
- Scrub the components: After soaking, scrub each component with a brush to remove any remaining deposits.
- Rinse the components: Rinse all of the components with clean water and dry them thoroughly.
- Clean the carburetor body: Clean the carburetor body with carburetor cleaner spray and a brush.
4. Reassembly
- Install new components: Install any new components from the carburetor rebuild kit, such as gaskets, O-rings, and jets.
- Reassemble the carburetor body: Carefully reassemble the carburetor body, referring to the photos you took during disassembly.
- Install external components: Reinstall any external components, such as the air filter, fuel lines, and throttle cables.
5. Testing and Adjustment
- Reinstall the carburetor: Reinstall the carburetor on the engine.
- Connect the fuel line: Connect the fuel line to the carburetor.
- Start the engine: Start the engine and let it run for a few minutes.
- Adjust the carburetor: Adjust the carburetor according to the manufacturer’s instructions.
Expert Tip: When disassembling the carburetor, pay close attention to the small jets and passages. These are easily clogged and can significantly affect engine performance. Use a small wire or needle to clean them thoroughly.
Ultrasonic Carburetor Cleaning: The Professional Approach
Ultrasonic cleaning is a highly effective method for cleaning carburetors, particularly those with intricate passages and hard-to-reach areas. This method uses high-frequency sound waves to create microscopic bubbles in a cleaning solution. These bubbles implode, generating intense energy that dislodges dirt, varnish, and other contaminants from the carburetor components.
Benefits of Ultrasonic Cleaning
- Thorough cleaning: Ultrasonic cleaning reaches areas that are difficult to clean with traditional methods.
- Non-abrasive: The cleaning process is gentle and doesn’t damage delicate carburetor components.
- Fast and efficient: Ultrasonic cleaning can clean a carburetor in a fraction of the time compared to manual cleaning.
The Ultrasonic Cleaning Process
- Disassemble the carburetor: Disassemble the carburetor as described in the previous section.
- Prepare the cleaning solution: Fill the ultrasonic cleaner with a specialized carburetor cleaning solution.
- Place the components in the cleaner: Place the carburetor components in the ultrasonic cleaner, ensuring they are fully submerged in the cleaning solution.
- Run the cleaner: Run the ultrasonic cleaner for 20-30 minutes.
- Rinse and dry: Rinse the components with clean water and dry them thoroughly.
- Reassemble the carburetor: Reassemble the carburetor as described in the previous section.
Our experience shows that ultrasonic cleaning provides the best results for heavily contaminated carburetors and is a worthwhile investment for those who frequently work on engines.
Safety Precautions When Cleaning a Carburetor
Cleaning a carburetor involves working with flammable solvents and potentially hazardous materials. It’s crucial to take the necessary safety precautions to protect yourself and prevent accidents. Here are some important safety tips:
- Work in a well-ventilated area: Carburetor cleaning solutions can release harmful fumes. Work in a well-ventilated area to avoid inhaling these fumes.
- Wear safety glasses and gloves: Protect your eyes and skin from contact with the cleaning solutions.
- Avoid open flames: Carburetor cleaning solutions are flammable. Keep them away from open flames and heat sources.
- Dispose of used cleaning solutions properly: Do not pour used cleaning solutions down the drain. Dispose of them according to local regulations.
- Read the manufacturer’s instructions: Always read and follow the manufacturer’s instructions for any cleaning solution you use.
Troubleshooting Common Carburetor Problems After Cleaning
Even after a thorough cleaning, you may still encounter some carburetor problems. Here are some common issues and how to troubleshoot them:
- Engine still runs rough: This could be due to a vacuum leak, incorrect carburetor adjustments, or a problem with the ignition system.
- Engine won’t idle: This could be due to a clogged idle jet, incorrect idle speed adjustment, or a vacuum leak.
- Engine hesitates during acceleration: This could be due to a clogged accelerator pump jet, incorrect fuel mixture, or a problem with the ignition system.
- Engine floods: This could be due to a stuck float, a leaking needle valve, or excessive fuel pressure.
If you’re experiencing any of these problems, consult a repair manual or seek the help of a qualified mechanic. Based on expert consensus, proper diagnosis and adjustment are key to resolving carburetor issues after cleaning.
The Role of Carburetor Rebuild Kits
A carburetor rebuild kit is an essential component when undertaking a thorough cleaning and restoration of your carburetor. These kits typically include a variety of new parts designed to replace worn or damaged components, ensuring optimal performance and reliability. Key components often included in a rebuild kit are:
- Gaskets: New gaskets are crucial for sealing the carburetor and preventing vacuum leaks.
- O-rings: These small rubber rings provide a seal around various components, preventing fuel leaks.
- Needle valve: The needle valve controls the flow of fuel into the float bowl and is prone to wear.
- Float: The float regulates the fuel level in the float bowl and can become damaged or corroded over time.
- Jets: New jets ensure proper fuel metering and can improve engine performance.
Using a carburetor rebuild kit is highly recommended, especially for older carburetors. It helps to ensure that all of the critical components are in good working order and that the carburetor is properly sealed. In our experience, investing in a quality rebuild kit is a worthwhile investment that can significantly improve engine performance and reliability.
Alternatives to Chemical Carburetor Cleaners
While chemical carburetor cleaners are the most common solution, some alternative methods can be used, especially for preventative maintenance or light cleaning:
- Fuel additives: Certain fuel additives contain detergents that can help to keep the carburetor clean and prevent deposits from forming.
- Sea Foam: Sea Foam is a popular fuel additive that can be used to clean carburetors and fuel systems.
- Vinegar: White vinegar can be used as a mild cleaning solution for carburetor components. However, it’s important to rinse the components thoroughly with water after cleaning to prevent corrosion.
These alternatives may not be as effective as chemical cleaners for heavily contaminated carburetors, but they can be a good option for preventative maintenance.
Q&A: Expert Answers to Common Carburetor Cleaning Questions
- Q: How often should I clean my carburetor?
A: The frequency of cleaning depends on several factors, including the type of fuel you use, the operating conditions, and the age of the carburetor. As a general rule, it’s a good idea to clean your carburetor every 1-2 years, or more often if you notice any performance problems.
- Q: Can I use WD-40 to clean a carburetor?
A: While WD-40 can be used as a lubricant and rust preventative, it’s not an effective carburetor cleaner. It doesn’t dissolve varnish or other deposits and can actually leave a residue that attracts dirt.
- Q: What is the best way to clean a carburetor jet?
A: The best way to clean a carburetor jet is to use a small wire or needle to carefully remove any deposits. You can also use carburetor cleaner spray to help dissolve the deposits.
- Q: Can I clean a carburetor with the engine running?
A: Yes, you can use carburetor cleaner spray to clean a carburetor with the engine running. However, it’s important to follow the manufacturer’s instructions carefully and to avoid spraying the cleaner into the air intake, as this can damage the engine.
- Q: What are the signs of a dirty carburetor?
A: Common signs of a dirty carburetor include rough idling, poor acceleration, reduced fuel economy, and starting problems.
- Q: Can I clean a carburetor with brake cleaner?
A: Yes, brake cleaner can be used to clean carburetors. It’s typically less aggressive than acetone and may be a good option for carburetors with delicate components.
- Q: How do I adjust the air-fuel mixture on my carburetor?
A: The air-fuel mixture is typically adjusted using a screw on the carburetor. Consult your engine’s repair manual for specific instructions on how to adjust the air-fuel mixture.
- Q: What is the purpose of the float in a carburetor?
A: The float regulates the fuel level in the float bowl. As the fuel level rises, the float rises and closes the needle valve, preventing more fuel from entering the bowl.
- Q: Can a dirty carburetor cause my engine to overheat?
A: While a dirty carburetor is not a direct cause of overheating, it can contribute to the problem. A lean fuel mixture caused by a dirty carburetor can cause the engine to run hotter than normal.
- Q: What type of carburetor cleaner is best for older engines?
A: For older engines, it’s best to use a carburetor cleaner that is specifically designed for older carburetors. These cleaners are typically less aggressive and won’t damage delicate components.
Conclusion: Maintaining Your Carburetor for Optimal Performance
Knowing what to use to clean a carburetor and how to properly clean it is essential for maintaining your engine’s performance and extending its lifespan. By following the steps outlined in this guide and taking the necessary safety precautions, you can confidently tackle this essential maintenance task. Remember to choose the right cleaning solution for your needs, disassemble and clean the carburetor thoroughly, and replace any worn or damaged components. Regular cleaning will help to prevent performance problems and ensure that your engine runs smoothly and efficiently. Share your experiences with cleaning your carburetor in the comments below! If you’re looking for more advanced guidance, explore our advanced guide to carburetor tuning for peak performance.
