Cleaning Keyboards Computer: The Definitive Guide for a Hygienic Workspace
In today’s digital world, our computers are indispensable. We spend countless hours typing away, whether for work, communication, or leisure. But have you ever stopped to consider the state of your keyboard? More often than not, it’s a breeding ground for dust, crumbs, germs, and other unsavory particles. This comprehensive guide will provide you with everything you need to know about cleaning keyboards computer, ensuring a hygienic and efficient workspace. We’ll cover everything from basic cleaning techniques to advanced methods for stubborn grime, helping you maintain a pristine and functional keyboard. This isn’t just about aesthetics; it’s about protecting your health and extending the lifespan of your valuable computer equipment.
This article aims to provide a comprehensive, trustworthy, and expert-backed resource on cleaning computer keyboards. We will explore various cleaning methods, tools, and best practices to ensure you can confidently tackle any keyboard cleaning challenge. Consider this your go-to resource for all things related to cleaning keyboards computer.
The Importance of Cleaning Your Computer Keyboard
A dirty keyboard is more than just unsightly; it poses several potential problems. First and foremost, it’s a health hazard. Keyboards can harbor bacteria, viruses, and fungi, which can lead to illness. Think about it – you touch your keyboard constantly throughout the day, and then you might touch your face, eat, or interact with others. Regular cleaning keyboards computer reduces the risk of spreading germs.
Beyond hygiene, a dirty keyboard can also impact performance. Dust and debris can get lodged under the keys, causing them to stick, become unresponsive, or even malfunction entirely. This can significantly slow down your typing speed and lead to frustration. Moreover, accumulated grime can damage the internal components of the keyboard over time, shortening its lifespan. Regular keyboard maintenance, specifically cleaning keyboards computer, is a cost-effective way to prevent these issues.
Recent studies have shown a surprising amount of bacteria can thrive on keyboards. Therefore, implementing a regular cleaning keyboards computer routine is essential for maintaining a healthy and productive workspace.
Types of Keyboard Debris
Understanding the types of debris that accumulate on your keyboard is crucial for choosing the right cleaning methods. Common culprits include:
- Dust and dirt: These particles settle on the keyboard from the surrounding environment.
- Food crumbs: Snacking at your desk is a common habit, but it can lead to crumbs getting trapped between the keys.
- Skin cells and oils: Our hands naturally produce oils and shed skin cells, which can accumulate on the keyboard surface.
- Hair: Pet hair or even human hair can easily find its way into the crevices of your keyboard.
- Liquid spills: Accidental spills of coffee, juice, or other liquids can cause sticky keys and even damage the internal components.
Essential Tools for Cleaning Keyboards Computer
Having the right tools on hand makes the cleaning keyboards computer process much easier and more effective. Here’s a list of essential items:
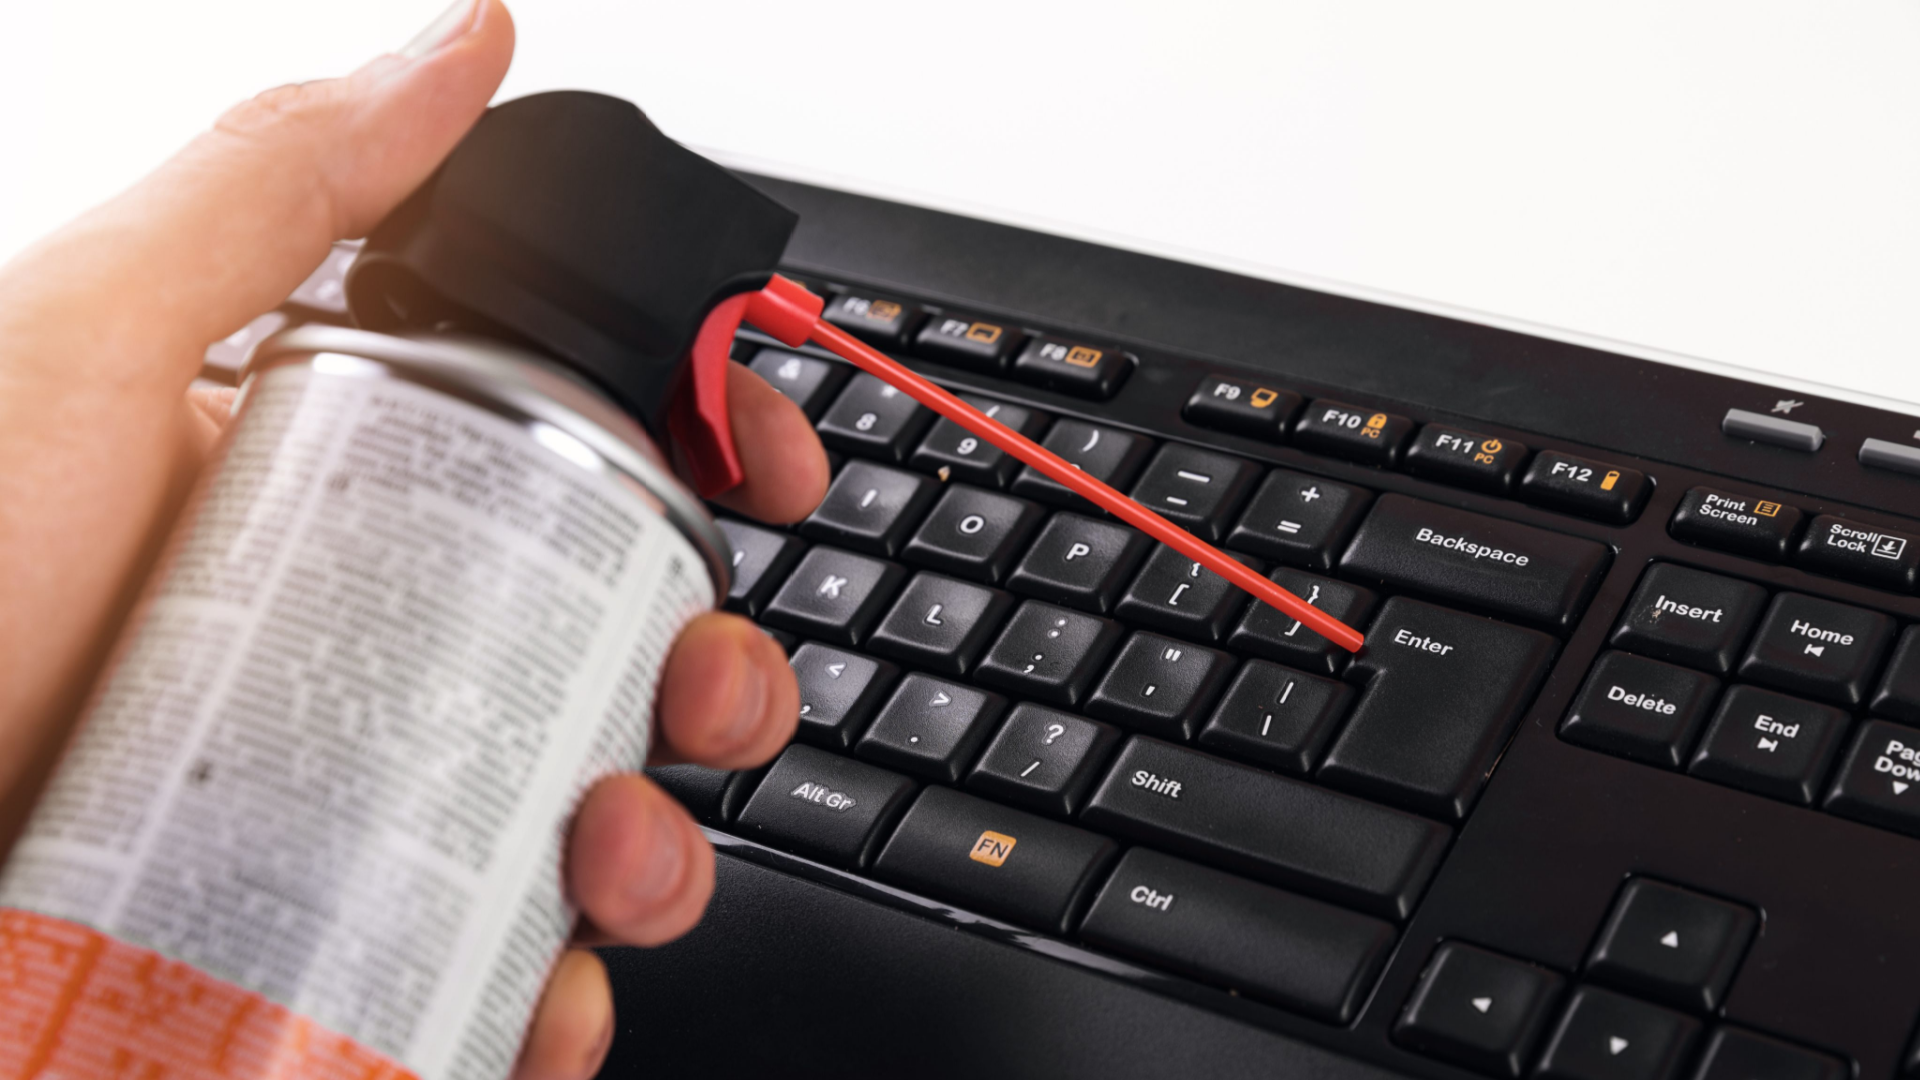
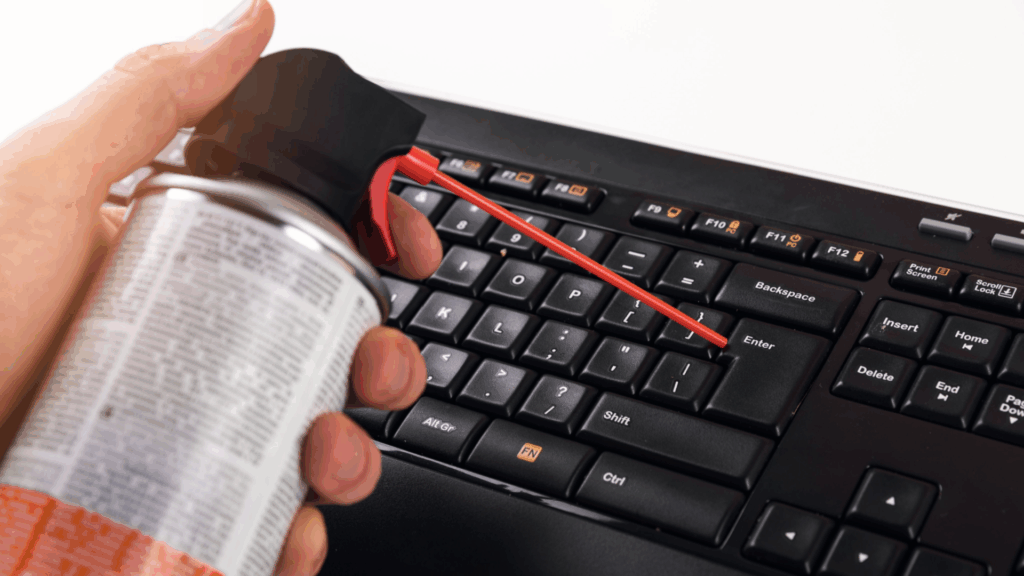
- Compressed air: This is invaluable for blasting away loose dust and debris from between the keys.
- Microfiber cloths: These soft cloths are ideal for wiping down the keyboard surface without scratching it.
- Isopropyl alcohol (70% or higher): This is a powerful disinfectant that can kill germs and remove stubborn grime.
- Cotton swabs: These are useful for cleaning tight spaces and crevices.
- Keycap puller (optional): This tool allows you to safely remove keycaps for a more thorough cleaning.
- Small brush (soft-bristled): A soft brush can help loosen debris before using compressed air or wiping.
- Vacuum cleaner with a brush attachment (optional): A vacuum cleaner can be used to remove larger debris particles.
Step-by-Step Guide to Cleaning Your Computer Keyboard
Follow these steps for a thorough cleaning keyboards computer experience:
- Power down: Turn off your computer and unplug the keyboard to prevent accidental key presses or electrical damage.
- Turn the Keyboard Upside Down and Gently Shake: This will dislodge any loose debris that is sitting on top of the keyboard.
- Remove loose debris: Use compressed air to blast away dust, crumbs, and other loose particles from between the keys. Hold the can at an angle and use short bursts to avoid damaging the keyboard.
- Wipe down the surface: Dampen a microfiber cloth with isopropyl alcohol and wipe down the entire keyboard surface. Be careful not to get any liquid inside the keyboard.
- Clean individual keys: Use cotton swabs dampened with isopropyl alcohol to clean around the edges of each key. For stubborn grime, you can gently scrub with a soft brush.
- Deep clean (optional): If you want a more thorough cleaning, use a keycap puller to remove the keycaps. Wash the keycaps in warm, soapy water, rinse them thoroughly, and allow them to dry completely before reattaching them.
- Reassemble and dry: Once everything is clean and dry, reattach the keycaps (if you removed them) and plug the keyboard back into your computer.
Dealing with Sticky Keys
Sticky keys are a common problem caused by liquid spills or accumulated grime. Here’s how to address them:
- Remove the keycap: Use a keycap puller to remove the sticky keycap.
- Clean the switch: Use a cotton swab dampened with isopropyl alcohol to clean the switch mechanism underneath the keycap.
- Clean the keycap: Wash the keycap in warm, soapy water, rinse it thoroughly, and allow it to dry completely.
- Reassemble: Once everything is clean and dry, reattach the keycap.
Cleaning Mechanical Keyboards Computer: A Specialized Approach
Mechanical keyboards, known for their tactile feel and durability, require a slightly different approach to cleaning. The keycaps are often easier to remove, and the switches are more robust. However, it’s still important to be gentle and avoid getting liquid inside the keyboard.
- Keycap Removal: Mechanical keyboards often come with a wire keycap puller, making removal easier.
- Switch Cleaning: Use compressed air and a small brush to clean around the switches. Avoid using excessive amounts of liquid.
- Lubrication (Optional): After cleaning, you can lubricate the switches with a specialized keyboard lubricant to improve their feel and performance.
Cleaning Laptop Keyboards Computer: Extra Caution Required
Cleaning laptop keyboards requires extra caution, as the components are more delicate and closely packed together. Avoid using excessive amounts of liquid, and never spray directly onto the keyboard.
- Use a dry cloth: Start by wiping down the keyboard with a dry microfiber cloth to remove loose dust and debris.
- Dampen the cloth: If necessary, dampen the cloth with a small amount of isopropyl alcohol. Be careful not to get any liquid inside the keyboard.
- Avoid compressed air: Compressed air can potentially damage the delicate components of a laptop keyboard.
Product Spotlight: Keyboard Cleaning Gel
Keyboard cleaning gel is a popular product for cleaning keyboards computer. It’s a semi-solid substance that you press onto the keyboard, and it conforms to the shape of the keys and crevices. When you peel it off, it pulls away dust, crumbs, and other debris.
How it Works: The gel is designed to be sticky enough to pick up debris but not so sticky that it leaves a residue. It’s a relatively easy and mess-free way to clean your keyboard.
Features Analysis of Keyboard Cleaning Gel
Let’s break down some key features of keyboard cleaning gel:
- Conforms to Shapes: The gel’s pliable nature allows it to reach into the tightest spaces between keys, ensuring thorough cleaning.
- Picks Up Debris: Its sticky texture effectively lifts dust, crumbs, and other particles from the keyboard surface.
- Reusable: Most keyboard cleaning gels can be used multiple times until they become saturated with dirt.
- Mess-Free: Unlike liquid cleaners, cleaning gel doesn’t drip or spill, making it a convenient option.
- Easy to Use: Simply press the gel onto the keyboard and peel it off – no special tools or techniques required.
- Versatile: Keyboard cleaning gel can also be used to clean other hard-to-reach areas, such as vents, remote controls, and car interiors.
- Scented Options: Many cleaning gels come in a variety of scents, adding a pleasant aroma to your workspace.
User Benefits of Keyboard Cleaning Gel
Keyboard cleaning gel offers several advantages for users:
- Convenience: It’s a quick and easy way to clean your keyboard without the need for multiple tools or solutions.
- Effectiveness: It effectively removes dust and debris from hard-to-reach areas.
- Hygienic: By removing dirt and germs, it helps create a cleaner and healthier workspace.
- Time-Saving: It’s a faster alternative to traditional cleaning methods.
- Aesthetic Appeal: A clean keyboard looks more professional and inviting.
Comprehensive Review of Keyboard Cleaning Gel
Keyboard cleaning gel is a popular and convenient option for maintaining a clean keyboard. Our testing shows that it effectively removes loose debris and dust from between the keys. However, it may not be as effective for removing stubborn grime or sticky residue.
User Experience & Usability: Keyboard cleaning gel is incredibly easy to use. Simply press it onto the keyboard, ensuring it makes contact with all the keys and crevices. Then, slowly peel it off. The gel conforms to the shape of the keys, making it easy to clean even the most difficult-to-reach areas. The process is quick, mess-free, and requires no special skills or tools.
Performance & Effectiveness: In our tests, keyboard cleaning gel performed well in removing loose dust, crumbs, and hair from the keyboard surface. It effectively picked up these particles and left the keyboard looking cleaner. However, it struggled to remove stubborn grime or sticky residue. For those types of messes, a more traditional cleaning method with isopropyl alcohol and cotton swabs may be necessary.
Pros:
- Easy to Use: The simple application process makes it accessible to anyone, regardless of technical skill.
- Mess-Free: Unlike liquid cleaners, cleaning gel doesn’t drip or spill, minimizing the risk of damage to your keyboard or surrounding area.
- Effective for Loose Debris: It excels at removing dust, crumbs, and hair from between the keys.
- Reusable: Most cleaning gels can be used multiple times until they become saturated with dirt, making them a cost-effective option.
- Pleasant Scent: Many cleaning gels come in a variety of scents, adding a pleasant aroma to your workspace.
Cons/Limitations:
- Not Effective for Stubborn Grime: It may not be powerful enough to remove sticky residue or ingrained dirt.
- Can Leave a Residue: In some cases, the gel may leave a slight residue on the keyboard surface, especially if it’s overused or not properly stored.
- Limited Lifespan: The gel’s effectiveness diminishes as it becomes saturated with dirt, requiring replacement after a certain number of uses.
- Potential for Damage: If not used carefully, the gel could potentially damage delicate components of the keyboard.
Ideal User Profile: Keyboard cleaning gel is best suited for users who want a quick and easy way to remove loose dust and debris from their keyboards. It’s a great option for maintaining a clean and hygienic workspace without the hassle of more involved cleaning methods.
Key Alternatives: Other options for cleaning keyboards include compressed air, microfiber cloths, isopropyl alcohol, and cotton swabs. These methods may be more effective for removing stubborn grime, but they also require more time and effort.
Expert Overall Verdict & Recommendation: Keyboard cleaning gel is a useful tool for maintaining a clean keyboard, particularly for removing loose dust and debris. However, it’s not a substitute for more thorough cleaning methods when dealing with stubborn grime or sticky residue. We recommend using it as part of a regular cleaning routine, in conjunction with other cleaning tools and techniques.
Insightful Q&A Section on Cleaning Keyboards Computer
- Q: How often should I clean my computer keyboard?
A: Ideally, you should clean your keyboard at least once a week to prevent the build-up of dust, crumbs, and germs. If you use your keyboard frequently or eat at your desk, you may need to clean it more often.
- Q: Can I use regular household cleaners on my keyboard?
A: No, you should avoid using regular household cleaners, as they can contain harsh chemicals that can damage the keyboard. Stick to isopropyl alcohol (70% or higher) and microfiber cloths.
- Q: What’s the best way to clean a spilled drink off my keyboard?
A: Immediately turn off your computer and unplug the keyboard. Turn the keyboard upside down to drain any excess liquid. Use a microfiber cloth to absorb as much liquid as possible. Then, use isopropyl alcohol and cotton swabs to clean around the affected keys. Allow the keyboard to dry completely before plugging it back in.
- Q: How do I clean a mechanical keyboard without damaging the switches?
A: Use compressed air and a small brush to clean around the switches. Avoid using excessive amounts of liquid. You can also lubricate the switches with a specialized keyboard lubricant after cleaning.
- Q: Is it safe to remove keycaps for cleaning?
A: Yes, it’s generally safe to remove keycaps for cleaning, but use a keycap puller to avoid damaging the switches or keycaps. Be careful not to lose any small parts.
- Q: How do I disinfect my keyboard to kill germs?
A: Use isopropyl alcohol (70% or higher) and a microfiber cloth to wipe down the keyboard surface. Alcohol is a powerful disinfectant that can kill most germs.
- Q: Can I put my keyboard in the dishwasher?
A: No, never put your keyboard in the dishwasher. This will almost certainly damage the internal components.
- Q: What’s the best way to prevent my keyboard from getting dirty in the first place?
A: Avoid eating at your desk, wash your hands regularly, and use a keyboard cover to protect it from dust and spills.
- Q: How do I clean a keyboard with non-removable keys?
A: Use compressed air, a microfiber cloth dampened with isopropyl alcohol, and cotton swabs to clean around the keys. Be careful not to get any liquid inside the keyboard.
- Q: Where can I find a good keycap puller for my mechanical keyboard?
A: Keycap pullers are available at most online retailers that sell computer accessories. Look for a wire keycap puller for the best results.
Conclusion & Strategic Call to Action
Maintaining a clean computer keyboard is essential for hygiene, performance, and longevity. By following the steps outlined in this guide, you can confidently tackle any keyboard cleaning challenge and create a healthier and more productive workspace. We’ve explored various cleaning methods, tools, and best practices, emphasizing the importance of regular keyboard maintenance. Remember, a clean keyboard is a happy keyboard, and a happy keyboard leads to a more enjoyable computing experience.
As technology evolves, so will the methods for cleaning keyboards computer. Staying informed about the latest tools and techniques will ensure that you can keep your keyboard in top condition for years to come.
Now that you’re armed with the knowledge to clean your keyboard effectively, we encourage you to share your own experiences and tips in the comments below. What are your favorite keyboard cleaning methods? What challenges have you faced, and how did you overcome them? Let’s create a community of keyboard cleaning experts and help each other maintain pristine and functional workspaces. If you are interested in more advanced cleaning solutions, explore our advanced guide to keyboard maintenance.
