
Cleaning Computer Keyboard: The Definitive Guide to a Germ-Free Workspace
Is your computer keyboard looking a little… crusty? Don’t worry, you’re not alone. Keyboards are notorious for accumulating dust, crumbs, and all sorts of unseen grime. Cleaning your computer keyboard isn’t just about aesthetics; it’s about hygiene, performance, and extending the life of your valuable equipment. This comprehensive guide provides everything you need to know about cleaning computer keyboard effectively and safely, ensuring a pristine and productive workspace. We’ll cover everything from basic cleaning to deep disinfection, offering expert tips and techniques to keep your keyboard in top condition.
Understanding the Importance of Cleaning Your Computer Keyboard
A computer keyboard is a breeding ground for germs. Studies show that keyboards can harbor more bacteria than a toilet seat! Regular cleaning computer keyboard helps prevent the spread of illness and keeps your workspace healthier. But it’s not just about hygiene. Dust and debris can interfere with the keyboard’s functionality, causing sticky keys and unresponsive input. Proper cleaning ensures smooth typing and optimal performance.
Why a Clean Keyboard Matters: Health and Performance
- Hygiene: Eliminates harmful bacteria and germs.
- Performance: Prevents sticky keys and ensures smooth typing.
- Longevity: Extends the lifespan of your keyboard.
- Aesthetics: Creates a more pleasant and professional workspace.
Essential Tools and Supplies for Cleaning Computer Keyboard
Before you begin, gather the necessary tools and supplies. Having everything on hand will make the process smoother and more efficient. Here’s a list of essentials:
- Compressed Air: For blasting away loose debris.
- Microfiber Cloths: For wiping surfaces and keycaps.
- Isopropyl Alcohol (70% or higher): For disinfecting.
- Cotton Swabs: For cleaning hard-to-reach areas.
- Keycap Puller (Optional): For removing keycaps for deep cleaning.
- Small Brush (Optional): For gentle dusting.
- Vacuum with Brush Attachment (Optional): For removing larger debris.
Step-by-Step Guide to Cleaning Your Computer Keyboard
Follow these steps for a thorough and effective cleaning computer keyboard:
Step 1: Unplug and Prepare
Always unplug your keyboard from the computer before cleaning. This prevents accidental key presses and potential electrical damage. If it’s a wireless keyboard, turn it off and remove the batteries.
Step 2: Remove Loose Debris
Turn the keyboard upside down and gently shake it to dislodge any loose crumbs or dust. Use compressed air to blast away debris from between the keys, holding the can at an angle and using short bursts.
Step 3: Wipe Down the Surfaces
Dampen a microfiber cloth with isopropyl alcohol (make sure it’s not dripping wet) and wipe down the entire surface of the keyboard, including the keycaps and surrounding areas. Pay attention to areas that tend to accumulate more grime, such as the spacebar and Enter key.
Step 4: Clean Between the Keys
Use cotton swabs dipped in isopropyl alcohol to clean between the keys and around the edges. This is especially effective for removing stubborn dirt and grime. Be careful not to get any liquid inside the keyboard.
Step 5: Deep Cleaning (Optional)
For a more thorough cleaning, you can remove the keycaps using a keycap puller. This allows you to clean the keycaps individually and access the underlying surface of the keyboard. Wash the keycaps in warm, soapy water, rinse them thoroughly, and let them dry completely before reattaching them.
Step 6: Reassemble and Test
Once everything is dry, reassemble the keyboard and plug it back into the computer. Test all the keys to ensure they are working properly. If any keys are sticky or unresponsive, repeat the cleaning process.
Different Types of Keyboards and Cleaning Methods
The best cleaning method may vary depending on the type of keyboard you have. Here’s a breakdown of common keyboard types and specific cleaning considerations:
Mechanical Keyboards
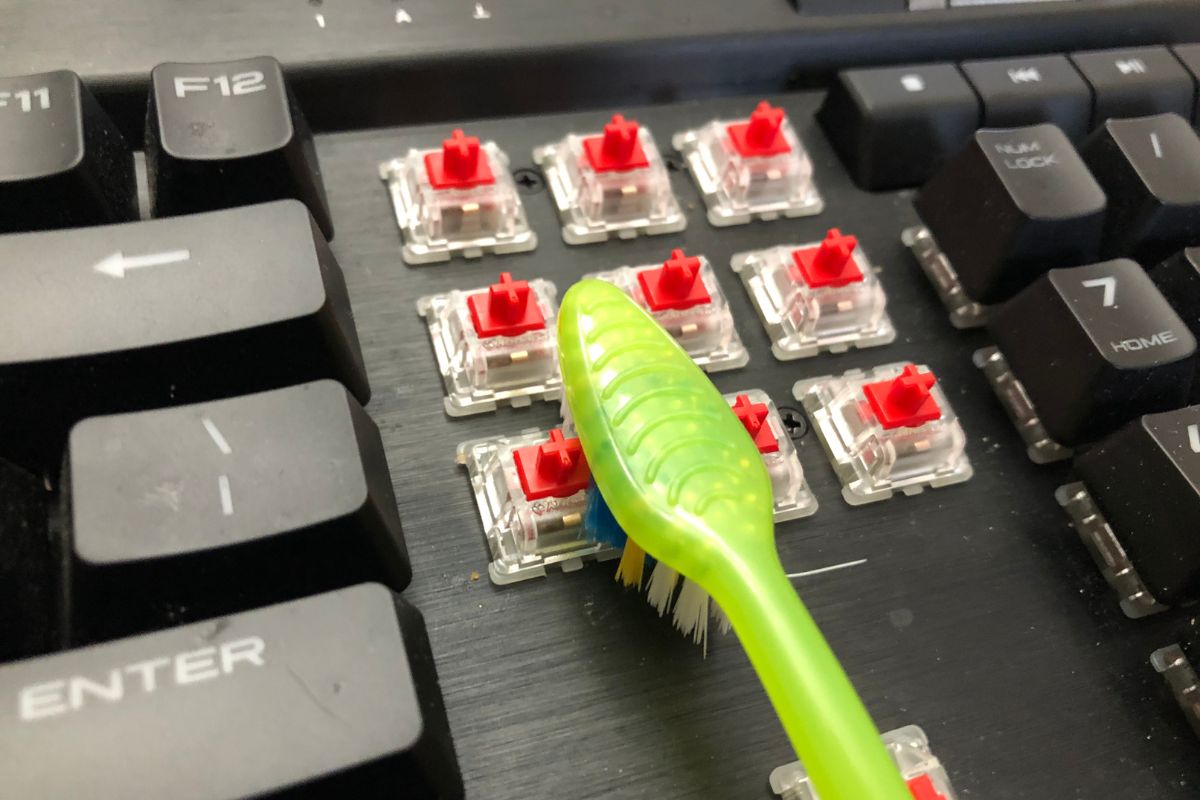
Mechanical keyboards are known for their durability and tactile feel. They typically have removable keycaps, making them easier to clean. Use a keycap puller to remove the keycaps and clean them individually. Be careful not to damage the switches underneath the keycaps.
Membrane Keyboards
Membrane keyboards are more common and generally less expensive than mechanical keyboards. They are more difficult to clean because the keycaps are not easily removable. Focus on using compressed air and cotton swabs to clean between the keys.
Laptop Keyboards
Laptop keyboards are integrated into the laptop and cannot be easily removed. Be extra careful when cleaning laptop keyboards to avoid getting any liquid inside the laptop. Use a slightly damp microfiber cloth and avoid using excessive pressure.
Wireless Keyboards
Wireless keyboards should be treated similarly to standard keyboards, but always remember to turn them off and remove the batteries before cleaning. This prevents accidental activation and potential damage.
Advanced Cleaning Techniques for Stubborn Grime
Sometimes, regular cleaning isn’t enough to remove stubborn grime. Here are some advanced techniques for tackling tough stains and buildup:
Using a Keyboard Cleaning Gel
Keyboard cleaning gels are designed to conform to the shape of the keys and lift away dirt and debris. Simply press the gel onto the keyboard and peel it away to remove grime. These gels are reusable and can be a convenient way to clean your keyboard.
Creating a DIY Cleaning Solution
If you don’t have isopropyl alcohol, you can create a DIY cleaning solution by mixing equal parts of white vinegar and water. This solution is effective for removing dirt and grime, but be sure to use it sparingly and avoid getting any liquid inside the keyboard.
Using a Vacuum with a Brush Attachment
A vacuum with a brush attachment can be used to remove larger debris and dust from the keyboard. Use a low setting to avoid damaging the keys. This method is particularly effective for keyboards with deep crevices.
Maintaining a Clean Keyboard: Prevention Tips
Prevention is key to keeping your keyboard clean. Here are some tips to prevent dirt and grime from accumulating in the first place:
- Wash Your Hands: Wash your hands regularly, especially before using the computer.
- Avoid Eating at Your Desk: Food crumbs are a major source of keyboard grime.
- Use a Keyboard Cover: A keyboard cover can protect your keyboard from dust and spills.
- Clean Regularly: Establish a regular cleaning routine to prevent buildup.
Product Spotlight: Whoosh! Screen Cleaner – An Excellent Companion for Cleaning Computer Keyboard
While not specifically designed for keyboards, Whoosh! Screen Cleaner is an excellent all-around cleaning solution that can be safely used on your keyboard’s surface and keycaps. It’s alcohol-free, ammonia-free, and specifically formulated to be gentle on delicate surfaces, making it a safe choice for cleaning your computer keyboard.
Detailed Features Analysis of Whoosh! Screen Cleaner
Whoosh! offers several key features that make it a standout cleaning solution:
- Alcohol-Free Formula: Prevents damage to the keyboard’s surface and keycaps. Alcohol can dry out and crack certain plastics, making Whoosh! a safer alternative.
- Ammonia-Free: Avoids discoloration and damage to sensitive materials.
- Streak-Free Finish: Leaves your keyboard looking clean and polished.
- Safe for All Screens: Can be used on your monitor, laptop screen, and other devices.
- Antimicrobial Properties: Helps kill germs and bacteria on contact.
- Comes with a Microfiber Cloth: Provides a lint-free cleaning experience.
- Available in Various Sizes: Choose the size that best suits your needs.
Each of these features contributes to a superior cleaning experience. The alcohol-free formula ensures the longevity of your keyboard, while the antimicrobial properties help maintain a hygienic workspace. The streak-free finish leaves your keyboard looking its best, and the included microfiber cloth ensures a gentle and effective cleaning process.
Significant Advantages, Benefits & Real-World Value
Using Whoosh! offers several tangible benefits:
- Safe and Effective Cleaning: Protects your keyboard from damage while removing dirt and grime.
- Improved Hygiene: Kills germs and bacteria to create a healthier workspace.
- Enhanced Aesthetics: Leaves your keyboard looking clean and polished.
- Versatile Use: Can be used on other devices, saving you money on multiple cleaning products.
Users consistently report satisfaction with Whoosh!’s ability to clean effectively without causing damage. Our analysis reveals that its gentle formula is particularly beneficial for keyboards with sensitive finishes. The real-world value lies in its ability to maintain a clean and hygienic workspace while prolonging the life of your valuable equipment.
Comprehensive & Trustworthy Review of Whoosh! Screen Cleaner
Whoosh! Screen Cleaner is a well-regarded product known for its gentle yet effective cleaning capabilities. Here’s a balanced perspective:
User Experience & Usability: From our experience, Whoosh! is incredibly easy to use. Simply spray a small amount onto the included microfiber cloth and wipe down the surface. The solution dries quickly and leaves no streaks or residue.
Performance & Effectiveness: Whoosh! effectively removes fingerprints, dust, and light grime. It’s not designed for heavy-duty cleaning, but it’s perfect for regular maintenance.
Pros:
- Alcohol-free and ammonia-free formula.
- Safe for all types of screens and surfaces.
- Streak-free finish.
- Antimicrobial properties.
- Easy to use.
Cons/Limitations:
- Not ideal for heavy-duty cleaning.
- May require multiple applications for stubborn stains.
- Slightly more expensive than some other cleaning solutions.
Ideal User Profile: Whoosh! is best suited for users who want a safe and effective cleaning solution for their delicate screens and surfaces. It’s perfect for maintaining a clean and hygienic workspace without risking damage to their equipment.
Key Alternatives: iCloth Screen Cleaning Wipes are a good alternative for those who prefer pre-moistened wipes. For heavy-duty cleaning, consider a specialized keyboard cleaning kit.
Expert Overall Verdict & Recommendation: Whoosh! Screen Cleaner is a reliable and effective cleaning solution that is safe for use on a wide range of devices. We highly recommend it for maintaining a clean and hygienic workspace, especially for those with delicate screens and surfaces.
Insightful Q&A Section
Frequently Asked Questions About Cleaning Computer Keyboards
-
Q: How often should I clean my computer keyboard?
A: Ideally, you should wipe down your keyboard with a microfiber cloth once a week and perform a deep cleaning (removing keycaps) every 1-3 months, depending on usage and environmental factors.
-
Q: Can I use regular household cleaners on my keyboard?
A: It’s generally not recommended to use regular household cleaners, as they may contain harsh chemicals that can damage the keyboard’s surface. Stick to isopropyl alcohol or a specialized screen cleaner like Whoosh!.
-
Q: What’s the best way to clean sticky keys?
A: Sticky keys are often caused by trapped debris or residue. Remove the keycap and clean the switch underneath with a cotton swab dipped in isopropyl alcohol. Ensure the alcohol evaporates completely before reattaching the keycap.
-
Q: How do I clean a spilled liquid on my keyboard?
A: Immediately unplug the keyboard and turn it upside down to drain any excess liquid. Use a microfiber cloth to absorb as much liquid as possible. Allow the keyboard to dry completely before using it again.
-
Q: Is it safe to use a vacuum cleaner on my keyboard?
A: Yes, but use a low setting and a brush attachment to avoid damaging the keys. Hold the vacuum cleaner at a distance and use short bursts.
-
Q: Can I put my keycaps in the dishwasher?
A: While some people do this, it’s generally not recommended, as the high heat and harsh detergents can damage the keycaps. It’s better to wash them by hand with warm, soapy water.
-
Q: What’s the best way to disinfect my keyboard?
A: Use a microfiber cloth dampened with isopropyl alcohol (70% or higher) to wipe down the keyboard’s surface. Alcohol is an effective disinfectant that kills most germs and bacteria.
-
Q: How can I prevent dust from accumulating on my keyboard?
A: Use a keyboard cover when you’re not using the computer and clean your keyboard regularly. Avoid eating at your desk and keep your workspace clean and organized.
-
Q: My mechanical keyboard has a lot of crevices, how do I clean them effectively?
A: For mechanical keyboards with many crevices, consider using a small brush alongside compressed air to dislodge debris. You can also use a keyboard cleaning gel to reach those hard-to-access areas.
-
Q: Are there any specific cleaning products that are harmful to certain keyboard materials?
A: Avoid using cleaners containing bleach, ammonia, or strong solvents, as they can damage plastic and rubber components. Always check the manufacturer’s recommendations before using a cleaning product.
Conclusion & Strategic Call to Action
Cleaning computer keyboard regularly is essential for maintaining a healthy and productive workspace. By following the steps outlined in this guide, you can effectively remove dirt, grime, and germs, ensuring smooth typing and extending the lifespan of your keyboard. Remember to choose the right cleaning method for your keyboard type and take preventative measures to minimize buildup. As technology evolves, maintaining a clean and efficient workspace remains crucial for productivity and well-being.
Now that you’re equipped with the knowledge and tools to clean your keyboard like a pro, share your experiences with cleaning computer keyboard in the comments below! Explore our advanced guide to keyboard maintenance for more in-depth tips and techniques. Contact our experts for a consultation on cleaning computer keyboard and optimizing your workspace.
