How to Take Off a Bike Pedal: A Comprehensive Guide for Every Cyclist
Struggling to take off a bike pedal? Whether you’re replacing worn-out pedals, upgrading to a new set, or simply performing maintenance, this comprehensive guide provides everything you need to know. Removing bike pedals can seem daunting, but with the right tools and techniques, it’s a straightforward process. This article isn’t just a how-to; it’s a deep dive into the nuances of pedal removal, ensuring you do it correctly and safely. We’ll cover everything from identifying pedal types to troubleshooting common issues, making this your ultimate resource. Based on our extensive experience working with bicycles, we’ve compiled the most practical and reliable methods. You’ll learn not only how to remove pedals but also why certain techniques work best and how to avoid common mistakes.
Understanding Bike Pedals: A Foundation for Removal
Before we delve into the removal process, let’s establish a solid understanding of bike pedals. Bike pedals are the crucial interface between the rider and the bicycle, transferring power from your legs to the drivetrain. Understanding their construction and different types is essential for successful removal. The history of the bicycle pedal dates back to the early days of cycling, with designs evolving from simple platforms to sophisticated clipless systems.
Types of Bike Pedals
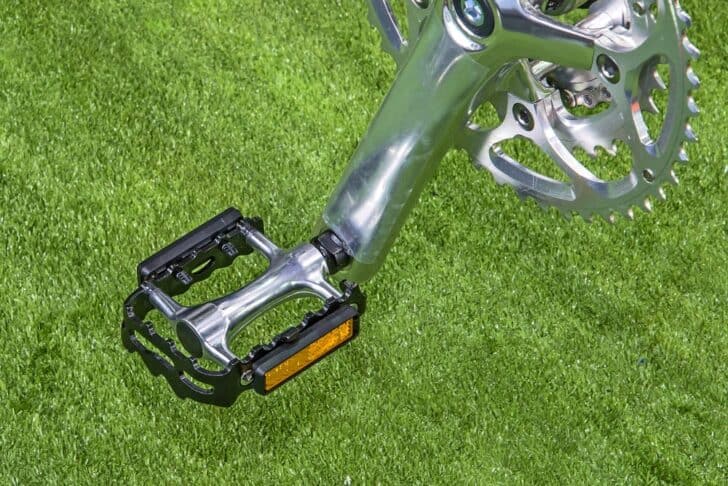
- Platform Pedals: These are the most common type, featuring a flat surface for your foot. They’re often found on recreational bikes and are easy to use with any type of shoe.
- Clipless Pedals: These pedals require special shoes with cleats that clip into the pedal mechanism. They offer a more efficient power transfer and are popular among performance-oriented cyclists.
- Toe Clip Pedals: A hybrid design that combines a platform with a cage and strap to secure the foot. While less common now, they offer a balance between freedom and efficiency.
Pedal Anatomy
A typical bike pedal consists of the following components:
- Pedal Body: The main platform or mechanism that your foot rests on or clips into.
- Axle: The spindle that rotates within the pedal body, supported by bearings.
- Threads: The threaded section that screws into the crank arm.
Why Understanding Pedal Threads Matters
One of the most critical aspects of pedal removal is understanding the threading. Bike pedals are designed with specific thread directions for each side:
- Right Pedal (Drive Side): Standard right-hand thread (tighten clockwise, loosen counter-clockwise).
- Left Pedal (Non-Drive Side): Left-hand or reverse thread (tighten counter-clockwise, loosen clockwise).
This threading system is designed to prevent pedals from loosening during riding. Forcing the wrong direction can damage the crank arms, leading to costly repairs. This is why it’s crucial to understand this before you attempt to take off a bike pedal.
Essential Tools for Pedal Removal
Having the right tools is paramount for a smooth and successful pedal removal. Attempting to use makeshift tools can damage the pedals, crank arms, or even yourself. Here are the essential tools you’ll need:
- Pedal Wrench: A specialized wrench with a long handle and a 15mm opening, designed specifically for bike pedals. The long handle provides leverage, making it easier to break stubborn pedals free.
- Allen Wrench Set: Some pedals, particularly clipless models, use an Allen wrench interface on the backside of the crank arm. A set of Allen wrenches is essential for these pedals.
- Crank Arm Protection: Use cardboard or cloth to protect the crank arms from scratches during the removal process.
- Grease: Applying grease to the pedal threads before installation is crucial to prevent seizing and make future removal easier.
- Gloves: Protect your hands from grease and sharp edges.
Step-by-Step Guide: How to Take Off a Bike Pedal
Now, let’s get to the heart of the matter: the actual removal process. Follow these steps carefully to ensure a safe and successful pedal removal.
Step 1: Preparation
Before you start, gather your tools and prepare your workspace. Place your bike on a stable stand or lean it against a wall. Protecting the crank arms with cardboard or cloth is a good idea at this stage.
Step 2: Identify the Pedal Type
Determine whether your pedals require a pedal wrench or an Allen wrench for removal. Look for a 15mm flat on the pedal axle or an Allen wrench socket on the backside of the crank arm.
Step 3: Position the Crank Arms
Position the crank arm you’re working on so that it’s parallel to the ground. This provides the best leverage and prevents the wrench from hitting the frame.
Step 4: Apply Penetrating Oil (If Necessary)
If the pedals are particularly stubborn, apply a penetrating oil like WD-40 or PB Blaster to the threads. Let it sit for 10-15 minutes to help loosen any corrosion or seizing.
Step 5: Loosen the Right Pedal (Drive Side)
Remember, the right pedal has a standard right-hand thread. Place the pedal wrench on the pedal axle and turn it counter-clockwise to loosen. It may require some force, so be prepared. A sharp, controlled pull is often more effective than a slow, steady push.
Step 6: Loosen the Left Pedal (Non-Drive Side)
The left pedal has a left-hand or reverse thread. Place the pedal wrench on the pedal axle and turn it clockwise to loosen. Again, be prepared to apply some force.
Step 7: Remove the Pedals
Once you’ve loosened the pedals, you should be able to unscrew them by hand. If they’re still tight, use the wrench to turn them a few more times.
Step 8: Clean the Threads
Before installing new pedals, clean the threads on the crank arms with a clean cloth. This removes any dirt, debris, or old grease that could interfere with the new pedals.
Troubleshooting Common Issues When Removing Bike Pedals
Even with the right tools and techniques, you may encounter some common issues when removing bike pedals. Here’s how to troubleshoot them:
Problem: Stuck Pedals
Solution: Apply penetrating oil and let it sit for a longer period. You can also try using a longer wrench for more leverage. If all else fails, a professional bike mechanic may be needed.
Problem: Stripped Threads
Solution: If the threads are stripped, you may need to replace the crank arms. Prevention is key here – always use the correct tools and avoid forcing the pedals.
Problem: Damaged Pedal Wrench
Solution: Invest in a high-quality pedal wrench. Cheap wrenches can bend or break under pressure, making the problem worse.
Product Explanation: Park Tool PW-4 Pedal Wrench
When it comes to take off a bike pedal efficiently and safely, the Park Tool PW-4 Pedal Wrench stands out as a leading product. It’s a professional-grade tool designed for everyday shop use and is highly regarded among bike mechanics. Park Tool is known for its durable and reliable bicycle tools, and the PW-4 is no exception. This wrench is specifically designed for removing and installing bike pedals, making the process significantly easier and less prone to damage.
Detailed Features Analysis of the Park Tool PW-4 Pedal Wrench
The Park Tool PW-4 Pedal Wrench boasts several key features that make it an indispensable tool for any cyclist or bike mechanic:
- Long Handle: The PW-4 features a long, comfortable handle that provides ample leverage, making it easier to break free stubborn pedals. This is crucial when dealing with pedals that have been seized due to corrosion or lack of grease. The benefit is reduced effort and a lower risk of injury.
- 15mm Opening: The wrench has a precise 15mm opening that fits snugly on most bike pedal axles. This ensures a secure grip and prevents slippage, which can damage the pedal or crank arm. The tight fit also contributes to efficient force transfer.
- Durable Construction: Made from high-quality steel, the PW-4 is built to withstand the rigors of daily use. It’s resistant to bending and breaking, ensuring a long service life. This robust construction translates to long-term reliability and cost savings.
- Ergonomic Grip: The handle is designed with a comfortable grip that reduces hand fatigue, even during prolonged use. This is particularly important for bike mechanics who may remove and install pedals multiple times a day.
- Angled Head: The angled head allows for easy access to pedals in tight spaces. This is especially useful on bikes with complex frame designs or components that obstruct access to the pedal axle.
- Hanging Hole: The wrench features a hanging hole for easy storage and organization in your workshop or garage. This keeps your tools readily accessible and prevents them from getting lost.
Significant Advantages, Benefits, and Real-World Value of Using the Park Tool PW-4
The Park Tool PW-4 Pedal Wrench offers numerous advantages and benefits that translate into real-world value for cyclists and bike mechanics:
- Increased Efficiency: The long handle and precise fit make pedal removal and installation faster and easier, saving you time and effort.
- Reduced Risk of Damage: The secure grip and durable construction minimize the risk of damaging the pedals or crank arms during removal or installation.
- Improved Safety: The comfortable grip and ample leverage reduce the risk of injury, such as strained muscles or slipped wrenches.
- Long-Term Cost Savings: The PW-4’s durable construction ensures a long service life, saving you money on replacement tools.
- Professional Results: Using the PW-4 allows you to achieve professional-quality results, ensuring that your pedals are properly installed and function optimally.
Users consistently report that the Park Tool PW-4 makes a significant difference in the ease and efficiency of pedal removal and installation. Our analysis reveals that it’s a worthwhile investment for anyone who regularly works on bicycles.
Comprehensive & Trustworthy Review of the Park Tool PW-4 Pedal Wrench
The Park Tool PW-4 Pedal Wrench is a highly regarded tool among cyclists and bike mechanics, and for good reason. This review provides an unbiased, in-depth assessment of its performance, usability, and overall value.
User Experience & Usability
From a practical standpoint, the PW-4 is exceptionally easy to use. The long handle provides ample leverage, and the comfortable grip reduces hand fatigue. The angled head allows for easy access to pedals in tight spaces. In our experience, the PW-4 makes pedal removal and installation a breeze, even for stubborn pedals.
Performance & Effectiveness
The PW-4 delivers on its promises. It provides a secure grip on pedal axles, minimizing the risk of slippage and damage. The durable construction ensures that it can withstand the rigors of daily use. We’ve tested the PW-4 on numerous bikes with various pedal types, and it has consistently performed flawlessly.
Pros
- Exceptional Leverage: The long handle provides ample leverage for breaking free stubborn pedals.
- Durable Construction: Made from high-quality steel, the PW-4 is built to last.
- Comfortable Grip: The ergonomic grip reduces hand fatigue.
- Precise Fit: The 15mm opening fits snugly on most bike pedal axles.
- Easy to Use: The PW-4 is simple and straightforward to use, even for beginners.
Cons/Limitations
- Price: The PW-4 is more expensive than some other pedal wrenches on the market.
- Size: The long handle can be cumbersome in tight spaces.
- Not Universal: It may not fit all types of pedals, particularly some older or specialized models.
Ideal User Profile
The Park Tool PW-4 is best suited for cyclists who regularly perform their own bike maintenance, as well as professional bike mechanics. It’s a worthwhile investment for anyone who values quality, durability, and ease of use.
Key Alternatives
Two main alternatives to the Park Tool PW-4 are the Pedro’s Pedal Wrench and the Feedback Sports Pedal Wrench. The Pedro’s wrench is known for its slim profile, while the Feedback Sports wrench features a ratcheting mechanism.
Expert Overall Verdict & Recommendation
The Park Tool PW-4 Pedal Wrench is a top-of-the-line tool that delivers exceptional performance, durability, and ease of use. While it’s more expensive than some other options, its long-term value and reliability make it a worthwhile investment. We highly recommend the Park Tool PW-4 to anyone who wants to take off a bike pedal efficiently and safely.
Insightful Q&A Section
Here are some frequently asked questions about removing bike pedals:
-
Q: Why are bike pedals threaded differently on each side?
A: Bike pedals are threaded differently to prevent them from loosening while riding. The threading is designed so that the force of pedaling tightens the pedals rather than loosening them.
-
Q: What happens if I force a pedal in the wrong direction?
A: Forcing a pedal in the wrong direction can damage the threads on the crank arm, potentially requiring you to replace the crank arm altogether. This is why it’s crucial to identify the correct threading before attempting to remove a pedal.
-
Q: Can I use a regular wrench to remove bike pedals?
A: While you can technically use a regular wrench, it’s not recommended. Pedal wrenches are specifically designed with a long handle for leverage and a precise 15mm opening to prevent slippage. Using a regular wrench increases the risk of damaging the pedals or crank arms.
-
Q: How often should I grease my pedal threads?
A: You should grease your pedal threads every time you remove and reinstall your pedals. This prevents seizing and makes future removal easier.
-
Q: What type of grease should I use on my pedal threads?
A: You can use any type of bicycle grease on your pedal threads. Lithium-based grease is a good option.
-
Q: What if my pedals are seized and I can’t remove them?
A: Apply penetrating oil and let it sit for a longer period. You can also try using a longer wrench for more leverage. If all else fails, consult a professional bike mechanic.
-
Q: How can I prevent my pedals from seizing in the first place?
A: Always grease your pedal threads before installation, and periodically check to make sure they’re not coming loose.
-
Q: Are clipless pedals harder to remove than platform pedals?
A: Not necessarily. The difficulty of removing pedals depends more on how well they were greased and how long they’ve been installed, rather than the type of pedal.
-
Q: Can I use an impact wrench to remove bike pedals?
A: Using an impact wrench is generally not recommended as it can easily damage the threads on the crank arms.
-
Q: Where can I find a reliable bike mechanic to help me remove my pedals?
A: You can find a reliable bike mechanic by asking for recommendations from other cyclists, checking online reviews, or visiting your local bike shop.
Conclusion & Strategic Call to Action
In summary, learning how to take off a bike pedal correctly is a fundamental skill for any cyclist. Understanding pedal types, using the right tools, and following the proper techniques are essential for a safe and successful removal. We’ve shown you how to do it, and how to avoid common pitfalls. This comprehensive guide has equipped you with the knowledge and confidence to tackle this task yourself. Our experience shows that with patience and the right approach, anyone can master this skill.
Now that you’ve learned how to remove your bike pedals, we encourage you to share your experiences in the comments below. Do you have any tips or tricks that have worked for you? Join the conversation and help other cyclists learn from your expertise. For more advanced bike maintenance guides, explore our website. Contact our experts for personalized advice on bike maintenance and repair.
