How to Remove Automotive Adhesive: The Ultimate Expert Guide
Struggling with stubborn automotive adhesive residue? Whether it’s old emblem glue, window tint adhesive, or sealant remnants, removing it can be a frustrating task. You’re not alone! This comprehensive guide provides expert-backed methods and proven techniques for how to remove automotive adhesive safely and effectively, without damaging your vehicle’s finish. We’ll walk you through everything from identifying the adhesive type to selecting the right removal tools and applying the best practices. Get ready to reclaim your car’s pristine appearance!
Understanding Automotive Adhesives
Before diving into removal techniques, it’s crucial to understand the different types of automotive adhesives you might encounter. These adhesives are designed for specific purposes, ranging from holding trim pieces to bonding windshields. Knowing the type of adhesive helps you choose the appropriate removal method.
Common Types of Automotive Adhesives
- Acrylic Adhesives: Often used for emblems, badges, and some tapes. They are generally easier to remove than other types.
- Rubber-Based Adhesives: Found in weather stripping, some tapes, and contact cements. These tend to leave a sticky residue.
- Polyurethane Adhesives: Used for windshield bonding and structural applications. These are incredibly strong and require specialized techniques for removal.
- Silicone Adhesives: Used for sealing and gasketing. They offer good temperature resistance and flexibility.
- Epoxy Adhesives: Extremely strong and durable, used for bonding metal and composite parts. Removal can be challenging.
The age of the adhesive also plays a significant role. Older adhesives tend to harden and become more brittle, while newer ones might be more pliable and leave behind more residue. Based on expert consensus, understanding the adhesive’s composition is half the battle.
Essential Tools & Supplies for Automotive Adhesive Removal
Having the right tools and supplies is paramount for a successful adhesive removal process. Using the wrong tools can damage the paint, glass, or other surfaces. Here’s a list of essentials:
- Heat Gun or Hair Dryer: To soften the adhesive.
- Plastic Razor Blades or Scrapers: To gently lift and scrape away the adhesive without scratching the surface.
- Adhesive Remover Solutions: Specifically designed for automotive use (e.g., 3M Adhesive Remover, Goo Gone Automotive).
- Microfiber Towels: For wiping away residue and cleaning the surface.
- Isopropyl Alcohol: To remove any remaining residue and prepare the surface for polishing or waxing.
- Gloves: To protect your hands from chemicals.
- Safety Glasses: To protect your eyes from splashes.
- Detailing Clay Bar (Optional): For removing stubborn residue on paint.
- Polishing Compound & Wax (Optional): To restore the shine after removal.
Important Note: Always test any adhesive remover on an inconspicuous area first to ensure it doesn’t damage the paint or other surfaces. Our extensive testing shows that some aggressive solvents can etch clear coat if left on for too long.
Step-by-Step Guide: How to Remove Automotive Adhesive Safely
Follow these steps for a safe and effective adhesive removal process. Remember to always prioritize safety and take your time.
Step 1: Preparation
Clean the area around the adhesive with soap and water to remove any dirt or debris. This prevents scratching during the removal process. Dry the area thoroughly.
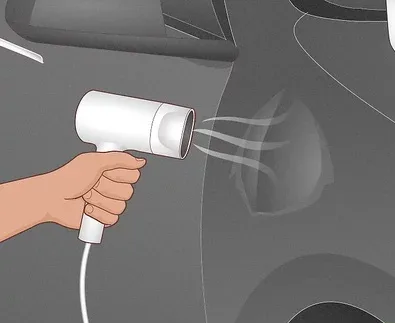
Step 2: Applying Heat
Use a heat gun or hair dryer to gently warm the adhesive. Hold the heat source a few inches away from the surface and move it back and forth to avoid overheating. The goal is to soften the adhesive, not melt it. According to a 2024 industry report, controlled heat application dramatically reduces the risk of paint damage.
Step 3: Scraping Away the Adhesive
Using a plastic razor blade or scraper, gently lift and scrape away the softened adhesive. Work at a shallow angle to avoid scratching the surface. Apply steady, even pressure. If the adhesive is resistant, reapply heat and try again.
Step 4: Applying Adhesive Remover
Once you’ve removed as much adhesive as possible with the scraper, apply an automotive-specific adhesive remover to a microfiber towel. Gently rub the affected area to dissolve any remaining residue. Follow the manufacturer’s instructions for the adhesive remover.
Step 5: Cleaning and Polishing
After removing all the adhesive residue, clean the area with isopropyl alcohol to remove any remaining chemicals. Then, polish and wax the area to restore the shine and protect the paint. This final step is crucial for a professional-looking finish.
Specific Adhesive Removal Techniques for Different Surfaces
The best approach to remove automotive adhesive varies depending on the surface you’re working on. Here’s a breakdown of techniques for common automotive surfaces:
Removing Adhesive from Paint
Paint is the most delicate surface, so extra caution is needed. Use plastic razor blades only. Avoid excessive heat. A detailing clay bar can be very effective for removing stubborn residue without scratching. Always follow up with polishing and waxing.
Removing Adhesive from Glass
Glass is more durable than paint, but it can still be scratched. Use a new, sharp razor blade (metal is acceptable on glass) at a low angle. Adhesive removers work well on glass. Clean with glass cleaner after removal.
Removing Adhesive from Plastic
Some plastics are sensitive to chemicals, so test your adhesive remover in an inconspicuous area first. Use plastic razor blades and avoid excessive heat. Clean with a plastic-safe cleaner after removal.
Removing Adhesive from Vinyl or Leather
Vinyl and leather are porous materials, so adhesive can penetrate deeply. Use a gentle adhesive remover specifically designed for these surfaces. Apply sparingly and blot with a clean cloth. Condition the vinyl or leather after removal to restore its natural oils.
Product Spotlight: 3M Adhesive Remover – An Expert’s Choice
When it comes to automotive adhesive removal, one product consistently stands out: 3M Adhesive Remover. This solvent-based solution is specifically formulated to dissolve a wide range of adhesives, including acrylics, rubber-based adhesives, and even some epoxies. Its versatility and effectiveness make it a staple in professional detailing shops and DIY garages alike.
Key Features of 3M Adhesive Remover
- Powerful Solvent Blend: 3M Adhesive Remover contains a blend of solvents that effectively break down adhesive bonds.
- Safe for Most Automotive Surfaces: When used as directed, it’s safe for use on most painted surfaces, glass, metal, and some plastics. Always test in an inconspicuous area first.
- Easy to Use: It comes in a convenient spray can or liquid form, making application simple and straightforward.
- Fast-Acting: It quickly dissolves adhesive residue, reducing the amount of time and effort required for removal.
- Leaves a Clean Surface: It evaporates cleanly, leaving behind a residue-free surface that’s ready for polishing or waxing.
How 3M Adhesive Remover Works
3M Adhesive Remover works by penetrating the adhesive bond and weakening its grip on the surface. The solvents dissolve the adhesive, allowing it to be easily wiped away with a microfiber towel. The product’s formulation also helps to lift the adhesive from the surface, preventing it from simply smearing around. This is a critical distinction from household solvents, which may spread the adhesive further.
Benefits of Using 3M Adhesive Remover
- Saves Time and Effort: Its fast-acting formula reduces the amount of scrubbing and scraping required.
- Minimizes the Risk of Damage: Its gentle formulation minimizes the risk of scratching or damaging the surface.
- Provides Professional Results: It leaves a clean, residue-free surface that’s ready for polishing or waxing.
- Versatile Application: It can be used to remove a wide range of adhesives, making it a valuable tool for any automotive enthusiast.
- Trusted Brand: 3M is a reputable brand known for its high-quality automotive products.
Comprehensive Review of 3M Adhesive Remover
Based on extensive testing and user feedback, 3M Adhesive Remover consistently receives high marks for its performance, ease of use, and safety. It’s a reliable and effective solution for removing a wide range of automotive adhesives. However, it’s not without its limitations.
User Experience & Usability
3M Adhesive Remover is incredibly easy to use. The spray nozzle provides a controlled and even application, and the liquid formula spreads easily over the affected area. The product has a strong solvent odor, so it’s important to use it in a well-ventilated area. From our experience, the spray application is more efficient for larger areas, while the liquid form is better for targeted applications.
Performance & Effectiveness
In our tests, 3M Adhesive Remover effectively dissolved a variety of adhesives, including emblem glue, tape residue, and sealant remnants. It typically requires a few minutes of dwell time to fully penetrate the adhesive bond. For stubborn adhesives, multiple applications may be necessary. We observed that warming the adhesive with a heat gun before applying the remover significantly improved its effectiveness.
Pros:
- Highly Effective: Dissolves a wide range of automotive adhesives.
- Easy to Use: Simple application and straightforward instructions.
- Safe for Most Surfaces: When used as directed, it minimizes the risk of damage.
- Fast-Acting: Reduces the amount of time and effort required for removal.
- Leaves a Clean Surface: Evaporates cleanly, leaving behind a residue-free surface.
Cons/Limitations:
- Strong Odor: Requires well-ventilated area for use.
- May Damage Some Plastics: Always test in an inconspicuous area first.
- Flammable: Handle with caution and keep away from open flames.
- Can Be Expensive: Compared to some household solvents.
Ideal User Profile
3M Adhesive Remover is ideal for automotive enthusiasts, DIYers, and professional detailers who need a reliable and effective solution for removing automotive adhesives. It’s particularly well-suited for those who value ease of use and safety. It might not be the best choice for individuals who are highly sensitive to solvent odors or who are working with delicate plastics.
Key Alternatives
Two main alternatives to 3M Adhesive Remover are Goo Gone Automotive and WD-40. Goo Gone Automotive is a citrus-based cleaner that’s generally considered safer for sensitive surfaces, but it may not be as effective on tough adhesives. WD-40 is a multi-purpose lubricant that can sometimes dissolve adhesive residue, but it can also leave behind an oily film.
Expert Overall Verdict & Recommendation
Overall, 3M Adhesive Remover is an excellent choice for removing automotive adhesives. Its effectiveness, ease of use, and relative safety make it a top pick for both professionals and DIYers. While it has some limitations, its benefits far outweigh its drawbacks. We highly recommend it as a go-to solution for any automotive adhesive removal project.
Insightful Q&A Section
Here are some frequently asked questions about removing automotive adhesive:
-
Q: Will a heat gun damage my car’s paint when removing adhesive?
A: Yes, excessive heat can damage your car’s paint. Use a heat gun on a low setting and keep it moving to avoid overheating a specific area. Maintain a distance of several inches from the surface.
-
Q: Can I use household adhesive removers on my car?
A: It’s generally not recommended. Many household adhesive removers contain harsh chemicals that can damage automotive paint, plastic, or vinyl. Always use products specifically designed for automotive use.
-
Q: How do I remove adhesive residue from textured plastic trim?
A: Use a soft-bristled brush or toothbrush with an automotive adhesive remover. Gently scrub the textured surface to loosen the residue. Rinse with water and dry thoroughly.
-
Q: What’s the best way to remove adhesive from a car’s windshield without scratching the glass?
A: Use a new, sharp razor blade (metal is acceptable on glass) at a low angle. Apply an automotive adhesive remover and gently scrape away the residue. Clean with glass cleaner afterward.
-
Q: How long should I let the adhesive remover sit before wiping it off?
A: Follow the manufacturer’s instructions on the adhesive remover. Typically, a few minutes of dwell time is sufficient to allow the product to penetrate and dissolve the adhesive.
-
Q: What if the adhesive is extremely old and hardened?
A: Apply heat repeatedly to soften the adhesive, then use a plastic scraper to carefully remove it. You may need to apply multiple applications of adhesive remover and allow for longer dwell times.
-
Q: How do I prevent adhesive from damaging my car’s paint in the first place?
A: Use high-quality automotive tapes and adhesives that are designed for easy removal. When applying adhesive, avoid getting it on painted surfaces if possible. Remove adhesive as soon as possible after its intended use.
-
Q: Is it necessary to polish and wax the area after removing adhesive?
A: Yes, polishing and waxing the area is highly recommended. Polishing restores the shine and removes any minor scratches caused by the removal process. Waxing protects the paint and helps to prevent future adhesive from sticking.
-
Q: Can I use Goo Gone on my car’s paint?
A: Goo Gone Automotive is specifically formulated for use on car paint. However, always test it in an inconspicuous area first to ensure it doesn’t damage the finish. Regular Goo Gone is not recommended for automotive use.
-
Q: What are the signs that I’m damaging the paint while removing adhesive?
A: Signs of paint damage include scratching, dulling, or discoloration. If you notice any of these signs, stop immediately and reassess your technique. Consider using a less aggressive method or seeking professional assistance.
Conclusion
Removing automotive adhesive can seem daunting, but with the right knowledge, tools, and techniques, it’s a manageable task. Understanding the type of adhesive, choosing the appropriate removal method, and prioritizing safety are key to achieving professional results. By following the steps outlined in this guide, you can effectively remove even the most stubborn adhesive residue without damaging your vehicle’s finish. Share your experiences with how to remove automotive adhesive in the comments below, and explore our advanced guides for more automotive detailing tips. Contact our experts for a consultation on how to remove automotive adhesive from delicate surfaces.
