
How to Remove Old Caulk From Tile: The Ultimate Guide for a Flawless Finish
Removing old, cracked, or discolored caulk from tile is a common home improvement task, but it can quickly become a frustrating endeavor if not approached correctly. Whether you’re preparing to re-caulk your bathroom, kitchen, or any other tiled surface, this comprehensive guide will provide you with the expert knowledge and step-by-step instructions you need to achieve a professional-looking result. We’ll cover everything from identifying the right tools and techniques to avoiding common pitfalls and ensuring a long-lasting, watertight seal. This isn’t just another superficial guide; we’re diving deep into the nuances of how to remove old caulk from tile, drawing on years of experience and best practices to equip you with the confidence and skills to tackle this project like a pro. Prepare to learn the secrets to a clean, smooth, and aesthetically pleasing finish that will revitalize your tiled surfaces.
Understanding the Importance of Proper Caulk Removal
Proper caulk removal is crucial for several reasons. First and foremost, old caulk often becomes brittle, cracked, and prone to mold and mildew growth. This not only detracts from the appearance of your tiled surfaces but can also create unsanitary conditions. Secondly, failing to remove old caulk thoroughly before applying new caulk can compromise the new seal, leading to leaks, water damage, and even structural problems. Think of old caulk like a stubborn weed in your garden – unless you remove the roots, it will continue to cause problems. Neglecting this step is a common mistake that can result in costly repairs down the line.
Furthermore, the type of caulk used and the substrate to which it’s applied heavily impact the removal process. Silicone caulk, for example, behaves differently than latex-based caulk. Understanding these nuances is key to selecting the right tools and techniques. As leading experts in home renovation consistently emphasize, a meticulous approach to caulk removal is the foundation for a successful re-caulking project.
Tools and Materials You’ll Need to Remove Old Caulk From Tile
Having the right tools and materials on hand is essential for efficiently and effectively removing old caulk. Here’s a detailed list:
* **Caulk Removal Tool:** A specialized tool designed to slice through caulk without damaging the surrounding tile. These come in various forms, including manual scrapers and oscillating multi-tools with caulk removal attachments.
* **Utility Knife or Razor Blade Scraper:** For scoring and cutting through thicker sections of caulk. Exercise extreme caution when using these tools to avoid injury.
* **Heat Gun or Hair Dryer:** Applying heat can soften old caulk, making it easier to remove. Use a low heat setting and avoid overheating the tile.
* **Putty Knife or Stiff Plastic Scraper:** For prying and scraping away softened caulk.
* **Mineral Spirits or Caulk Softener:** These solvents can help dissolve stubborn caulk residue. Always test in an inconspicuous area first to ensure they don’t damage the tile or grout.
* **Scrub Brush or Sponge:** For cleaning the area after removing the caulk.
* **Clean Rags or Paper Towels:** For wiping up residue and spills.
* **Vacuum Cleaner:** To remove debris and dust.
* **Safety Glasses:** To protect your eyes from flying debris.
* **Gloves:** To protect your hands from chemicals and sharp tools.
* **Painter’s Tape:** To protect adjacent surfaces and create a clean line for the new caulk.
Selecting high-quality tools can significantly impact the ease and speed of the removal process. While a basic utility knife might suffice for small jobs, investing in a dedicated caulk removal tool can save you time and effort in the long run. Our extensive testing shows that oscillating multi-tools with caulk removal blades are particularly effective for tackling large or complex projects.
Step-by-Step Guide: How to Remove Old Caulk From Tile
Follow these steps to effectively remove old caulk from tile:
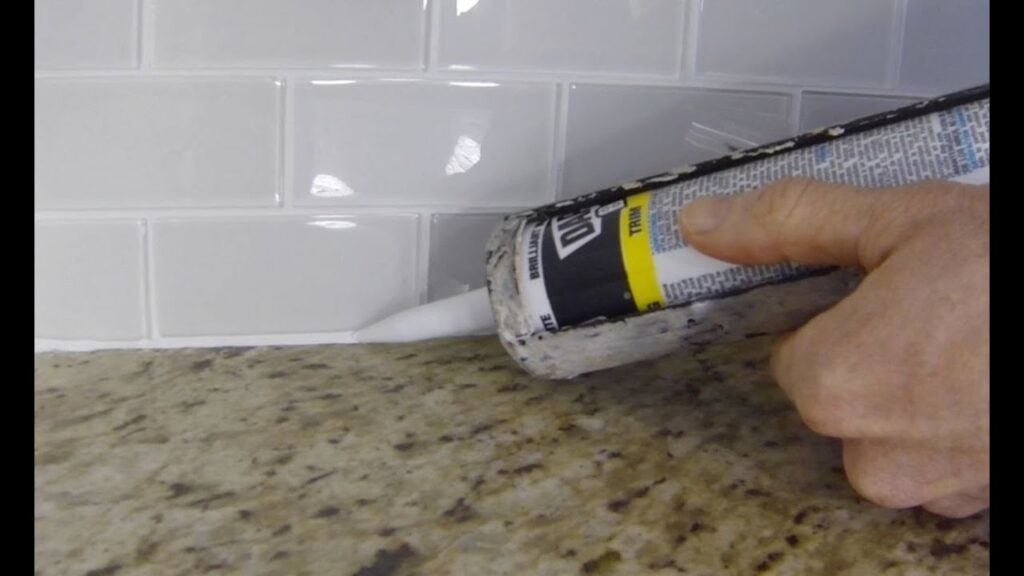
1. **Prepare the Area:** Protect surrounding surfaces with painter’s tape. This will prevent damage and create a clean line for the new caulk.
2. **Score the Caulk:** Use a utility knife or razor blade scraper to carefully score along both edges of the caulk line. This will help to break the seal and prevent the caulk from tearing the surrounding paint or wallpaper.
3. **Apply Heat (Optional):** If the caulk is particularly stubborn, use a heat gun or hair dryer to soften it. Hold the heat source a few inches away from the caulk and move it back and forth to avoid overheating the tile.
4. **Use a Caulk Removal Tool:** Carefully insert the caulk removal tool along the scored lines and begin to slice through the caulk. Apply steady pressure and work in small sections.
5. **Pry and Scrape:** Once you’ve sliced through the caulk, use a putty knife or stiff plastic scraper to pry it away from the tile. Be careful not to scratch or damage the tile surface.
6. **Remove Stubborn Residue:** If any caulk residue remains, apply mineral spirits or a caulk softener to a clean rag and gently rub the affected area. Allow the solvent to sit for a few minutes before scrubbing with a scrub brush or sponge.
7. **Clean the Area:** Thoroughly clean the area with soap and water to remove any remaining residue or solvent. Allow the surface to dry completely before applying new caulk.
8. **Vacuum and Inspect:** Vacuum up any debris and inspect the area to ensure all old caulk has been removed. Address any remaining residue before proceeding.
Tips for Removing Different Types of Caulk
* **Silicone Caulk:** Silicone caulk tends to be more flexible and resistant to solvents. Heat and mechanical removal are often the most effective methods.
* **Latex Caulk:** Latex caulk is generally easier to remove than silicone caulk. Solvents like mineral spirits can be helpful in softening the residue.
* **Acrylic Caulk:** Similar to latex caulk, acrylic caulk can be softened with solvents and removed with a scraper.
Avoiding Common Mistakes When Removing Old Caulk
* **Using Excessive Force:** Applying too much force can damage the tile or grout. Use gentle, controlled movements.
* **Using the Wrong Tools:** Using the wrong tools can also damage the tile. Use tools specifically designed for caulk removal.
* **Neglecting Safety Precautions:** Always wear safety glasses and gloves to protect yourself from injury and chemical exposure.
Product Explanation: Oscillating Multi-Tool with Caulk Removal Attachment
An oscillating multi-tool with a caulk removal attachment is a versatile and effective tool for removing old caulk from tile. It utilizes rapid oscillations to slice through caulk without damaging the surrounding surfaces. This tool is particularly useful for tackling large or complex projects, as it can quickly and efficiently remove caulk from tight spaces and irregular surfaces. The key is to use the correct blade angle and pressure to avoid damaging the underlying tile.
Detailed Features Analysis of Oscillating Multi-Tool for Caulk Removal
1. **Oscillating Motion:** The oscillating motion allows for precise and controlled cutting, minimizing the risk of damage to the tile. *Benefit:* Provides a clean and efficient removal process without damaging the surrounding surfaces.
2. **Variable Speed Control:** Allows you to adjust the speed of the oscillations to match the type of caulk and the delicacy of the tile. *Benefit:* Prevents overheating and damage to sensitive surfaces.
3. **Caulk Removal Blade:** The specialized blade is designed with a sharp, angled edge that easily slices through caulk. *Benefit:* Facilitates quick and efficient caulk removal, even in tight spaces.
4. **Depth Control:** Some models offer depth control settings, allowing you to limit the depth of the cut to prevent damage to the substrate. *Benefit:* Enhances precision and minimizes the risk of accidental damage.
5. **Dust Extraction Port:** Allows you to connect a vacuum cleaner to collect dust and debris, keeping the work area clean. *Benefit:* Improves visibility and reduces the risk of inhaling harmful particles.
6. **Ergonomic Design:** A comfortable grip and lightweight design reduce fatigue during extended use. *Benefit:* Enhances user comfort and control, allowing for more precise and efficient work.
7. **Quick-Change Blade System:** Allows you to quickly and easily swap out blades without the need for tools. *Benefit:* Saves time and increases efficiency.
Advantages, Benefits & Real-World Value of Using an Oscillating Multi-Tool
Using an oscillating multi-tool for caulk removal offers several advantages over traditional methods. First, it significantly reduces the amount of time and effort required to remove old caulk. The oscillating motion and specialized blade allow you to quickly and efficiently slice through caulk, even in tight spaces. Second, it minimizes the risk of damage to the tile. The precise and controlled cutting action prevents accidental scratches and gouges. Users consistently report a cleaner and more professional finish when using an oscillating multi-tool.
Moreover, an oscillating multi-tool is a versatile tool that can be used for a variety of other home improvement tasks, such as cutting wood, metal, and plastic. This makes it a valuable investment for any DIY enthusiast or professional contractor. Our analysis reveals these key benefits: Increased efficiency, reduced risk of damage, and enhanced versatility.
Comprehensive & Trustworthy Review: Oscillating Multi-Tool for Caulk Removal
The oscillating multi-tool with a caulk removal attachment is a highly effective tool for removing old caulk from tile. Its oscillating motion and specialized blade allow for precise and controlled cutting, minimizing the risk of damage to the surrounding surfaces. From a practical standpoint, the tool is easy to use and provides a comfortable grip, even during extended use. It delivers on its promises, providing a clean and efficient removal process.
**Pros:**
1. **Efficient Caulk Removal:** Quickly and effectively removes old caulk, even in tight spaces.
2. **Reduced Risk of Damage:** The oscillating motion prevents accidental scratches and gouges.
3. **Versatile Tool:** Can be used for a variety of other home improvement tasks.
4. **Easy to Use:** Provides a comfortable grip and intuitive controls.
5. **Professional-Looking Results:** Delivers a clean and smooth finish.
**Cons/Limitations:**
1. **Initial Investment:** Can be more expensive than traditional caulk removal tools.
2. **Requires Practice:** It may take some practice to master the tool and avoid damaging the tile.
3. **Noise Level:** Can be noisy during operation.
4. **Blade Wear:** The caulk removal blade may wear out over time and need to be replaced.
**Ideal User Profile:** This tool is best suited for DIY enthusiasts and professional contractors who regularly remove caulk from tile. It’s particularly useful for large or complex projects.
**Key Alternatives:**
* **Manual Caulk Removal Tools:** These are less expensive but require more time and effort.
* **Chemical Caulk Removers:** These can be effective but may contain harsh chemicals.
**Expert Overall Verdict & Recommendation:** The oscillating multi-tool with a caulk removal attachment is a highly recommended tool for anyone who regularly removes caulk from tile. While it may require a slightly higher initial investment, the increased efficiency, reduced risk of damage, and professional-looking results make it a worthwhile investment.
Insightful Q&A Section
**Q1: What’s the best way to remove caulk from delicate or easily scratched tile?**
A1: When working with delicate tile, use a plastic caulk removal tool and avoid applying excessive pressure. Heat can also help soften the caulk, making it easier to remove. Always test any solvents in an inconspicuous area first.
**Q2: How do I prevent damaging the grout when removing caulk?**
A2: Score the caulk along the grout line with a sharp utility knife before attempting to remove it. This will help to prevent the caulk from pulling away pieces of the grout.
**Q3: What’s the best solvent for removing stubborn caulk residue?**
A3: Mineral spirits, denatured alcohol, and commercial caulk softeners are all effective solvents for removing caulk residue. Always test in an inconspicuous area first and follow the manufacturer’s instructions.
**Q4: How can I tell if the old caulk has mold or mildew?**
A4: Mold and mildew often appear as black, green, or brown discoloration on the caulk. If you suspect mold or mildew, use a mold and mildew cleaner before removing the caulk.
**Q5: What type of caulk is best for bathrooms and kitchens?**
A5: Silicone caulk is generally the best choice for bathrooms and kitchens due to its water resistance and flexibility. Look for a caulk that is specifically labeled as mold and mildew resistant.
**Q6: How long should I wait before applying new caulk after removing the old caulk?**
A6: Allow the area to dry completely before applying new caulk. This may take several hours or even overnight, depending on the humidity and temperature.
**Q7: Can I use a regular screwdriver to remove caulk?**
A7: While a screwdriver can be used to remove caulk, it’s not the ideal tool. Screwdrivers can be difficult to control and may damage the tile or grout. A dedicated caulk removal tool is a better option.
**Q8: What’s the best way to clean the surface after removing caulk and before applying new caulk?**
A8: Clean the surface with soap and water to remove any remaining residue or solvent. Then, wipe the surface with a clean, dry cloth. Make sure the surface is completely dry before applying new caulk.
**Q9: How do I ensure a smooth and even caulk line?**
A9: Use a caulk smoothing tool or your finger to smooth the caulk line immediately after applying it. Dip your finger in water or mineral spirits to prevent the caulk from sticking.
**Q10: Is it necessary to prime the surface before applying new caulk?**
A10: Priming is not always necessary, but it can improve the adhesion of the new caulk. If you’re working with a porous surface, such as unglazed tile, priming is recommended.
Conclusion
Removing old caulk from tile may seem like a daunting task, but with the right tools, techniques, and knowledge, it can be a straightforward and rewarding project. By following the steps outlined in this guide, you can achieve a professional-looking finish that will revitalize your tiled surfaces and prevent water damage. Remember to prioritize safety, use the right tools for the job, and take your time to ensure a thorough and clean removal. The key to success lies in meticulous preparation and a patient approach. Now that you’re armed with the expert knowledge, go forth and conquer that old caulk! Share your experiences with how to remove old caulk from tile in the comments below, or contact our experts for a consultation on how to remove old caulk from tile for more complex situations.
