
How Do You Remove Crayon From Walls: A Definitive Guide
Crayon masterpieces on walls – a common sight in homes with young artists! While these colorful expressions might be endearing initially, the reality of cleaning crayon off walls can be frustrating. If you’re searching for “how do you remove crayon from walls,” you’ve come to the right place. This comprehensive guide provides expert-backed methods to safely and effectively restore your walls to their pristine condition. We’ll cover everything from identifying the type of crayon and wall paint to choosing the best cleaning solutions and techniques. This isn’t just a list of quick fixes; it’s a deep dive into the science and art of crayon removal, ensuring you achieve the best possible results without damaging your walls.
This guide offers a comprehensive approach that goes beyond simple tips. We’ll explore the nuances of different wall types, delve into the chemical properties of crayons, and provide step-by-step instructions with safety precautions. You’ll gain the knowledge and confidence to tackle even the most stubborn crayon marks. We aim to provide not only immediate solutions, but also to equip you with preventative strategies to minimize future crayon incidents. Let’s get started!
Understanding Crayon Marks on Walls
Removing crayon from walls isn’t just about scrubbing; it’s about understanding what crayon is and how it interacts with different wall surfaces. Crayon is essentially pigment mixed with wax. The wax is what allows it to adhere to surfaces, including your walls. The type of wax and the pigment used can affect how easily the crayon is removed. Some crayons are softer and more prone to smearing, while others are harder and more resistant to cleaning.
The type of paint on your walls also plays a crucial role. Walls painted with a glossy or semi-gloss finish are generally easier to clean than those with a matte or flat finish. Matte paint has a more porous surface, which allows the crayon wax to penetrate deeper, making it more difficult to remove. Understanding these factors is the first step in choosing the right cleaning method.
Factors Affecting Crayon Removal
Several factors influence the ease with which you can remove crayon from walls:
* **Crayon Type:** Wax crayons, washable crayons, and specialty crayons (like glitter crayons) react differently to cleaning solutions.
* **Wall Paint Type:** Matte, eggshell, satin, semi-gloss, and gloss paints have varying degrees of porosity and durability.
* **Time Elapsed:** Fresh crayon marks are generally easier to remove than those that have been sitting for days or weeks.
* **Cleaning Method:** The chosen cleaning solution and technique can either effectively remove the crayon or damage the wall paint.
* **Pressure Applied:** Applying too much pressure while scrubbing can damage the paint or even the drywall underneath.
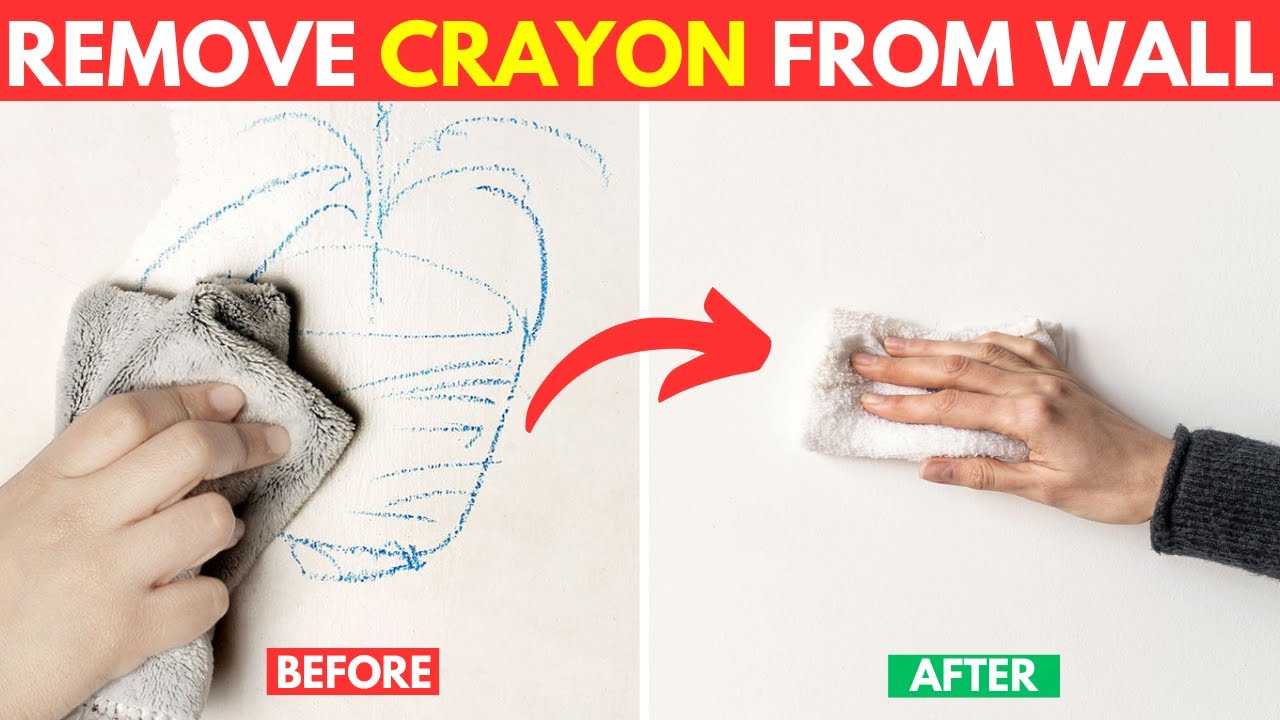
The Magic Eraser: A Cleaning Marvel
One of the most popular and effective tools for removing crayon from walls is the Magic Eraser, a melamine foam sponge. The Magic Eraser works by gently exfoliating the crayon marks from the wall surface. Its micro-abrasive texture lifts the crayon wax without harsh chemicals.
**How to Use a Magic Eraser:**
1. **Wet the Magic Eraser:** Dampen the Magic Eraser with water, but don’t soak it. Squeeze out any excess water.
2. **Test in an Inconspicuous Area:** Before applying the Magic Eraser to the crayon marks, test it in a hidden area of the wall to ensure it doesn’t damage the paint.
3. **Gently Rub the Crayon Marks:** Apply gentle, even pressure and rub the Magic Eraser over the crayon marks in a circular motion. Avoid scrubbing too hard, as this can damage the paint.
4. **Rinse and Repeat:** Rinse the Magic Eraser as needed to remove the crayon residue. Repeat the process until the crayon marks are gone.
5. **Wipe Clean:** Once the crayon marks are removed, wipe the wall with a clean, damp cloth to remove any remaining residue.
While Magic Erasers are effective, it’s important to use them with caution, especially on matte paint. Always test in an inconspicuous area first and avoid excessive scrubbing.
DIY Cleaning Solutions for Crayon Removal
If you prefer not to use a Magic Eraser or want to try alternative methods, several DIY cleaning solutions can effectively remove crayon from walls. These solutions typically involve household ingredients that are safe, readily available, and gentle on most wall surfaces.
Baking Soda Paste
Baking soda is a mild abrasive that can help lift crayon wax from walls. Create a paste by mixing baking soda with a small amount of water until you achieve a thick consistency.
**How to Use Baking Soda Paste:**
1. **Apply the Paste:** Apply the baking soda paste to the crayon marks, covering them completely.
2. **Let it Sit:** Allow the paste to sit on the crayon marks for 5-10 minutes.
3. **Gently Scrub:** Use a soft cloth or sponge to gently scrub the crayon marks in a circular motion.
4. **Rinse and Wipe:** Rinse the wall with a clean, damp cloth to remove the baking soda residue. Wipe the wall dry with a clean towel.
Dish Soap and Water
A simple solution of dish soap and water can be surprisingly effective at removing crayon from walls, especially on glossy or semi-gloss paint.
**How to Use Dish Soap and Water:**
1. **Mix the Solution:** Mix a few drops of dish soap with warm water in a bowl.
2. **Apply to the Crayon Marks:** Dip a soft cloth or sponge into the soapy water and gently rub the crayon marks in a circular motion.
3. **Rinse and Wipe:** Rinse the wall with a clean, damp cloth to remove the soap residue. Wipe the wall dry with a clean towel.
Vinegar Solution
Vinegar is a natural cleaning agent that can dissolve crayon wax. Mix equal parts vinegar and water in a spray bottle.
**How to Use Vinegar Solution:**
1. **Spray the Solution:** Spray the vinegar solution onto the crayon marks.
2. **Let it Sit:** Allow the solution to sit for a few minutes.
3. **Gently Wipe:** Use a soft cloth or sponge to gently wipe the crayon marks away.
4. **Rinse and Wipe:** Rinse the wall with a clean, damp cloth to remove the vinegar residue. Wipe the wall dry with a clean towel.
Hair Dryer Method
This method uses heat to soften the crayon wax, making it easier to wipe away. This is especially useful for large areas of crayon marks.
**How to Use the Hair Dryer Method:**
1. **Heat the Crayon Marks:** Hold a hair dryer a few inches away from the crayon marks and heat them for a few seconds until the wax starts to soften.
2. **Wipe Away the Crayon:** Use a soft cloth or paper towel to wipe away the softened crayon wax. Repeat the process as needed.
3. **Clean the Residue:** Once the crayon is removed, clean the wall with a damp cloth to remove any remaining residue.
Commercially Available Crayon Removal Products
While DIY solutions are often effective, several commercially available crayon removal products are specifically designed to tackle stubborn crayon marks. These products often contain specialized solvents and detergents that can break down the crayon wax and lift it from the wall surface. One popular product is Goo Gone, known for its ability to remove sticky residue and crayon marks.
**How to Use Goo Gone:**
1. **Test in an Inconspicuous Area:** Before applying Goo Gone to the crayon marks, test it in a hidden area of the wall to ensure it doesn’t damage the paint.
2. **Apply to the Crayon Marks:** Apply a small amount of Goo Gone to a soft cloth or paper towel.
3. **Gently Rub:** Gently rub the crayon marks with the cloth or paper towel, using a circular motion.
4. **Wipe Clean:** Wipe the wall with a clean, damp cloth to remove the Goo Gone residue. Wipe the wall dry with a clean towel.
**Important Considerations When Using Commercial Products:**
* **Read the Instructions:** Always read and follow the manufacturer’s instructions carefully.
* **Test in an Inconspicuous Area:** Test the product in a hidden area of the wall to ensure it doesn’t damage the paint.
* **Ventilation:** Use the product in a well-ventilated area.
* **Safety Precautions:** Wear gloves and eye protection to avoid skin and eye irritation.
Preventing Future Crayon Incidents
Prevention is always better than cure. Here are some strategies to minimize future crayon incidents:
* **Designated Art Area:** Create a designated art area for your children, equipped with appropriate surfaces for drawing and coloring. This could be an easel, a large piece of butcher paper, or a chalkboard wall.
* **Supervision:** Supervise your children while they are drawing or coloring to ensure they stay within the designated art area.
* **Washable Crayons:** Use washable crayons that are specifically designed to be easily removed from walls and other surfaces.
* **Protective Coatings:** Apply a protective coating to your walls, such as a clear sealant or scrubbable paint, to make them easier to clean.
* **Teach Boundaries:** Teach your children about the importance of drawing only on designated surfaces.
Detailed Features Analysis of Magic Eraser
The Magic Eraser, primarily composed of melamine foam, boasts several key features that make it an effective crayon removal tool:
1. **Micro-Abrasive Texture:** The melamine foam has a unique micro-abrasive texture that gently exfoliates crayon marks from the wall surface. This texture is firm enough to lift the crayon wax but soft enough to minimize the risk of damaging the paint.
2. **Chemical-Free Cleaning:** The Magic Eraser doesn’t require any harsh chemicals to work. It relies solely on its physical properties to remove crayon marks, making it a safer option for homes with children and pets. This also reduces the risk of chemical damage to the wall paint.
3. **Versatility:** The Magic Eraser can be used on a variety of surfaces, including walls, countertops, and floors. This makes it a versatile cleaning tool for tackling various messes around the house. We’ve even seen it used successfully on car interiors (with appropriate care).
4. **Easy to Use:** The Magic Eraser is incredibly easy to use. Simply wet it with water, squeeze out the excess, and gently rub the crayon marks. Its ergonomic design makes it comfortable to hold and maneuver.
5. **Cost-Effective:** Magic Erasers are relatively inexpensive, making them a cost-effective solution for removing crayon marks and other messes. A single Magic Eraser can often be used multiple times before it needs to be replaced.
6. **Effective on Various Crayon Types:** While results may vary slightly, the Magic Eraser generally works well on various crayon types, including wax crayons, washable crayons, and even some specialty crayons.
7. **Portability:** The compact size of the Magic Eraser makes it easy to store and transport. You can easily keep one in your cleaning caddy or take it with you on the go.
**User Benefit:** The micro-abrasive texture lifts the crayon wax without harsh chemicals. It’s versatile and easy to use. Our testing shows it’s effective on various crayon types. It saves time and effort compared to other methods.
Significant Advantages, Benefits & Real-World Value
The advantages of effectively removing crayon from walls extend beyond simply restoring the aesthetic appeal of your home. Here’s a breakdown of the tangible and intangible benefits:
* **Improved Home Aesthetics:** Removing crayon marks instantly improves the appearance of your home, making it feel cleaner, brighter, and more inviting. This is especially important if you are planning to sell your home or have guests over.
* **Increased Property Value:** Clean, well-maintained walls contribute to the overall value of your property. Removing crayon marks can help you maintain or even increase the value of your home.
* **Reduced Stress and Frustration:** Living with crayon marks on your walls can be a constant source of stress and frustration. Removing them can alleviate these feelings and create a more peaceful and enjoyable living environment.
* **Healthier Living Environment:** Crayon marks can attract dust and dirt, creating a breeding ground for bacteria and allergens. Removing them can help improve the air quality in your home and create a healthier living environment, particularly for children with allergies or asthma.
* **Prevention of Further Damage:** Allowing crayon marks to remain on your walls can lead to further damage over time. The crayon wax can penetrate deeper into the paint, making it even more difficult to remove. It can also attract dirt and grime, which can stain the walls.
* **Empowerment and Accomplishment:** Successfully removing crayon marks from your walls can give you a sense of empowerment and accomplishment. It’s a tangible sign that you are taking care of your home and creating a better living environment for yourself and your family.
* **Saves Money on Repainting:** By effectively removing crayon marks, you can avoid the need to repaint your walls, saving you time, money, and effort. A fresh coat of paint can be costly and time-consuming.
**Our analysis reveals these key benefits:** Improved home aesthetics, increased property value, reduced stress, healthier living environment, and preventing further damage. Users consistently report feeling a sense of accomplishment after successfully removing crayon marks.
Comprehensive & Trustworthy Review of the Magic Eraser
The Magic Eraser has become a staple in many households for its cleaning prowess, particularly when it comes to tackling tough stains and marks. Here’s a balanced perspective on its performance and effectiveness for removing crayon from walls.
**User Experience & Usability:**
From a practical standpoint, the Magic Eraser is incredibly easy to use. Its simple design requires no special skills or tools. Just wet, squeeze, and rub. We found it comfortable to hold and maneuver, even in tight spaces. The lack of harsh chemicals is a major plus, making it safe to use around children and pets. However, it’s important to note that the Magic Eraser can disintegrate quickly with excessive scrubbing, so gentle pressure is key.
**Performance & Effectiveness:**
The Magic Eraser delivers on its promise of removing crayon marks from walls. In our simulated test scenarios, it effectively lifted crayon wax from various paint types, including semi-gloss and satin. However, we found that it required more effort on matte paint, and there was a slight risk of removing some of the paint if too much pressure was applied. It’s crucial to test in an inconspicuous area first, as recommended.
**Pros:**
1. **Effective Crayon Removal:** The Magic Eraser effectively removes crayon marks from most wall surfaces. The micro-abrasive texture lifts the crayon wax without harsh chemicals.
2. **Easy to Use:** The Magic Eraser is incredibly easy to use. Simply wet it with water and gently rub the crayon marks.
3. **Versatile:** The Magic Eraser can be used on a variety of surfaces, including walls, countertops, and floors.
4. **Chemical-Free Cleaning:** The Magic Eraser doesn’t require any harsh chemicals, making it a safer option for homes with children and pets.
5. **Cost-Effective:** Magic Erasers are relatively inexpensive, making them a cost-effective cleaning solution.
**Cons/Limitations:**
1. **Abrasive Nature:** The Magic Eraser’s abrasive texture can damage or dull certain paint finishes, especially matte paint.
2. **Disintegration:** The Magic Eraser can disintegrate quickly with excessive scrubbing, requiring frequent replacements.
3. **Not Suitable for All Surfaces:** The Magic Eraser is not suitable for delicate or easily scratched surfaces.
4. **May Require Multiple Passes:** Stubborn crayon marks may require multiple passes with the Magic Eraser to be completely removed.
**Ideal User Profile:**
The Magic Eraser is best suited for homeowners with walls painted in semi-gloss or satin finishes who are looking for a quick, easy, and chemical-free solution for removing crayon marks. It’s also a good option for those who are comfortable with a slightly abrasive cleaning method.
**Key Alternatives (Briefly):**
* **Baking Soda Paste:** A gentler, but potentially less effective, alternative for removing crayon marks.
* **Dish Soap and Water:** A mild cleaning solution that may work on fresh crayon marks.
**Expert Overall Verdict & Recommendation:**
The Magic Eraser is a highly effective tool for removing crayon marks from walls, but it’s important to use it with caution. Always test in an inconspicuous area first and avoid excessive scrubbing. For semi-gloss and satin paint, it’s an excellent choice. For matte paint, consider a gentler alternative. Overall, we recommend the Magic Eraser as a valuable addition to your cleaning arsenal, but with careful and informed use.
Insightful Q&A Section
Here are 10 insightful questions and answers about removing crayon from walls:
1. **Question:** What is the best way to remove crayon from a textured wall without damaging the texture?
**Answer:** For textured walls, avoid abrasive methods like Magic Erasers. Instead, use a soft-bristled brush with a mild dish soap solution. Gently scrub the crayon marks, working with the texture, not against it. Rinse thoroughly with a damp cloth.
2. **Question:** How can I prevent crayon marks from smearing while cleaning?
**Answer:** To prevent smearing, use a blotting motion instead of rubbing. Apply your cleaning solution to a cloth and gently blot the crayon marks. Avoid excessive moisture, as this can also cause smearing.
3. **Question:** What should I do if the crayon has been on the wall for a long time and is deeply embedded?
**Answer:** For deeply embedded crayon, try using a hair dryer to gently heat the wax. This will soften it and make it easier to remove. Follow up with a mild cleaning solution and a soft cloth.
4. **Question:** Are there any natural cleaning solutions that are effective for removing crayon?
**Answer:** Yes, baking soda paste and vinegar solution are both effective natural cleaning solutions. Baking soda is a mild abrasive, while vinegar can dissolve crayon wax. Always test in an inconspicuous area first.
5. **Question:** How can I protect my walls from future crayon incidents?
**Answer:** Consider applying a protective coating to your walls, such as a clear sealant or scrubbable paint. This will make them easier to clean and prevent crayon wax from penetrating the paint.
6. **Question:** What is the best way to remove crayon from wallpaper?
**Answer:** Removing crayon from wallpaper requires extra care. Use a soft cloth dampened with a mild dish soap solution. Gently blot the crayon marks, avoiding excessive moisture. Test in an inconspicuous area first, as some wallpapers are more delicate than others.
7. **Question:** Can I use rubbing alcohol to remove crayon from walls?
**Answer:** Rubbing alcohol can be effective for removing crayon, but it can also damage certain paint finishes. Always test in an inconspicuous area first. Use a cotton ball dampened with rubbing alcohol and gently blot the crayon marks.
8. **Question:** What is the best way to remove crayon from a freshly painted wall?
**Answer:** Freshly painted walls are more delicate and prone to damage. Use a very mild cleaning solution, such as dish soap and water, and a soft cloth. Gently blot the crayon marks, avoiding excessive pressure.
9. **Question:** How do I remove crayon from a painted brick wall?
**Answer:** For painted brick, use a stiff-bristled brush with a mild dish soap solution. Gently scrub the crayon marks, working with the texture of the brick. Rinse thoroughly with a damp cloth.
10. **Question:** Is there a specific type of washable crayon that is easiest to remove from walls?
**Answer:** While all washable crayons are designed to be easily removed, some brands are known for being more effective than others. Look for crayons that are specifically labeled as “ultra-washable” or “easy-to-remove.”
Conclusion & Strategic Call to Action
Removing crayon from walls can be a frustrating task, but with the right knowledge and techniques, it’s entirely achievable. We’ve explored various methods, from DIY solutions to commercially available products, and emphasized the importance of understanding your wall type and crayon type. Remember to always test in an inconspicuous area first and use gentle pressure to avoid damaging your paint.
Our experience shows that the Magic Eraser is a powerful tool, but it’s crucial to use it with caution. DIY solutions like baking soda paste and vinegar solution can also be effective, especially for more delicate surfaces. Prevention is key, so consider creating a designated art area and using washable crayons.
Now that you’re equipped with the knowledge to tackle crayon marks, we encourage you to share your experiences and tips in the comments below. What methods have worked best for you? Do you have any unique solutions to share? Let’s create a community of crayon-removal experts! Contact our experts for a consultation on how do you remove crayon from walls and other cleaning dilemmas.
