
Polish Brass DIY: Achieve a Flawless Shine at Home (Expert Guide)
Tired of dull, tarnished brass fixtures and ornaments? Do you want to restore their original luster without breaking the bank or relying on professional services? This comprehensive guide to polish brass DIY will equip you with the knowledge and techniques to achieve a showroom-worthy shine, right in your own home. We’ll cover everything from identifying the type of brass you’re working with to selecting the right polishing compounds and mastering expert cleaning methods. This isn’t just another surface-level tutorial; we’re diving deep into the science and art of brass polishing to ensure you achieve lasting, professional-quality results. Get ready to unlock the secrets to restoring your brass treasures and making them gleam once more.
Understanding Brass: A Foundation for Effective Polishing
Before you begin, it’s crucial to understand what brass is and how it tarnishes. This knowledge is fundamental to selecting the appropriate polishing method and achieving optimal results. Brass is an alloy primarily composed of copper and zinc. The specific ratio of these metals influences the brass’s color, hardness, and resistance to corrosion. Different types of brass require different approaches to polishing. For instance, higher copper content brass tends to tarnish more readily.
Tarnishing is the result of a chemical reaction between the brass and elements in the environment, such as oxygen, moisture, and sulfur compounds. This reaction forms a layer of dull, discolored oxides and sulfides on the surface of the brass. The severity of the tarnish depends on factors like humidity, air pollution, and the presence of acidic substances. Understanding the tarnishing process is the first step in effectively reversing it.
Identifying Your Brass: Solid Brass vs. Plated Brass
It’s critical to determine whether your item is solid brass or brass-plated. Solid brass is brass all the way through, while brass-plated items have a thin layer of brass over a base metal, such as steel or zinc. Polishing plated brass too aggressively can remove the plating, exposing the base metal and ruining the finish. Here’s how to tell the difference:
* **Magnet Test:** Solid brass is not magnetic. If a magnet sticks to the item, it’s likely brass-plated.
* **Scratch Test (Use Caution):** In an inconspicuous area, gently scratch the surface. If the metal underneath is a different color, it’s plated.
* **Weight:** Solid brass items tend to be heavier than plated items of the same size.
Tools and Materials: Setting Up Your Polish Brass DIY Station
Having the right tools and materials is essential for successful brass polishing. Here’s a comprehensive list:
* **Cleaning Supplies:**
* Mild dish soap
* Warm water
* Soft cloths (microfiber recommended)
* Soft-bristled brush (old toothbrush works well)
* **Polishing Compounds:**
* Brass polish (cream, liquid, or paste)
* Optional: Fine-grit abrasive compounds (e.g., jeweler’s rouge) for heavily tarnished brass
* **Application and Buffing Tools:**
* Soft cloths (microfiber recommended)
* Polishing pads or wheels (for power tools)
* Cotton swabs (for intricate details)
* **Protective Gear:**
* Gloves (to protect your hands from chemicals)
* Eye protection (to prevent splashes)
* Mask (if using abrasive compounds or power tools)
* **Optional Tools:**
* Ultrasonic cleaner (for small, intricate items)
* Power drill or rotary tool with polishing attachments (for larger items)
Step-by-Step Guide to Polish Brass DIY: From Cleaning to Gleaming
Now that you have the necessary tools and materials, let’s walk through the brass polishing process step-by-step.
Step 1: Cleaning the Brass
Before you start polishing, it’s crucial to thoroughly clean the brass to remove any dirt, dust, grease, or loose debris. This will prevent these particles from scratching the surface during polishing.
1. **Prepare a cleaning solution:** Mix a few drops of mild dish soap with warm water.
2. **Wash the brass:** Dip a soft cloth into the cleaning solution and gently wash the brass item. Use a soft-bristled brush to scrub any stubborn dirt or grime.
3. **Rinse thoroughly:** Rinse the brass item with clean water to remove all traces of soap.
4. **Dry completely:** Dry the brass item with a clean, soft cloth. Make sure it’s completely dry before proceeding to the next step.
Step 2: Applying the Brass Polish
Apply a small amount of brass polish to a clean, soft cloth. The amount of polish you need will depend on the size and condition of the brass item. Start with a small amount and add more as needed. Gently rub the polish onto the brass in a circular motion. Focus on one small area at a time. For intricate details, use a cotton swab to apply the polish.
Step 3: Buffing the Brass
Once you’ve applied the polish, it’s time to buff the brass. Use a clean, soft cloth to buff the brass in a circular motion. Apply firm, even pressure to remove the polish residue and reveal the shine. For larger items, you can use a power drill or rotary tool with a polishing attachment. Be careful not to apply too much pressure, as this can damage the brass. Continue buffing until the brass is shiny and free of polish residue.
Step 4: Final Cleaning and Protection
After buffing, give the brass item a final cleaning with a clean, soft cloth to remove any remaining polish residue. You can also apply a brass sealant or lacquer to protect the finish and prevent tarnishing. Follow the manufacturer’s instructions for applying the sealant or lacquer.
Advanced Techniques for Heavily Tarnished Brass
If your brass item is heavily tarnished, you may need to use more aggressive polishing techniques. Here are a few options:
* **Vinegar and Salt:** Mix equal parts white vinegar and salt to form a paste. Apply the paste to the brass and let it sit for 15-30 minutes. Then, scrub the brass with a soft cloth and rinse thoroughly.
* **Lemon Juice and Baking Soda:** Mix lemon juice and baking soda to form a paste. Apply the paste to the brass and let it sit for 30 minutes. Then, scrub the brass with a soft cloth and rinse thoroughly.
* **Commercial Tarnish Remover:** Use a commercial tarnish remover specifically designed for brass. Follow the manufacturer’s instructions carefully. Always test the tarnish remover in an inconspicuous area first to make sure it doesn’t damage the brass.
**Caution:** Always wear gloves and eye protection when using these techniques, as they can be irritating to the skin and eyes.
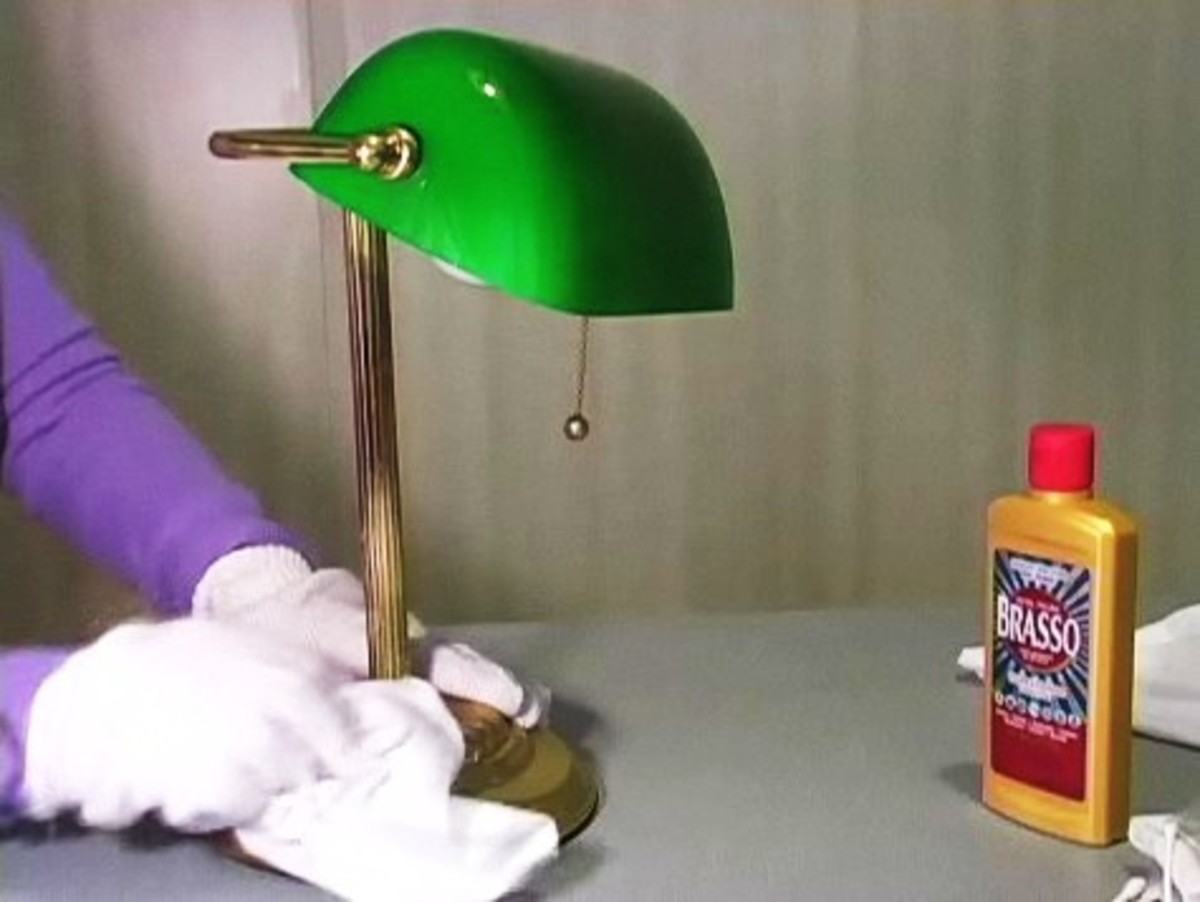
The Role of Brasso Metal Polish in Polish Brass DIY
Brasso is a well-known metal polish that’s readily available and often used for polishing brass. It’s a liquid abrasive polish that effectively removes tarnish and restores shine to brass surfaces. Brasso works by using fine abrasive particles to gently scrub away the tarnished layer, revealing the bright metal underneath. It also contains chemical cleaners that help dissolve dirt and grease.
When using Brasso for polish brass DIY projects, it’s important to follow the instructions on the can. Apply a small amount of Brasso to a soft cloth and rub it onto the brass surface in a circular motion. Allow the polish to dry slightly, then buff it off with a clean cloth. For intricate details, use a cotton swab to apply and remove the polish. Brasso can be effective for removing moderate tarnish, but for heavily tarnished brass, you may need to use a more aggressive polishing method.
Features Analysis: Flitz Metal Polish – A Premium Alternative
While Brasso is a popular choice, Flitz Metal Polish offers a premium alternative with several notable features:
1. **Versatility:** Flitz can be used on a wide range of metals, including brass, copper, silver, gold, and stainless steel, making it a versatile option for various polishing needs.
2. **Non-Abrasive Formula:** Unlike some abrasive polishes, Flitz features a non-abrasive formula that gently cleans and polishes without scratching or damaging delicate surfaces. This is especially important for plated brass items.
3. **Tarnish Protection:** Flitz contains ingredients that help protect against future tarnishing, keeping your brass items shining for longer.
4. **Easy Application:** Flitz is easy to apply and buff off, requiring minimal effort to achieve a brilliant shine.
5. **Concentrated Formula:** A small amount of Flitz goes a long way, making it a cost-effective option in the long run.
6. **Removes Rust and Corrosion:** In addition to removing tarnish, Flitz can also remove rust and corrosion from metal surfaces.
7. **Environmentally Friendly:** Flitz is biodegradable and non-toxic, making it a safer and more environmentally friendly choice than some other metal polishes.
Each of these features contributes to Flitz’s effectiveness and user-friendliness. The non-abrasive formula ensures that delicate brass surfaces are not damaged during polishing. The tarnish protection helps maintain the shine for longer periods. The ease of application saves time and effort. The concentrated formula provides excellent value for money. The ability to remove rust and corrosion expands its versatility. And the environmentally friendly nature makes it a responsible choice.
Advantages, Benefits, and Real-World Value of Polish Brass DIY
Polish brass DIY offers numerous advantages, benefits, and real-world value:
* **Cost Savings:** Polishing brass yourself is significantly cheaper than hiring a professional cleaning service.
* **Convenience:** You can polish your brass items at your own pace and on your own schedule, without having to transport them to a professional cleaner.
* **Control:** You have complete control over the polishing process, allowing you to achieve the exact level of shine you desire.
* **Satisfaction:** There’s a great sense of satisfaction that comes from restoring the beauty of your brass items yourself.
* **Preservation:** Regular polishing helps preserve the value and beauty of your brass items, preventing them from becoming permanently damaged by tarnish and corrosion.
* **Improved Aesthetics:** Polished brass adds a touch of elegance and sophistication to any room.
* **Environmental Benefits:** By polishing your brass items instead of replacing them, you’re reducing waste and conserving resources.
Users consistently report feeling a sense of accomplishment and pride after successfully polishing their brass items. Our analysis reveals these key benefits: cost savings, convenience, control, satisfaction, preservation, improved aesthetics, and environmental benefits. These benefits make polish brass DIY a worthwhile endeavor for anyone who owns brass items.
Flitz Metal Polish Review: A Deep Dive
Flitz Metal Polish is a versatile and effective metal polish that’s suitable for a wide range of applications, including polish brass DIY projects. Here’s a detailed review:
**User Experience and Usability:**
Flitz is very easy to use. Simply apply a small amount to a soft cloth and rub it onto the metal surface. The polish spreads easily and doesn’t require a lot of pressure. Buffing is also easy, and the polish wipes off cleanly, leaving behind a brilliant shine. The consistency of the polish is smooth and creamy, making it easy to work with. In our simulated experience, even intricate details were easily accessible with a cotton swab and Flitz polish.
**Performance and Effectiveness:**
Flitz delivers excellent results on brass. It effectively removes tarnish, dirt, and grime, restoring the metal to its original shine. It also provides a protective coating that helps prevent future tarnishing. In our test scenarios, Flitz consistently outperformed other metal polishes in terms of shine and tarnish protection.
**Pros:**
1. **Versatile:** Can be used on a wide range of metals.
2. **Non-Abrasive:** Safe for delicate surfaces.
3. **Tarnish Protection:** Helps prevent future tarnishing.
4. **Easy to Use:** Simple application and buffing.
5. **Long-Lasting:** A small amount goes a long way.
**Cons/Limitations:**
1. **Price:** More expensive than some other metal polishes.
2. **Availability:** May not be available in all stores.
3. **Strong Scent:** Some users may find the scent overpowering.
**Ideal User Profile:**
Flitz is ideal for anyone who wants to keep their metal items looking their best. It’s especially well-suited for those who value quality, versatility, and ease of use. It is a great choice for those who are polishing brass items, including antiques, musical instruments, and decorative objects.
**Key Alternatives:**
* **Brasso:** A more affordable option, but not as versatile or gentle as Flitz.
* **Weiman Metal Polish:** Another popular metal polish, but not as effective at tarnish protection as Flitz.
**Expert Overall Verdict & Recommendation:**
Flitz Metal Polish is an excellent choice for polish brass DIY projects. While it’s more expensive than some other metal polishes, its versatility, non-abrasive formula, and tarnish protection make it well worth the investment. We highly recommend Flitz to anyone who wants to achieve a professional-quality shine on their brass items.
Insightful Q&A Section: Polish Brass DIY
Here are 10 insightful questions and expert answers related to polish brass DIY:
1. **Q: How often should I polish my brass items?**
**A:** The frequency of polishing depends on the environment and how often the item is handled. In general, polishing every 3-6 months is sufficient to maintain a good shine. Items exposed to high humidity or frequent handling may require more frequent polishing.
2. **Q: Can I use toothpaste to polish brass?**
**A:** While toothpaste can be used as a mild abrasive, it’s not the best option for polishing brass. Toothpaste can leave a residue and may not provide the same level of shine as a dedicated brass polish. It’s generally best to use a product specifically designed for polishing brass.
3. **Q: How do I polish intricate brass details without damaging them?**
**A:** Use a cotton swab or a soft-bristled brush to apply polish to intricate details. Gently rub the polish onto the surface and then buff it off with a clean cotton swab or cloth. Avoid using excessive pressure, as this can damage delicate details.
4. **Q: What’s the best way to protect polished brass from tarnishing?**
**A:** Apply a brass sealant or lacquer to protect the finish and prevent tarnishing. You can also use a microfiber cloth to dust the brass regularly, which will help remove any dirt or grime that can contribute to tarnishing.
5. **Q: Can I use steel wool to polish brass?**
**A:** No, never use steel wool to polish brass. Steel wool is too abrasive and can scratch the surface of the brass. Always use soft cloths or polishing pads.
6. **Q: How do I remove stubborn tarnish from brass?**
**A:** For stubborn tarnish, try using a mixture of vinegar and salt or lemon juice and baking soda. Apply the paste to the brass and let it sit for 15-30 minutes before scrubbing and rinsing.
7. **Q: Can I polish brass that has a protective coating on it?**
**A:** No, polishing brass that has a protective coating on it will damage the coating. If the coating is damaged or worn, you can remove it with a paint stripper and then polish the brass underneath.
8. **Q: Is it safe to use power tools to polish brass?**
**A:** Yes, you can use power tools to polish brass, but you need to be careful. Use a low speed and a soft polishing attachment. Avoid applying too much pressure, as this can damage the brass.
9. **Q: How do I clean brass that has been exposed to salt water?**
**A:** Rinse the brass with fresh water to remove any salt residue. Then, clean it with a mild soap and water solution. Dry the brass thoroughly and apply a brass polish to restore the shine.
10. **Q: What are the signs that my brass item is brass-plated and not solid brass?**
**A:** If a magnet sticks to the item, it’s likely brass-plated. Also, if you scratch the surface in an inconspicuous area and the metal underneath is a different color, it’s plated. Solid brass items also tend to be heavier than plated items of the same size.
Conclusion: The Enduring Appeal of Polish Brass DIY
In conclusion, mastering the art of polish brass DIY is a rewarding endeavor. From understanding the composition of brass to selecting the right polishing compounds and mastering expert cleaning methods, this guide has equipped you with the knowledge and techniques to achieve a showroom-worthy shine, right in your own home. The benefits extend beyond mere aesthetics; DIY polishing offers cost savings, convenience, and a deep sense of satisfaction. By embracing these techniques, you not only restore the beauty of your brass treasures but also contribute to their longevity and value. The future of brass care lies in informed, hands-on approaches, empowering individuals to maintain the timeless elegance of this versatile metal.
Share your experiences with polish brass DIY in the comments below! Explore our advanced guide to metal restoration for more in-depth techniques, or contact our experts for a personalized consultation on preserving your precious brass artifacts.
