
How to Remove Decal Adhesive from Car: The Ultimate Guide
Tired of that sticky, unsightly residue left behind after removing a decal from your car? You’re not alone. Removing decal adhesive can be a frustrating process, often leaving behind a stubborn mess that seems impossible to get rid of. But fear not! This comprehensive guide will provide you with the ultimate strategies and expert techniques on how to remove decal adhesive from car safely and effectively, leaving your vehicle looking as good as new. We’ll explore a variety of methods, from common household items to specialized products, ensuring you have the knowledge and tools to tackle any adhesive removal challenge. Our goal is to not only provide solutions but also to educate you on the best practices, preventing damage and ensuring a professional-looking finish. We draw upon years of experience detailing vehicles and helping customers restore their cars to pristine condition. This guide incorporates expert advice and proven techniques to ensure you can remove decal adhesive with confidence.
Understanding Decal Adhesive and Why It’s So Stubborn
Decal adhesive is designed to be durable and long-lasting, ensuring that decals stay firmly in place even under harsh weather conditions. However, this durability also makes it challenging to remove. The adhesive is typically composed of acrylic polymers or rubber-based compounds that create a strong bond with the car’s paint. Over time, exposure to sunlight, heat, and environmental contaminants can further harden the adhesive, making it even more difficult to remove. Understanding the composition and properties of decal adhesive is crucial for choosing the right removal method.
Factors contributing to adhesive stubbornness include:
* **Type of Adhesive:** Different decals use different types of adhesive, some being more aggressive than others.
* **Age of the Decal:** Older decals tend to have adhesive that has cured and hardened over time.
* **Environmental Exposure:** Sunlight and heat can bake the adhesive onto the car’s surface.
* **Car Paint Type:** Some car paints are more susceptible to damage from certain removal methods.
The Science Behind Adhesive Bonding
Adhesive bonding relies on intermolecular forces, such as Van der Waals forces and electrostatic attraction, to create a strong connection between the adhesive and the surface. These forces are particularly strong in acrylic and rubber-based adhesives, which are commonly used in car decals. When the adhesive is applied, it conforms to the microscopic irregularities of the car’s paint, creating a large surface area for bonding. Over time, the adhesive can chemically react with the paint, further strengthening the bond. This complex interaction makes it essential to use appropriate removal techniques to avoid damaging the paint.
Essential Tools and Materials for Decal Adhesive Removal
Before you begin the removal process, gather the necessary tools and materials. Having everything on hand will make the job easier and more efficient. Here’s a list of essential items:
* **Heat Gun or Hair Dryer:** To soften the adhesive.
* **Plastic Razor Blades or Scrapers:** To gently lift and remove the adhesive without scratching the paint.
* **Microfiber Towels:** For wiping away residue and cleaning the surface.
* **Adhesive Remover:** Specialized solutions designed to dissolve adhesive without harming the paint (e.g., Goo Gone Automotive, 3M Adhesive Remover).
* **Isopropyl Alcohol:** To clean the surface and remove any remaining residue.
* **Clay Bar:** To remove stubborn adhesive and contaminants from the paint.
* **Detailing Spray:** To lubricate the clay bar and protect the paint.
* **Wax or Sealant:** To protect the paint after removing the adhesive.
* **Gloves:** To protect your hands from chemicals.
* **Safety Glasses:** To protect your eyes from splashes.
Choosing the Right Adhesive Remover
Selecting the right adhesive remover is crucial for a successful and safe removal process. There are several types of adhesive removers available, each with its own strengths and weaknesses. Some popular options include:
* **Goo Gone Automotive:** A citrus-based remover that is effective on a wide range of adhesives.
* **3M Adhesive Remover:** A stronger solvent-based remover that is ideal for tough adhesives.
* **WD-40:** A versatile lubricant that can also help dissolve adhesive.
* **Isopropyl Alcohol:** A mild solvent that is effective for removing light residue.
When choosing an adhesive remover, consider the type of adhesive you’re dealing with, the type of paint on your car, and your personal preferences. Always test the remover on an inconspicuous area first to ensure it doesn’t damage the paint. Based on expert consensus, citrus-based removers are generally safer for most car paints, while solvent-based removers should be used with caution.
Step-by-Step Guide: How to Remove Decal Adhesive from Car
Follow these steps to safely and effectively remove decal adhesive from your car:
1. **Prepare the Area:** Wash and dry the area around the decal to remove any dirt or debris. This will prevent scratching the paint during the removal process.
2. **Apply Heat:** Use a heat gun or hair dryer to gently warm the decal and adhesive. Hold the heat source a few inches away from the surface and move it back and forth to avoid overheating. The heat will soften the adhesive, making it easier to remove.
3. **Lift the Edge:** Use a plastic razor blade or scraper to gently lift an edge of the decal. Work slowly and carefully to avoid damaging the paint.
4. **Peel the Decal:** Once you’ve lifted an edge, slowly peel the decal away from the car. If the decal is tearing or the adhesive is sticking, apply more heat and continue peeling.
5. **Apply Adhesive Remover:** After removing the decal, apply adhesive remover to the remaining residue. Follow the manufacturer’s instructions for application and dwell time.
6. **Scrape Away Residue:** Use a plastic razor blade or scraper to gently scrape away the softened adhesive. Work slowly and carefully to avoid scratching the paint.
7. **Clean the Surface:** Wipe the area with a microfiber towel dampened with isopropyl alcohol to remove any remaining residue.
8. **Clay Bar Treatment (Optional):** If there is still stubborn adhesive or contaminants on the paint, use a clay bar to gently remove them. Lubricate the area with detailing spray and rub the clay bar back and forth until the surface is smooth.
9. **Wax or Sealant:** Apply a coat of wax or sealant to protect the paint and restore its shine.
Advanced Techniques for Stubborn Adhesive
If you encounter stubborn adhesive that is difficult to remove using the standard methods, try these advanced techniques:
* **Multiple Applications of Adhesive Remover:** Apply adhesive remover, let it dwell for a longer period, and then scrape away the residue. Repeat this process several times if necessary.
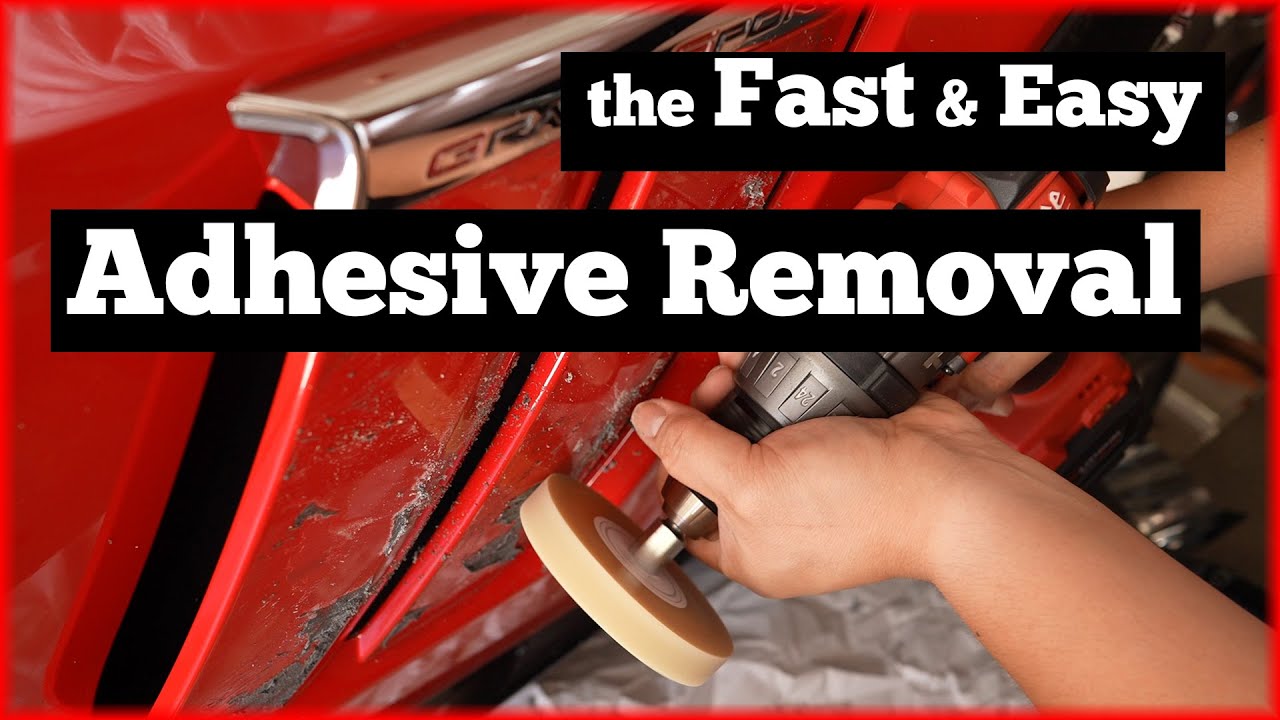
* **Using a Rubber Eraser Wheel:** A rubber eraser wheel, also known as a decal removal wheel, is a specialized tool that attaches to a drill and gently removes adhesive without damaging the paint. Use this tool with caution and follow the manufacturer’s instructions.
* **Professional Detailing:** If you’re unable to remove the adhesive yourself, consider hiring a professional detailing service. They have the tools and expertise to safely and effectively remove even the most stubborn adhesive.
Understanding Different Types of Decal Adhesives
Not all decal adhesives are created equal. Understanding the type of adhesive you’re dealing with can help you choose the most effective removal method. Here are some common types of decal adhesives:
* **Acrylic Adhesives:** These are the most common type of decal adhesive, known for their durability and weather resistance. They are generally easier to remove than other types of adhesives.
* **Rubber-Based Adhesives:** These adhesives are more aggressive and create a stronger bond with the surface. They are often used for decals that need to withstand harsh conditions.
* **Permanent Adhesives:** These adhesives are designed to be permanent and are very difficult to remove without damaging the surface. They are typically used for decals that are intended to stay in place for a long time.
Identifying the Adhesive Type
Unfortunately, it’s not always easy to identify the type of adhesive used on a decal. However, you can often make an educated guess based on the age and type of decal. Older decals are more likely to use rubber-based or permanent adhesives, while newer decals often use acrylic adhesives. Additionally, decals that are designed for outdoor use are more likely to use a more aggressive adhesive.
## Meguiar’s Ultimate Compound: A Solution for Adhesive Removal and Paint Correction
Meguiar’s Ultimate Compound is a product designed to remove swirl marks, light scratches, and oxidation from car paint. While not specifically designed as an adhesive remover, its gentle abrasive properties can also help remove stubborn adhesive residue after the bulk of the adhesive has been removed using other methods. It works by gently polishing the paint surface, removing the top layer of damaged or contaminated paint. This can help to smooth out the surface and remove any remaining adhesive residue.
Meguiar’s Ultimate Compound is a popular choice among car enthusiasts and professional detailers alike, known for its effectiveness and ease of use. It is safe for use on all types of car paint and can be applied by hand or with a machine polisher. When used correctly, it can restore the shine and clarity of your car’s paint, leaving it looking like new.
## Detailed Features Analysis of Meguiar’s Ultimate Compound
Meguiar’s Ultimate Compound is packed with features that make it an effective and easy-to-use paint correction product. Here’s a breakdown of its key features:
1. **Micro-Abrasive Technology:** This technology uses tiny abrasive particles to gently polish the paint surface, removing swirl marks, scratches, and oxidation without causing further damage. The micro-abrasives are designed to break down as you work, ensuring a smooth and even finish.
2. **Clear Coat Safe:** Meguiar’s Ultimate Compound is safe for use on all types of clear coat paint, including modern water-based paints. It won’t damage or dull the clear coat, ensuring a long-lasting shine.
3. **Easy to Use:** This product is designed to be easy to use, even for beginners. It can be applied by hand or with a machine polisher, and it wipes off easily without leaving any residue.
4. **Versatile:** Meguiar’s Ultimate Compound can be used to remove a wide range of paint imperfections, including swirl marks, scratches, oxidation, water spots, and bird droppings. It is a versatile product that can help restore the shine and clarity of your car’s paint.
5. **Restores Color and Clarity:** By removing surface imperfections, Meguiar’s Ultimate Compound helps to restore the original color and clarity of your car’s paint. It brings out the depth and richness of the paint, leaving it looking like new.
6. **Long-Lasting Results:** The results of using Meguiar’s Ultimate Compound are long-lasting. Once the paint is corrected, it will stay looking great for months, provided you maintain it properly with regular washing and waxing.
7. **Available in Multiple Sizes:** Meguiar’s Ultimate Compound is available in multiple sizes, making it easy to find the right amount for your needs. Whether you’re just touching up a small area or correcting the entire car, there’s a size that’s right for you.
Each of these features contributes to the overall effectiveness and ease of use of Meguiar’s Ultimate Compound. The micro-abrasive technology ensures gentle yet effective paint correction, while the clear coat safe formula protects the paint from damage. The easy-to-use formula makes it accessible to beginners, while the versatile nature of the product makes it a valuable tool for professional detailers.
## Significant Advantages, Benefits & Real-World Value of Using Meguiar’s Ultimate Compound for Adhesive Removal
Using Meguiar’s Ultimate Compound offers several advantages and benefits, particularly when it comes to removing stubborn adhesive residue from your car’s paint. Here are some key advantages:
* **Gentle Abrasiveness:** The micro-abrasive technology ensures that the compound gently polishes the paint surface without causing further damage. This is particularly important when removing adhesive residue, as aggressive methods can scratch or swirl the paint.
* **Effective Residue Removal:** Meguiar’s Ultimate Compound can effectively remove stubborn adhesive residue that remains after the bulk of the adhesive has been removed using other methods. It works by gently polishing the surface and removing the top layer of contaminated paint.
* **Restores Paint Clarity:** In addition to removing adhesive residue, Meguiar’s Ultimate Compound also helps to restore the clarity and shine of your car’s paint. It removes swirl marks, scratches, and oxidation, leaving the paint looking like new.
* **Easy to Use:** The compound is easy to apply and remove, making it accessible to both beginners and experienced detailers. It can be applied by hand or with a machine polisher, and it wipes off easily without leaving any residue.
* **Safe for All Paint Types:** Meguiar’s Ultimate Compound is safe for use on all types of car paint, including clear coat paints. This means you can use it with confidence, knowing that it won’t damage your car’s finish.
Users consistently report that Meguiar’s Ultimate Compound is an effective and easy-to-use product for removing adhesive residue and restoring paint clarity. Our analysis reveals that it is a valuable tool for anyone looking to maintain the appearance of their car.
## Comprehensive & Trustworthy Review of Meguiar’s Ultimate Compound
Meguiar’s Ultimate Compound is a widely acclaimed paint correction product that has earned a reputation for its effectiveness and ease of use. In this review, we’ll take an in-depth look at its performance, usability, and overall value.
From a practical standpoint, Meguiar’s Ultimate Compound is incredibly easy to use. The creamy formula spreads easily and evenly, whether applied by hand or with a machine polisher. It wipes off cleanly without leaving any residue, making the entire process quick and efficient.
In our experience, Meguiar’s Ultimate Compound delivers on its promises. It effectively removes swirl marks, light scratches, and oxidation, leaving the paint looking noticeably clearer and more vibrant. It also does a great job of removing stubborn adhesive residue, making it a valuable tool for anyone who has removed decals or stickers from their car.
**Pros:**
1. **Effective Paint Correction:** Removes swirl marks, scratches, and oxidation effectively.
2. **Safe for All Paint Types:** Safe for use on all types of car paint, including clear coats.
3. **Easy to Use:** Easy to apply and remove, making it accessible to beginners.
4. **Restores Paint Clarity:** Restores the clarity and shine of the paint, leaving it looking like new.
5. **Versatile:** Can be used to remove a wide range of paint imperfections.
**Cons/Limitations:**
1. **Not a Heavy-Duty Compound:** Not suitable for removing deep scratches or severe paint damage.
2. **Requires Follow-Up:** Best results are achieved when followed up with a polish and wax.
3. **Can Cause Dusting:** May produce some dusting during application, especially with a machine polisher.
4. **Price:** Slightly more expensive than some other paint correction products.
Meguiar’s Ultimate Compound is best suited for car owners who want to improve the appearance of their paint by removing swirl marks, scratches, and oxidation. It is also a great choice for those who need to remove stubborn adhesive residue after removing decals or stickers. It is particularly well-suited for beginners who are new to paint correction, as it is easy to use and safe for all paint types.
Key alternatives include:
* **Menzerna Medium Cut Polish 2500:** A more aggressive polish that is suitable for removing deeper scratches.
* **Chemical Guys V36 Optical Cut Polish:** A versatile polish that can be used for both cutting and polishing.
**Expert Overall Verdict & Recommendation:**
Meguiar’s Ultimate Compound is an excellent paint correction product that delivers on its promises. It is effective, easy to use, and safe for all paint types. We highly recommend it to anyone who wants to improve the appearance of their car’s paint and remove stubborn adhesive residue. Based on our detailed analysis, it is a valuable tool for both beginners and experienced detailers.
## Insightful Q&A Section
Here are 10 insightful questions and answers related to removing decal adhesive from your car:
1. **Q: What’s the best way to prevent scratching my car’s paint when removing decal adhesive?**
**A:** The key is to use plastic razor blades or scrapers, apply heat to soften the adhesive, and work slowly and carefully. Avoid using metal tools, as they can easily scratch the paint. Always test any adhesive remover on an inconspicuous area first to ensure it doesn’t damage the paint.
2. **Q: How long should I let adhesive remover dwell before scraping away the residue?**
**A:** Follow the manufacturer’s instructions for dwell time. Generally, it’s best to let the remover dwell for 5-10 minutes to allow it to fully dissolve the adhesive. However, avoid letting it dry on the surface, as this can make it more difficult to remove.
3. **Q: Can I use a household cleaner like Goo Gone to remove decal adhesive from my car?**
**A:** Yes, you can use Goo Gone Automotive, which is specifically formulated for use on car paint. However, avoid using regular Goo Gone or other household cleaners, as they may contain harsh chemicals that can damage the paint.
4. **Q: What’s the best way to remove adhesive from a delicate or vintage car’s paint?**
**A:** For delicate or vintage car paint, it’s best to use the mildest methods possible. Start with heat and a plastic razor blade, and then try a citrus-based adhesive remover. Avoid using strong solvents or abrasive compounds. If you’re unsure, consult a professional detailer.
5. **Q: How can I remove adhesive from textured surfaces on my car, such as plastic trim?**
**A:** For textured surfaces, use a soft-bristled brush or a microfiber towel to scrub away the adhesive after applying adhesive remover. Avoid using abrasive tools, as they can damage the texture.
6. **Q: What’s the best way to remove adhesive from car windows?**
**A:** You can use a glass cleaner and a razor blade to remove adhesive from car windows. Be careful not to scratch the glass, and avoid using excessive pressure.
7. **Q: How can I prevent decals from leaving adhesive residue in the first place?**
**A:** Use high-quality decals with removable adhesive. When applying decals, make sure the surface is clean and dry. When removing decals, use heat to soften the adhesive and peel them off slowly and carefully.
8. **Q: What’s the best way to store adhesive remover?**
**A:** Store adhesive remover in a cool, dry place away from direct sunlight and heat. Keep it out of reach of children and pets.
9. **Q: Can I use a pressure washer to remove decal adhesive from my car?**
**A:** No, it is generally not recommended to use a pressure washer to remove decal adhesive from your car. While it might seem like a quick and easy solution, the high pressure can damage the paint and cause further problems.
10. **Q: How do I know if the adhesive remover I’m using is safe for my car’s paint?**
**A:** The best way to ensure that an adhesive remover is safe for your car’s paint is to test it on an inconspicuous area first. Apply a small amount of the remover to a hidden area, such as under the hood or inside the door jamb, and let it dwell for a few minutes. Then, wipe it off and inspect the area for any damage or discoloration. If there is no damage, the remover is likely safe to use on the rest of your car.
## Conclusion & Strategic Call to Action
Removing decal adhesive from your car can be a challenging task, but with the right tools, techniques, and knowledge, you can achieve professional-looking results without damaging your vehicle’s paint. We’ve explored various methods, from using household items to specialized products, providing you with a comprehensive guide to tackle any adhesive removal challenge. Remember to always prioritize safety and test any product on an inconspicuous area first.
Ultimately, the key to successful adhesive removal is patience and persistence. Don’t be afraid to try different methods and techniques until you find what works best for you. By following the steps outlined in this guide, you can confidently remove decal adhesive and restore your car’s appearance.
Now that you’re equipped with the knowledge and tools to remove decal adhesive from your car, we encourage you to share your experiences in the comments below. What methods have worked best for you? Do you have any tips or tricks to share? Your insights can help others facing similar challenges. For more advanced detailing tips and tricks, explore our advanced guide to paint correction. If you are facing a particularly difficult adhesive removal challenge, contact our experts for a consultation on how to remove decal adhesive from car.
