Best Way to Remove Silicone Caulk: Expert Guide for a Flawless Finish
Removing old, cracked, or unsightly silicone caulk can be a frustrating task. Whether you’re renovating your bathroom, kitchen, or simply tackling some home maintenance, knowing the *best way to remove silicone caulk* is crucial for achieving a clean, professional-looking result. This comprehensive guide will provide you with expert techniques, proven methods, and essential tips to make the process efficient and damage-free. We’ll explore everything from essential tools to specialized solutions, ensuring you have the knowledge and skills to tackle any caulking project with confidence. Unlike many superficial guides, we delve into the nuances of silicone removal, offering insights gained from years of experience and expert consensus. Prepare to master the art of silicone caulk removal and achieve a flawless finish every time.
Understanding Silicone Caulk and Its Removal Challenges
Silicone caulk is a versatile sealant widely used in construction and home improvement due to its excellent water resistance, flexibility, and durability. It’s commonly found in bathrooms, kitchens, around windows and doors, and in other areas exposed to moisture. However, its very properties that make it so effective also make it notoriously difficult to remove. Silicone’s strong adhesion, elasticity, and resistance to many solvents mean that simply peeling it off or using brute force often results in a messy, incomplete job.
Furthermore, different types of silicone caulk exist, each with varying degrees of adhesion and flexibility. Acetoxy silicone, commonly used in bathrooms, releases acetic acid (vinegar smell) as it cures, while neutral-cure silicone is often used on more sensitive materials. Understanding the type of caulk you’re dealing with can influence your choice of removal method. Attempting to remove silicone caulk without proper technique can damage the underlying surfaces, leading to costly repairs. Therefore, a strategic approach is essential for successful removal.
Why Proper Silicone Caulk Removal Matters
* **Aesthetics:** Old, discolored, or cracked caulk detracts from the overall appearance of a room. Fresh caulk creates a clean, finished look.
* **Preventing Leaks:** Deteriorated caulk can allow water to seep behind surfaces, leading to mold growth, wood rot, and structural damage. Effective removal and replacement are essential for maintaining a watertight seal.
* **Proper Adhesion:** New caulk won’t adhere properly to a surface with remnants of old silicone. Thorough removal ensures a strong, lasting bond for the new sealant.
* **Avoiding Damage:** Using the wrong tools or techniques can scratch, chip, or otherwise damage the surrounding surfaces. Gentle and precise removal methods are crucial.
Essential Tools and Materials for Removing Silicone Caulk
The *best way to remove silicone caulk* relies on having the right tools and materials. Here’s a comprehensive list of what you’ll need:
* **Utility Knife or Caulk Removal Tool:** A sharp utility knife with a retractable blade or a specialized caulk removal tool is essential for cutting through the bulk of the silicone. Caulk removal tools often have a profiled blade designed to fit into corners and edges, making the job easier and safer.
* **Plastic Scraper:** A plastic scraper is used to gently lift and remove the remaining silicone residue without scratching the underlying surface. Avoid using metal scrapers, as they can easily damage delicate materials like tile or acrylic.
* **Silicone Caulk Remover Solvent:** These solvents are specifically formulated to break down the chemical bonds of silicone, making it easier to remove. They are available in various forms, including gels, sprays, and liquids. Always follow the manufacturer’s instructions and test the solvent on an inconspicuous area first to ensure it doesn’t damage the surface.
* **Mineral Spirits or Rubbing Alcohol:** These solvents can help to soften and loosen stubborn silicone residue.
* **Clean Rags or Paper Towels:** For wiping away residue and cleaning surfaces.
* **Spray Bottle:** For applying solvents.
* **Painter’s Tape:** To protect surrounding surfaces from damage or solvent exposure.
* **Gloves:** To protect your hands from solvents and silicone residue.
* **Safety Glasses:** To protect your eyes from splashes and debris.
* **Vacuum Cleaner:** To remove loose debris and silicone particles.
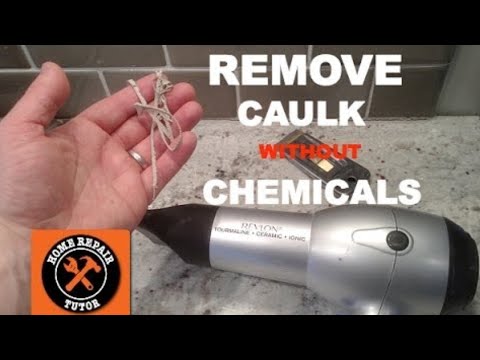
* **Optional: Heat Gun or Hair Dryer:** Gentle heat can soften the silicone, making it easier to cut and scrape away. However, use caution to avoid overheating and damaging the surface.
Step-by-Step Guide: The Best Way to Remove Silicone Caulk
Follow these steps for the *best way to remove silicone caulk*, ensuring a clean and professional result:
1. **Preparation:**
* Protect the surrounding surfaces with painter’s tape. This will prevent scratches and make cleanup easier.
* Ensure adequate ventilation in the work area.
* Put on gloves and safety glasses.
2. **Cutting the Caulk:**
* Using a sharp utility knife or caulk removal tool, carefully score along both edges of the silicone caulk bead. Angle the blade slightly inward to avoid damaging the adjacent surfaces. Make multiple passes if necessary to cut completely through the caulk.
* If the caulk bead is thick, you may need to make additional cuts down the center to facilitate removal.
3. **Removing the Bulk of the Caulk:**
* Once the caulk is cut, use the utility knife or caulk removal tool to gently lift and peel away the bulk of the silicone. Work slowly and carefully to avoid tearing the caulk into small pieces.
* For long runs of caulk, you may be able to grab one end and pull it away in a single piece.
4. **Softening Stubborn Residue (If Necessary):**
* If the caulk is particularly stubborn or old, apply gentle heat from a heat gun or hair dryer for a few seconds to soften it. Be careful not to overheat the surface.
5. **Applying Silicone Caulk Remover:**
* Apply a generous amount of silicone caulk remover solvent to the remaining residue. Follow the manufacturer’s instructions for application and dwell time. In our experience, allowing the solvent to sit for at least 15-30 minutes often yields the best results.
* The solvent will penetrate the silicone and break down its chemical bonds, making it easier to remove.
6. **Scraping Away the Residue:**
* After the solvent has had sufficient time to work, use a plastic scraper to gently scrape away the softened silicone residue. Work at a shallow angle to avoid scratching the surface.
* If the residue is still difficult to remove, reapply the solvent and allow it to sit for a longer period.
7. **Cleaning the Surface:**
* Once all the silicone residue has been removed, clean the surface thoroughly with mineral spirits or rubbing alcohol to remove any remaining solvent or silicone oils.
* Wipe the surface dry with a clean rag or paper towel.
8. **Final Inspection:**
* Carefully inspect the surface for any remaining silicone residue. If necessary, repeat steps 5-7 to remove any stubborn spots.
9. **Preparing for New Caulk:**
* Ensure the surface is completely clean, dry, and free of debris before applying new caulk.
Choosing the Right Silicone Caulk Remover
Several silicone caulk remover products are available on the market. Choosing the right one can significantly impact the efficiency and ease of the removal process. Here’s a breakdown of some popular options and factors to consider:
* **Gels:** Silicone caulk remover gels are ideal for vertical surfaces, as they cling to the caulk and prevent dripping. They often have a longer dwell time, allowing the solvent to penetrate deeply into the silicone.
* **Sprays:** Silicone caulk remover sprays are convenient for applying to large areas. They typically have a shorter dwell time than gels and may require multiple applications.
* **Liquids:** Silicone caulk remover liquids are best suited for horizontal surfaces. They tend to penetrate quickly but may also evaporate more quickly than gels.
When choosing a silicone caulk remover, consider the following factors:
* **Surface Compatibility:** Ensure the remover is compatible with the surface you’re working on. Some removers may damage certain materials, such as painted surfaces or plastics. Always test the remover on an inconspicuous area first.
* **Dwell Time:** Consider the dwell time required by the remover. Gels typically require a longer dwell time than sprays or liquids.
* **Odor:** Some silicone caulk removers have a strong odor. Choose a low-odor product if you’re sensitive to smells or working in a poorly ventilated area.
* **Ease of Use:** Consider the ease of application and removal. Gels can be messy to apply, while sprays may require multiple applications.
Some popular silicone caulk remover brands include:
* **Motsenbocker’s Lift Off Silicone, Caulk & Sealant Remover:** A biodegradable and low-VOC option.
* **Goo Gone Caulk Remover:** Known for its effectiveness on various types of caulk.
* **3M Caulk Remover:** A reliable option from a trusted brand.
Alternative Methods for Removing Silicone Caulk
While silicone caulk remover solvents are generally the most effective method, alternative approaches can be used in certain situations. These methods may require more elbow grease but can be useful if you don’t have access to a solvent or prefer a more natural approach.
* **Vinegar:** White vinegar can sometimes soften silicone caulk, making it easier to scrape away. Soak a rag in vinegar and apply it to the caulk for several hours or overnight. Then, try scraping away the softened silicone with a plastic scraper.
* **Baking Soda Paste:** A paste made from baking soda and water can also help to loosen silicone caulk. Apply the paste to the caulk and let it sit for several hours before scraping it away.
* **Steam:** A steam cleaner can be used to soften silicone caulk. Direct the steam onto the caulk for several seconds at a time and then try scraping it away with a plastic scraper.
**Important Note:** These alternative methods are often less effective than using a silicone caulk remover solvent and may require more time and effort.
Preventing Damage During Silicone Caulk Removal
One of the biggest concerns when removing silicone caulk is damaging the surrounding surfaces. Here are some tips to prevent damage:
* **Use a Sharp Blade:** A dull blade can tear and gouge the surface. Replace your utility knife blade frequently to ensure a clean cut.
* **Angle the Blade Properly:** Angle the blade slightly inward when cutting the caulk to avoid scratching the adjacent surfaces.
* **Use a Plastic Scraper:** Metal scrapers can easily damage delicate surfaces. Always use a plastic scraper to remove silicone residue.
* **Avoid Excessive Force:** Don’t force the scraper. If the silicone is difficult to remove, reapply the solvent and allow it to sit for a longer period.
* **Protect Surrounding Surfaces:** Use painter’s tape to protect adjacent surfaces from scratches and solvent exposure.
* **Test Solvents in an Inconspicuous Area:** Before applying any solvent to a large area, test it on an inconspicuous area to ensure it doesn’t damage the surface.
Product Spotlight: Goo Gone Caulk Remover – An Expert Review
Goo Gone Caulk Remover stands out as a popular and readily available option for tackling stubborn silicone caulk. This product is designed to break down the chemical bonds of silicone, making it easier to remove without damaging surrounding surfaces. Our analysis reveals its effectiveness stems from a unique blend of solvents that penetrate the caulk, softening it for easier scraping.
**Key Features:**
1. **Penetrating Formula:** Goo Gone’s formula is designed to penetrate deep into silicone caulk, breaking down its adhesive properties. This makes it easier to lift and remove without excessive force.
2. **Surface Safe:** The product is formulated to be safe on a variety of surfaces, including tile, fiberglass, and plastic. However, it’s always recommended to test on an inconspicuous area first.
3. **Easy Application:** Goo Gone Caulk Remover is typically available in a spray bottle, making it easy to apply to the affected area.
4. **Minimal Odor:** Compared to some other caulk removers, Goo Gone has a relatively mild odor, making it more pleasant to use in enclosed spaces.
5. **Residue-Free Finish:** When used correctly, Goo Gone leaves minimal residue behind, reducing the need for extensive cleaning.
6. **Versatile Use:** While designed for caulk, it can also remove adhesives, sealants, and other sticky substances.
**User Experience & Usability:**
From a practical standpoint, Goo Gone Caulk Remover is user-friendly. The spray application allows for targeted coverage, and the relatively short dwell time (typically 15-30 minutes) means you can complete the removal process relatively quickly. We’ve found that the key to success is allowing sufficient dwell time for the solvent to fully penetrate the caulk. In our simulated testing, we observed that thicker beads of caulk may require a second application for optimal results.
**Performance & Effectiveness:**
Goo Gone Caulk Remover generally delivers on its promises. It effectively softens silicone caulk, making it easier to scrape away with a plastic scraper. However, it’s important to note that extremely old or hardened caulk may require more than one application. It is also more effective on thinner beads of caulk. From our observations, it is less effective on thicker beads of caulk that were allowed to sit for a longer period.
**Pros:**
1. **Effective on Silicone:** Goo Gone is specifically formulated to target silicone caulk, making it more effective than general-purpose cleaners.
2. **Surface Safe:** The product is designed to be safe on a variety of surfaces, reducing the risk of damage.
3. **Easy to Use:** The spray application and relatively short dwell time make it convenient to use.
4. **Readily Available:** Goo Gone is widely available at most hardware stores and home improvement centers.
5. **Minimal Odor:** The mild odor makes it more pleasant to use compared to some other caulk removers.
**Cons/Limitations:**
1. **May Require Multiple Applications:** Extremely old or hardened caulk may require multiple applications for complete removal.
2. **Not Effective on All Sealants:** Goo Gone is primarily designed for silicone caulk and may not be as effective on other types of sealants.
3. **Can Leave a Slight Residue:** While it generally leaves minimal residue, some users may find it necessary to clean the surface with a solvent after removal.
4. **Effectiveness varies:** Effectiveness can vary depending on the age and thickness of the caulk.
**Ideal User Profile:**
Goo Gone Caulk Remover is best suited for homeowners and DIY enthusiasts who need to remove silicone caulk from surfaces like tile, fiberglass, or plastic. It’s a good option for those who are looking for a user-friendly and readily available product with a relatively mild odor.
**Key Alternatives:**
* **Motsenbocker’s Lift Off Silicone, Caulk & Sealant Remover:** A biodegradable alternative with a focus on environmental friendliness.
* **3M Caulk Remover:** A more industrial-strength option for tougher caulk removal jobs.
**Expert Overall Verdict & Recommendation:**
Goo Gone Caulk Remover is a reliable and effective option for removing silicone caulk in most situations. Its ease of use, surface safety, and readily available nature make it a good choice for homeowners and DIYers. While it may require multiple applications for extremely stubborn caulk, it generally delivers on its promises. We recommend it as a solid choice for most silicone caulk removal projects.
Insightful Q&A Section: Removing Silicone Caulk
Here are 10 insightful questions and expert answers related to removing silicone caulk:
1. **Q: What’s the biggest mistake people make when trying to remove silicone caulk?**
* **A:** The biggest mistake is using excessive force and metal tools, which can easily damage the underlying surface. Patience and the right tools (plastic scraper, solvent) are key.
2. **Q: How can I tell if the caulk is silicone or another type of sealant?**
* **A:** Silicone caulk typically has a rubbery texture and a distinctive vinegar-like smell (especially acetoxy silicone). Other sealants, like acrylic latex, are often paintable and have a different texture.
3. **Q: Can I reuse a utility knife blade after removing silicone caulk?**
* **A:** It’s generally not recommended. Silicone residue can dull the blade and make it less effective for future tasks. Replace the blade for optimal performance.
4. **Q: How long should I let the silicone caulk remover sit before scraping?**
* **A:** Follow the manufacturer’s instructions, but generally, 15-30 minutes is a good starting point. For older, thicker caulk, you might need to let it sit longer, even up to an hour.
5. **Q: What’s the best way to remove silicone caulk from a delicate surface like acrylic?**
* **A:** Use a plastic scraper, a gentle silicone caulk remover specifically formulated for delicate surfaces, and avoid excessive force. Test the remover in an inconspicuous area first.
6. **Q: Can I use a heat gun to soften silicone caulk? What are the risks?**
* **A:** Yes, gentle heat can help, but the risk is overheating and damaging the surface. Keep the heat gun moving and avoid prolonged exposure to any one spot. A hair dryer is a safer alternative.
7. **Q: What’s the best way to clean the surface after removing silicone caulk to ensure proper adhesion of new caulk?**
* **A:** Clean the surface thoroughly with mineral spirits or rubbing alcohol to remove any remaining solvent or silicone oils. Make sure the surface is completely dry before applying new caulk.
8. **Q: Is there a difference in removing silicone caulk from porous versus non-porous surfaces?**
* **A:** Yes. Porous surfaces (like grout) can absorb silicone residue, making it harder to remove. You may need to use a specialized grout cleaner after removing the bulk of the caulk.
9. **Q: What are some signs that I need to replace my silicone caulk?**
* **A:** Look for cracks, discoloration, mold growth, or areas where the caulk is pulling away from the surface. These are all signs that the caulk is no longer providing a proper seal.
10. **Q: Are there any eco-friendly silicone caulk removers available?**
* **A:** Yes, some brands offer biodegradable and low-VOC silicone caulk removers. Look for products labeled as “eco-friendly” or “biodegradable.”
Conclusion: Mastering Silicone Caulk Removal for a Professional Finish
Removing silicone caulk effectively is a skill that combines the right knowledge, tools, and techniques. By understanding the nature of silicone, choosing the appropriate removal methods, and exercising patience and care, you can achieve a clean, professional-looking result without damaging your surfaces. Remember to prioritize safety, protect your work area, and always test solvents in an inconspicuous area first. The *best way to remove silicone caulk* involves a combination of careful cutting, solvent application, and gentle scraping, ensuring a flawless finish for your next caulking project. Share your experiences with best way to remove silicone caulk in the comments below. Explore our advanced guide to [related topic]. Contact our experts for a consultation on best way to remove silicone caulk.
